June 30, 2023

My First Quilt with Yvonne Fuchs

It's the last Friday of the month, which means it's time for a My First Quilt interview! This month we get to learn all about Yvonne Fuchs' first quilt.
My First Quilt with Yvonne Fuchs | DevotedQuilter.com
Yvonne and I first met back in 2014, when we both participated in the New Quilt Blogger blog hop, and I have followed her blog, Quilting Jetgirl, ever since. Yvonne is also a technical editor, and she does an excellent job editing all of my patterns. After 9 years as online friends, so far, I hope that one of these days we'll actually get to meet in person!

You can connect with Yvonne on her website, Instagram, Facebook, and Youtube. You can also sign up for her newsletter.

And now, here is Yvonne's first quilt!
My First Quilt with Yvonne Fuchs | DevotedQuilter.com

What year did you make your first quilt? What prompted you to make it?


Prompted by my paternal grandmother, Ocie, I pieced together my first quilt top when I was a sophomore in high school (circa 1995). Ocie offered to hand quilt a twin sized quilt for me to take with me and use for my college dorm room bed. While my grandmother was a prolific quilter in her life, her offer was rare and wonderful and I was excited!

My mother and I went to a local quilt shop, and we picked out a Card Trick quilt pattern that was written as a "Quilt in a Day" book by Eleanor Burns. The pattern / booklet was the Winning Hand Quilt, and I pretty much picked out fabrics that matched the cover quilt exactly. We also purchased a rotary cutter, rotary cutting mat, and the recommended acrylic templates.
The Winning Hand quilt pattern booklet | DevotedQuilter.com

What techniques were used in that first quilt? Did you quilt it yourself?


The first adventure for my mother and I was to figure out how to cut the fabric. My mother was an accomplished garment sewist, so she was used to working with pattern templates and cutting fabric by hand. I recall it taking several days to cut all the fabric. In particular, the fabric I purchased for the sashing was a striped fabric, and we meticulously (or fussy) cut the strips so that the floral design would be pieced exactly centered for the sashing.

As far as piecing techniques go, I remember strip piecing and sub-cutting units. I also think that the blocks were set on point using corner setting triangles. But mostly it was a lot of long, straight seams.

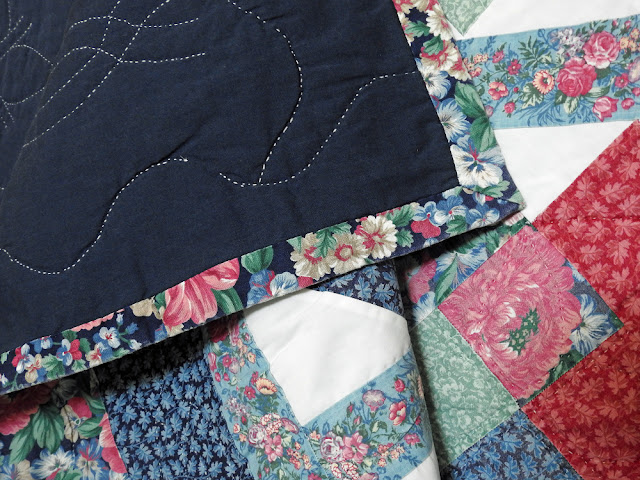
I know for a fact that my seam allowances were all over the place for this quilt. Several of my more scant seam allowances have popped open over the years, and I've simply whip-stitched them closed again, like you can see in the lower right hand corner of the block in the image below, between the white background and blue leaf print. 
My First Quilt with Yvonne Fuchs | DevotedQuilter.com
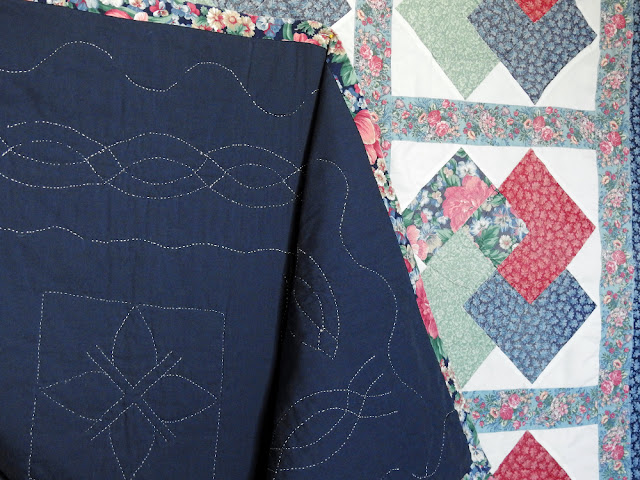
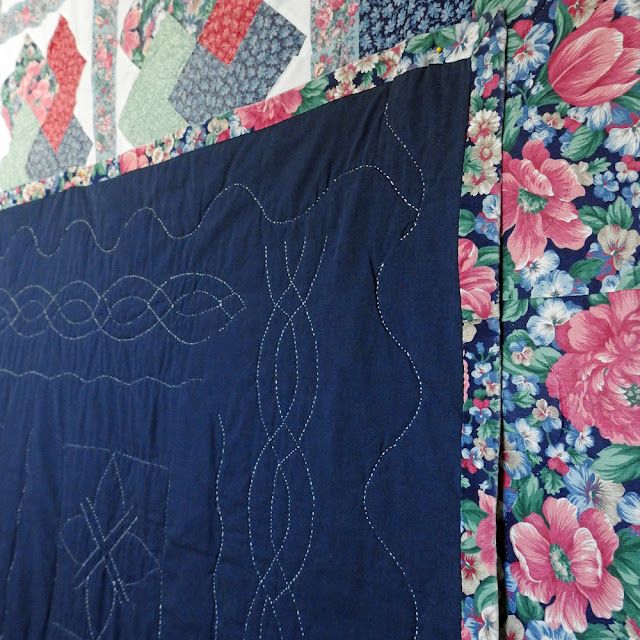
I did not quilt my first quilt. I found a high thread count solid navy sheet to use for the backing, and when my family went to grandma's for Thanksgiving, we took the quilt top and backing with us to let grandma work her magic. She had a custom wooden frame that my grandpa had made for her hand quilting that consisted of two wooden saw horses made to be the right height for her in her chair. She had different length wooden beams that would fit into slots in the saw horses that she wrapped the quilt sandwich around, depending on the size of the quilt she was working with. I did not get to see her doing any of the hand quilting, but when it was done, she mailed it back to me for finishing.

I had NO idea what "binding" a quilt meant. I used 3" wide WOF strips. I did not fold the strips in half for a double fold binding; instead, I sewed the binding to the quilt top using a 1/2" seam allowance. Then I folded the raw edge over to the back and then folded the second raw edge of the binding back to meet the trimmed edge of the quilt, making the binding on the back a wide, chunky finish of about 7/8". I hand stitched the binding to the back of the quilt, and while I started off confused and frustrated, by the end of the process I found that I was really enjoying it.
My First Quilt with Yvonne Fuchs | DevotedQuilter.com

Who taught you to make the quilt?


My mother and I sorted through making the quilt together following the instructions in the Winning Hand Quilt book by Eleanor Burns. My mother had lots of sewing experience, and I am grateful for her patience as we puzzled how to do each step together. I still remember her puzzling over the fact that the instructions said to use a 1/4" seam allowance, because garments typically work with much more generous seam allowances. Also, as a beginner, my seam allowances were anything but consistent and my mother (rightfully) worried that some of my seams were too scant.

Are the colours you chose for your first quilt ones you would still choose today?


I still love the general colors that I used in my first quilt, but I don't use nearly as many prints in my quilts today. All of the fabrics used in the quilt top, while basically mimicking the fabrics in the cover quilt of the pattern, were pulled based around the main large floral print that was used for the outer border, as one of the prints in the blocks, and for the binding.

My favorite color, since I had a concept of what that means, has always been blue. So, while I might not lean so hard on large scale prints and borders in my quilts now, this quilt still brings a smile to my face and is a joy to nap under.
My First Quilt with Yvonne Fuchs | DevotedQuilter.com


Did you fall in love with quilting right away? Or was there a gap between making the first quilt and the next one?


I absolutely fell in love with quilting right away! While my grandmother was hand quilting my first quilt top, I promptly made my second and third quilts (much smaller lap and wall hanging sizes). There was then a bit of a gap between my third and fourth quilts; going to college definitely put a dent in my free time and my access to my mother's sewing machine. But the process of making my fourth quilt at home on long weekends (and leaving my mother's sewing and craft room an utter mess while I was back at college) prompted my parents to gift me with my first sewing machine, a Husqvarna Viking Freesia 415.

Where is the quilt now?


I still have my first quilt. While we are not entirely certain, we think it was likely the last quilt that my grandmother hand quilted. She started having mini strokes shortly after finishing it and lost her fine motor skills. Grandma knew that I was proud to use it on my dorm room bed, and I still pull it out to nap under when I want to sleep on the sofa, especially when I'm feeling sick. There's something special about knowing I'm wrapping up in my grandmother's love.
My First Quilt with Yvonne Fuchs | DevotedQuilter.com

Is there anything you wish you could go back and tell yourself as you made that first quilt?


I was definitely not in love with some of the fabric choices for the quilt top, and I remember wishing for a wider variety of options to choose from. I didn't think the red leaf print used in the blocks was a good enough color match (and pinks/reds have never been a favorite color for me). I don't know that I would tell myself anything in particular, but I am really glad to have access to high quality solids and blenders now so that when I really do want a print to shine, it can!

Anything else you want to share about your first quilt?


My bed was right by the window in my dorm room, and the fabric at the foot of the bed that was in the sun is a bit faded. Some seams have popped open, necessitating repair. It's not a perfect quilt by any stretch of the imagination, but it is holding up and is one of my most treasured possessions. It is stored so that if I have a few minutes in case of an emergency, it can be one of the few things I grab and save.


Thanks for sharing your first quilt with us, Yvonne! It's a true family heirloom, for sure ❤

June 27, 2023

Introducing Stash Artists!

*** Edited to say, the Stash Artists doors have now closed. Join the waitlist now so you don't miss out when they're open again! ***

I'm excited to announce my Stash Artists membership is now open! 🥳 

As quilters, our fabric stash is our palette. It's where we go to pull out the colours and prints we combine to make our works of art, our quilts. Whether we wrap up in those quilts ourselves, give them as gifts to the people we love, or donate them to strangers in need of comfort, we're making the world more beautiful, one quilt at a time.

The Stash Artists membership is for Stash Artists like you! It combines stash-friendly and scrap-friendly patterns with a community of fellow Stash Artists who work with fabric and thread to create joy for themselves and others.

Click here to join now!


Fabric rainbow | DevotedQuilter.com

What's included in the membership?


🧵 The Reverberate pattern (see below)

🧵 6 exclusive patterns each year, released every other month. These patterns will be available only to Stash Artists for at least a year, after which they may be released to the public.

🧵 6 virtual Sew Together Sessions each year, in alternate months to the pattern releases. Quilty friends are the best, so let's sew together with friends from around the world!

🧵 An exclusive annual block-of-the-month quilt pattern, available in two sizes. Each month will include extra layout mockups for that month's block, too!

🧵 Video tutorials so you can learn new techniques and expand your quilting toolbox 

🧵 Exclusive monthly devotions

🧵 A private FB community to share progress on our quilts, ask questions, and build friendships

🧵 Discounts on patterns, workshops, and QALs outside the membership

Join now!


Since this is the first time Stash Artists has opened for new members, you can get in at the Founding Member price, and lock it in for as long as you're a member in good standing. The Stash Artists membership will never be offered at this price again! And if you join on the annual plan, you'll save even more!

Reverberate


When you join Stash Artists, you'll have access to the Reverberate quilt pattern right away. Reverberate is paper pieced, and the blocks make a fabulous secondary design when assembled together. It would look great in so many different colourways!
Reverberate baby quilt pattern | DevotedQuilter.com

Click here to join Stash Artists as a Founding Member today. The membership will be open for Founding Members until July 5th, after which the doors will close for a few months. When it reopens again the Founding Member price will no longer be available.

I hope to see you inside the Stash Artists membership!

Reverberate

Sometimes it's really hard to keep a quilt a secret! That's especially true when I really, really love the quilt, like I love this one I'm calling Reverberate 😊 It's even more true when I'm keeping it secret because it's part of a larger project I'm really excited about, like the Stash Artists membership. Thankfully the membership is now open for Founding Members, so I don't have to keep anything secret anymore! Learn all about the Stash Artists membership here.

*** Edited to say the Stash Artists doors are now closed. Join the waitlist now so you don't miss out when they open again! ***

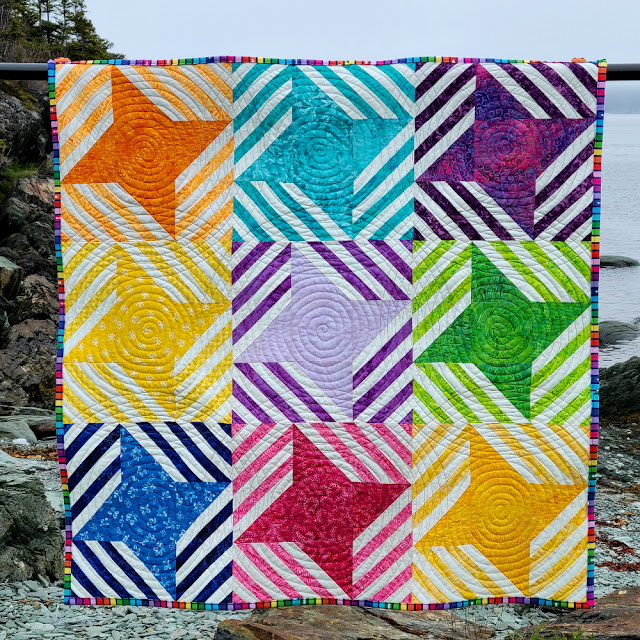
If you follow me on social media, you've seen plenty of sneak peeks of Reverberate, including some that showed almost the whole quilt, but this is the first time I'm actually sharing the full quilt. I love quilt blocks that create secondary patterns, and this one is no exception!
Reverberate quilt pattern | DevotedQuilter.com
Sometime last year I was invited to submit a block for Benartex's Block Remix page in their newsletter. The block being remixed for that particular newsletter, published in December, was the log cabin block. Of course I said yes, then started playing around with different possibilities. I wanted to play on the repeating lines of the log cabin, and eventually I ended up with the Reverberate block. It doesn't necessarily look much like a log cabin block anymore, but it does still have the repeating lines radiating out from the center.

They only needed a digital mockup of the block for the newsletter, but of course I wanted to actually make the block, and to make enough of them for a quilt. I made the 9 blocks during my 100 Days of Scrappy Sewing, and the fabrics were all pieces leftover from previous projects. There are two different background fabrics, though it's hard to tell, even in person.
Reverberate quilt pattern | DevotedQuilter.com
I love how the lines seem to suggest soundwaves or the ripples after a stone is dropped into a pond. I also love how they match up with the lines in the neighbouring block in some places and not in others. 
Reverberate quilt pattern | DevotedQuilter.com
The blocks are assembled with a partial seam, and I wrote a tutorial for that last week. I also made a Reverberate block with a black background for the tutorial, so of course now I want to make a bunch more!

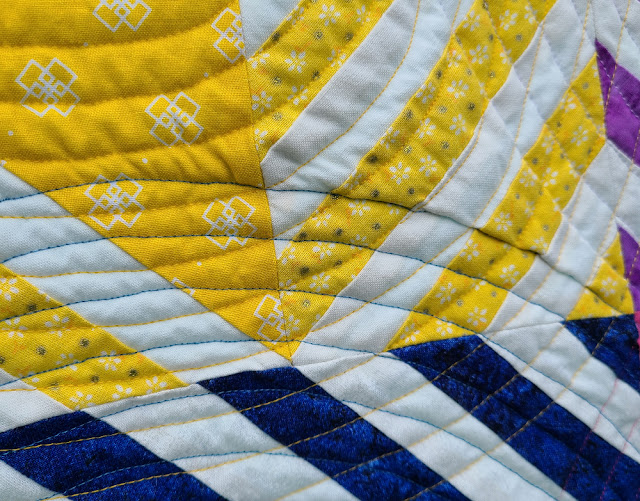
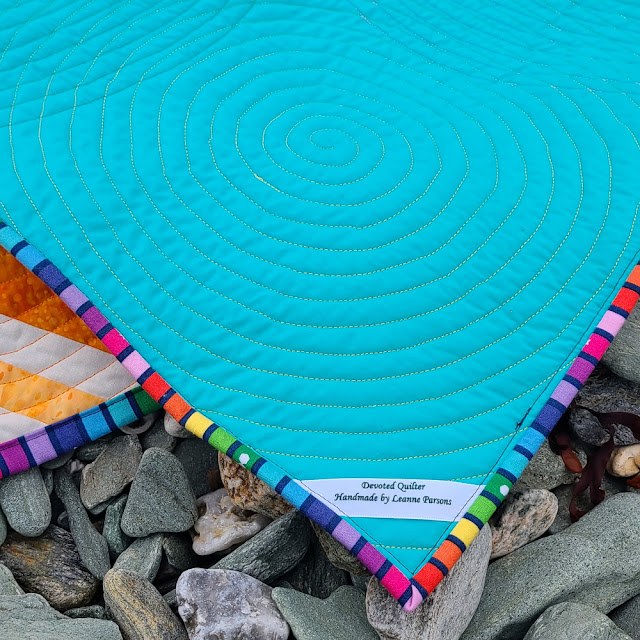
I quilted overlapping spirals, starting in the center of each block, in Aurifil 50 wt thread to match the colour of each block. I thought about using white thread for all of them, or only doing one spiral in white, but chose to go with all the colours mostly for the effect on the back. It's subtle, but I do love the overlapping colours!
Overlapping spiral quilting | DevotedQuilter.com
Walking foot quilting is not my forte! Those lines are anything but smooth. They're not always the same distance apart, even though I was using the edge of my walking foot as a guide. I started each spiral with my free motion foot, and more than once I considered just finishing the whole spiral with that foot. I know the distance between lines would have been even worse without the edge of the foot to guide me, though, so I always switched back to the walking foot. At one point I sent a friend a message that said, "Every now and then, just randomly, you should send me a message that says, 'Remember, you don't enjoy quilting with your walking foot. Don't do it!'" 

Where the spirals come together, I have some tucks and pleats. I didn't even consider trying to fix them, to be honest. That would have required ripping out too much quilting to be feasible, plus it's a baby quilt. I figure once it's washed the pleats will be even less noticeable, and whatever little one ends up dragging it around and snuggling in it won't care about (or notice) less than perfect quilting. 
Reverberate quilt pattern | DevotedQuilter.com
Since it's a 36" square, this little quilt let me use another scrap of my Warm and Natural batting. Gradually the pile of offcuts is getting smaller...not small, mind you, but smaller!

I debated for a while what to use for the binding. I considered a scrappy binding, using some of the fabrics in the front. I also considered white, but that didn't seem practical for a baby's quilt. Then I remembered this stripe, designed by Kristy of Quiet Play, and it seemed like the perfect frame. I'm so glad I had enough, though now I only have a piece a couple of inches wide left.
Reverberate quilt pattern | DevotedQuilter.com
Reverberate is the first Stash Artists pattern, available to Founding Members members right away. You can learn all about the membership here. Stash Artists will be open for Founding Members until July 5th, after which the doors will close, and the Founding Member price will be gone. If you join now, you'll lock in the Founding Member price for as long as you stay a member.

Along with the one I've started with the black background, I'm also thinking Reverberate would make a great Christmas quilt. Or go monochrome and choose all blue fabrics (my choice!) or all whatever your favourite colour is. What colours would you choose for your Reverberate? 


June 26, 2023

Doing Things Differently

Devotion for the Week...

Before we dive into this week's devotion, just a note to say this will be the last devotion published before my annual summer break. I'll be back with new devotions again in September. And it really will be September this year, not October like happened last year!


I have a few banners I hang up to decorate for birthdays. I've been using the same banners since the boys were small, and hanging them in the same places for every birthday. The night before Nathan's birthday this year, I almost forgot to put them up, only realizing it when I was on my way to bed. I asked Paul to help, and he hung the shortest banner in a different place from my normal spot for it. When I saw it, I caught myself about to correct him, but then realized two things: 1. the banner was fine where it was and 2. he doesn't have to do things the same way I do. 

I find myself having similar moments about other things people do differently from how I would do them. I see their different way, and my first thought is to correct them and show them how it should be done. Thankfully, I usually catch myself in time and keep my mouth closed! There are a lot of different ways to accomplish most things, and there's nothing wrong with any of them, even if they're not my preferred way of doing it.

Thinking about that made me think about Paul writing about divisions in the Corinthian church. Apparently there were squabbles among the believers there, and Paul felt the need to address it in a letter to the church. "Some of you are saying, 'I am a follower of Paul.' Others are saying, 'I follow Apollos,' or 'I follow Peter,' or 'I follow only Christ'" (1 Corinthians 1:12). Paul, Apollos and Peter all preached the same message about salvation through faith in Jesus, but they would have presented that message differently, according to their own personalities. Their different presentation styles would have resonated with different people. That's perfectly normal. Unfortunately, it sounds like people were then rushing headlong into the territory of 'if it's not done the way I like, then it's not right' and it was dividing the church.

We all have our preferences. Whether it's for the kind of music sung in the church or the style of sermon the pastor presents, there will inevitably be some that we like and some that we don't. That's all well and good. Problems come when we stop seeing our preferences as preferences and start seeing them as the only right way. Then we get upset because people are doing things 'wrong', and we let those preferences breed division among us. In the worst cases, we let our differences become reasons to attack and demean the other person, as if their preferences were a stain on their character or a sign of an inferior faith.

Instead, Paul urged the Corinthians, and by extension us, to live in harmony. "I appeal to you, dear brothers and sisters, by the authority of our Lord Jesus Christ, to live in harmony with each other. Let there be no divisions in the church. Rather, be of one mind, united in thought and purpose" (v. 10). That doesn't mean we have to be identical. There's plenty of room for our preferences, so long as we keep them in the proper perspective. It means we allow space for our different ways of doing things, without feeling the need to correct or to enforce our own way of doing it as the 'right' way.
We will reach more people if we embrace our differences | DevotedQuilter.com
After all, the gospel would have spread faster with Apollos, Peter, and Paul all working to share the Good News, each in his own way. The same is still true today. As we all work in our own ways, our different styles and personalities will appeal to different people, allowing us to reach more people because we embrace our differences than we ever could if we insisted everyone had to do things our way.

June 22, 2023

How To Sew A Block With A Partial Seam

What quilting skills intimidate you? There are some techniques that have a reputation for being hard, even if they're actually pretty simple, and the partial seam definitely falls into that category. It sounds confusing and scary, but I promise it's not! Gaye Glasspie (ggmadeit on Instagram) has a saying I love, "It's not hard, it's new." Isn't that a great shift in perspective?

I'm excited to open the Stash Artists membership for Founding Members on Tuesday, June 27th (get on the waiting list, to be sure you don't miss it!), and Reverberate will be the first pattern available to members. The Reverberate block goes together with a partial seam, so this seemed like a great opportunity to share a tutorial. Let's dive in!

I'll be sharing my full Reverberate cover quilt soon, but after a friend suggested the Reverberate block would look great with bright stars on a black background, I had to give it a try! I love it as much as I thought I would, so making more blocks has been added to my 'someday' list. That list never grows shorter, no matter how many quilts I make, and that actually makes me happy. I love knowing I'll never run out of things to make.

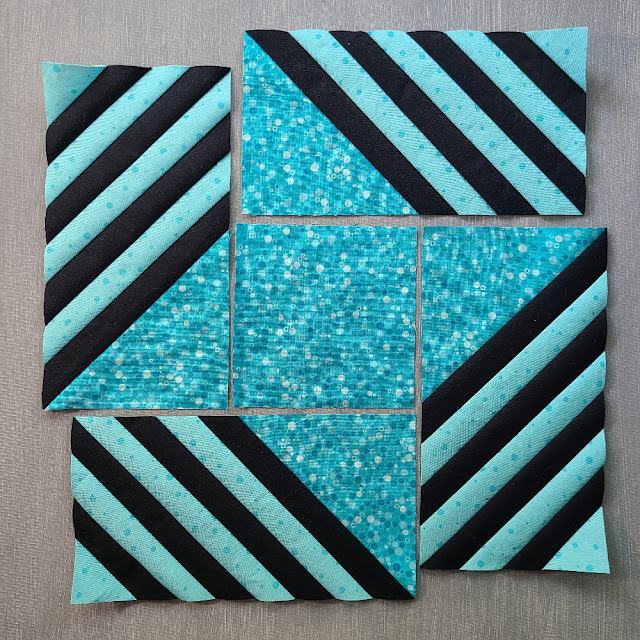
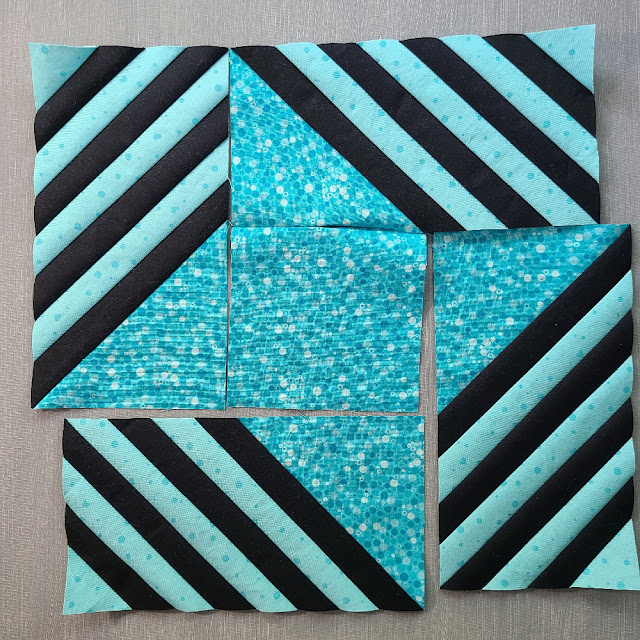
Here are the units for my Reverberate block. You can see how it wouldn't be possible to put the block together with normal seams, since all of the outside pieces are longer than the center square. This is the same problem you'll see with any block that needs a partial seam, and the method for assembling the block will always be the same. So these steps apply to any block with a partial seam, not just the Reverberate block!
How to sew a block with a partial seam | DevotedQuilter.com
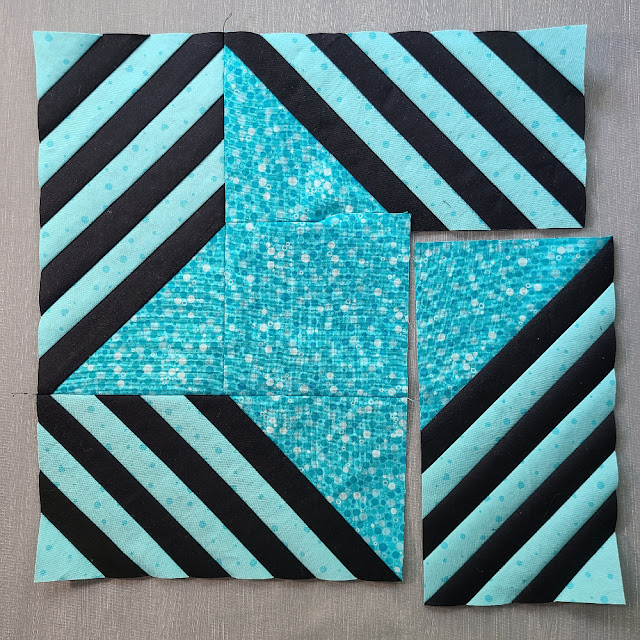
Starting with the unit on the top of the block, sew the first couple inches of the seam, backstitching a couple stitches where you stop. Press that portion of the seam open.
How to sew a block with a partial seam | DevotedQuilter.com
Now we'll add the unit on the left. With the first part of the top seam sewn, the left side of the center square unit is now the same length as the outside unit, so we can sew this seam normally. Press the seam open.
How to sew a block with a partial seam | DevotedQuilter.com
Add the bottom unit the same way.
How to sew a block with a partial seam | DevotedQuilter.com
And then the unit on the right.
How to sew a block with a partial seam | DevotedQuilter.com
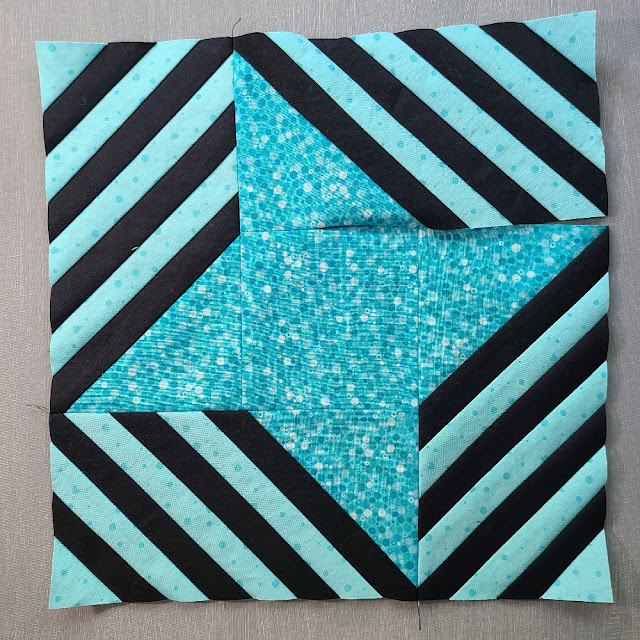
Now it's time to finish the top seam. 
How to sew a block with a partial seam | DevotedQuilter.com
Fold the top unit down so the raw edge lines up.
How to sew a block with a partial seam | DevotedQuilter.com
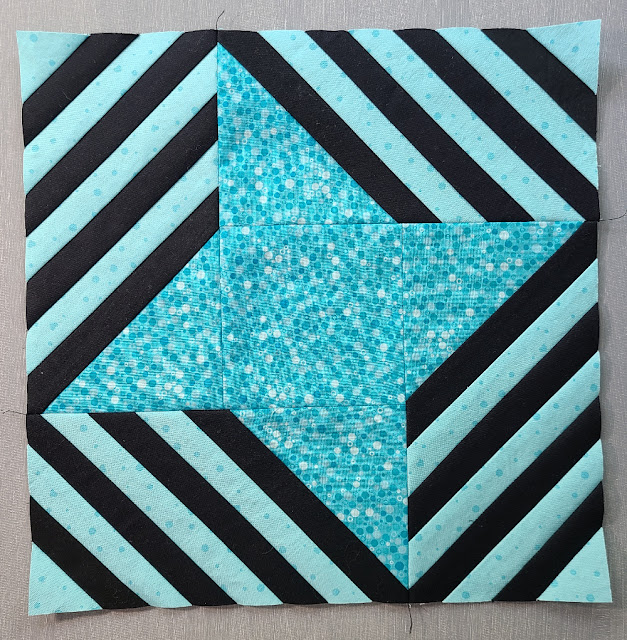
Start stitching where you stopped earlier, overlapping the stitches slightly, and backstitching again to secure those first stitches. Then just stitch the rest of the seam. Press the seam open, and your block is finished!
How to sew a block with a partial seam | DevotedQuilter.com
I hope you'll give partial seams a try, and discover just how doable they are! Remember, "It's not hard, it's new!"

June 21, 2023

Bar Graph Back For Berry Pi

Welcome to my stop on the Perfectly Pieced Quilt Backs blog hop! Kelly Young's new book is designed for people like me, lol. If you've been around here before, you may know I'm not a fan of piecing my quilt backs...while I love the idea, and I think pieced backs are beautiful, I find it feels like too much work to figure out how much of each fabric I need and how to put it together. Once I have the top finished, I just want to get to the quilting!

Perfectly Pieced Quilt Backs to the rescue! With 30 (yes, 30!) quilt back patterns, all of them with instructions for three sizes, you're sure to find something to fit your needs. Kelly did all the hard work for you, so you can follow the pattern just like you would for a quilt front, no figuring out required 😊 And if, by chance, you need a pattern for the front, too, Kelly has free downloadable patterns for 18 of the quilt 'fronts' featured in the book.

I decided I'd piece the back for my Berry Pi quilt. You can get the free Berry Pi pattern here.
Berry Pi quilt pattern | DevotedQuilter.com
I had scraps leftover from the 2 ½" strips I used for the front, plus I had made a cutting mistake when cutting the background for the front. That mistake left me with 3" strips that I really wanted to use rather than putting them into my scrap box, so I figured I'd use them for the background of the back. The scraps of the 2 ½" strips seemed perfectly suited to the Bar Graph pattern, so that's what I made, though I pieced my strips since I was starting with scraps.
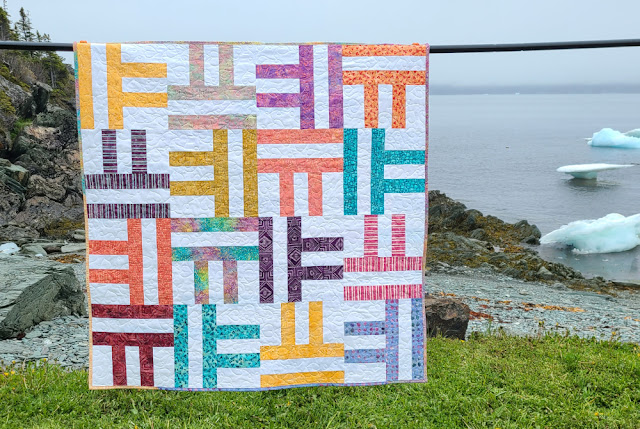
Bar Graph pieced quilt back | DevotedQuilter.com
Of course, I didn't have enough scraps of the 2 ½" strips, so I pulled more strips in colours that worked with what was already on the front. I had to cut more background strips, too, but eventually I had enough pieces of everything!
Bar Graph pieced quilt back | DevotedQuilter.com
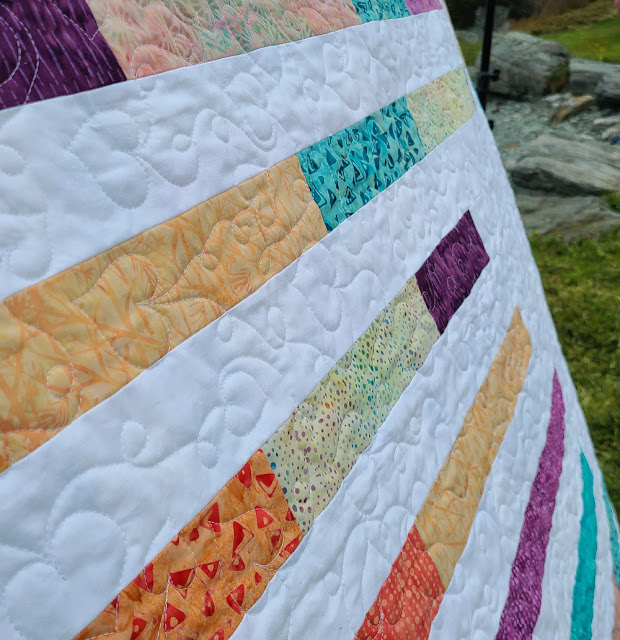
I don't think I've ever made a quilt back with so many seams. I have to admit, I love it, though! I quilted it with hearts and loops, with white Aurifil 50 wt thread. It was quick and fun to stitch, and seems the perfect fit for a baby quilt.
Bar Graph pieced quilt back | DevotedQuilter.com
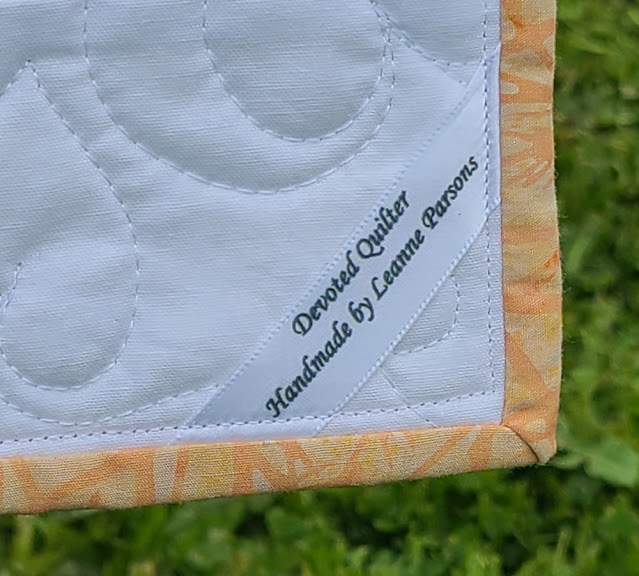
I won these labels in a giveaway on Kelly's blog way back in 2015! There were 1,000 on the roll...you can hardly tell I've used any, even after 8 years of steady quilt making. 
Bar Graph pieced quilt back | DevotedQuilter.com
We have had a dreary June, with an abundance of rain, drizzle, and fog, so a trip to the beach for quilt pictures wasn't quite as warm as you'd think. Note the ice and fog in the background, lol. There were a couple of icebergs around, but none close enough to show up nicely in pictures taken on my phone.
Bar Graph pieced quilt back | DevotedQuilter.com
If you want to get some help piecing the backs for your quilts, ask for Perfectly Pieced Quilt Backs in your LQS, or look wherever you buy quilting books. Or you can get a signed copy directly from Kelly 😊 And don't forget to download the free Berry Pi pattern!

Before I send you off to the rest of the blog hop, have you taken the What Kind of Scrap Quilter Are You quiz? This is the last week the quiz will be available, so follow the link to take it now!

There's plenty more quilt back inspiration to be found, so hop around to see what everyone else has made. All of the blog posts are being shared today, so there's no waiting required!

June 19, 2023

Unqualified

Devotion for the Week...

Last week Paul and I went to a retirement dinner for one of the teachers at his school. Several people paid tribute to her, and as they started their speeches, almost all of them made some mention of how uncomfortable they were standing up at the podium in front of everyone. Most of us don't like being the center of attention, and the less experience we have with it, the more our hands shake and our voices tremble.

With that in mind, it amused me to read Jeremiah 1:6 the next morning. Jeremiah had just been called by the Lord as a prophet, and his immediate reaction was, "O Sovereign Lord...I can’t speak for you! I’m too young!" Jeremiah didn't want to be the center of attention, either, and he latched onto the most logical reason why he couldn't do it - his age. Jeremiah wasn't used to standing up in front of crowds, making speeches, and having everyone judging him. He likely just wanted to stay a regular guy, doing his job and not drawing the attention of everyone in the nation. 

Instead, God had just told him, "I knew you before I formed you in your mother’s womb. Before you were born I set you apart and appointed you as my prophet to the nations" (v. 5). Not only would Jeremiah be standing in front of everyone, making speeches, but God was calling him to make speeches that would anger the people by pointing out their rebellion and their sin. Is it any wonder Jeremiah felt unqualified for the job?

God didn't let Jeremiah off the hook just because he didn't feel up to the job, though. God said to him, "Don’t say, ‘I’m too young,’ for you must go wherever I send you and say whatever I tell you. And don’t be afraid of the people, for I will be with you and will protect you. I, the Lord, have spoken!' Then the Lord reached out and touched my mouth and said, 'Look, I have put my words in your mouth!'" (vv. 7-9).

We're all going to feel unqualified for what God asks us to do, at least some of the time. I find a lot of encouragement in what He said to Jeremiah, though.

First, God wasn't going to send Jeremiah out there alone. No matter where God sent him, God would also go with him. The same is true for us, too. Whatever God calls us to do, we can be sure He will never leave us. After all, Jesus said, "And be sure of this: I am with you always, even to the end of the age" (Matthew 28:20).

Second, God gave Jeremiah the words to say. Jeremiah didn't have to come up with it all himself; God put the words directly in his mouth. The same will be true for us. If God is calling us to do something, He will give us what we need to do the job. The writer of Hebrews included this prayer, "Now may the God of peace...equip you with all you need for doing his will. May he produce in you, through the power of Jesus Christ, every good thing that is pleasing to him" (Hebrew 13:20-21).
If God is calling us to do something, He will give us what we need to do the job | DevotedQuilter.com
And third, God would be directing Jeremiah. God had the plan; Jeremiah just had to go where he was told to go and say what he was told to say. God doesn't speak to us out loud like He did in those days, but we can be sure He is directing our paths and leading us where He wants us to go. "Seek his will in all you do, and he will show you which path to take" (Proverbs 3:6).

When was the last time you felt unqualified for something God wanted you to do? Did you do it anyway?

June 12, 2023

Wildfire

Devotion for the Week...

My parents live in Nova Scotia, where a couple of wildfires burned out of control at the beginning of this month. Mom and Dad were just outside the evacuation zone for one of the fires, so I followed the news until fire officials declared the fire was no longer expected to grow or move. During a news briefing, one fire official talked about the randomness of fire, how it can burn one home to the ground, but skip over the one next door. He explained that the wind carries embers, throwing them ahead of the fire, where they can ignite any fuel they find.

His description of how fire moves made me think of James, writing about the danger inherent in the human tongue: "But a tiny spark can set a great forest on fire. And among all the parts of the body, the tongue is a flame of fire. It is a whole world of wickedness, corrupting your entire body. It can set your whole life on fire, for it is set on fire by hell itself" (James 3:5-6). 

When we first read that, it sounds unnecessarily harsh, doesn't it? Think about it for a minute, though, and it's easy to see the truth of James' assessment. We've all been burned by someone's words, and unfortunately, we've all burned others with our words, too. It's so easy to say things without thinking that will hurt another person's feelings, or even to say something that will stick in their mind for years and impact how they define themselves. 

Earlier in his letter, James wrote, "If you claim to be religious but don’t control your tongue, you are fooling yourself, and your religion is worthless" (James 1:26). When he said 'if you claim to be religious,' he was referring to how we present ourselves to others, and how we want to be seen. Some people do all the right religious things, like going to church, praying, and reading the Bible, but they never actually let the Holy Spirit have an impact on how they think and talk. Speaking of people in the last days, Paul wrote to Timothy, "They will act religious, but they will reject the power that could make them godly" (2 Timothy 3:5). It's the same thing James means. If we're doing all the religious things, but it's not impacting how we talk, then we're just pretending; the faith we profess has never been deep enough to impact our hearts.
If we're doing all the religious things, but it's not impacting how we talk, then we're just pretending | DevotedQuilter.com
The difference between 'religious' and 'godly' isn't so much about the tongue as it is about the heart...but it is revealed in what comes out of our mouths. Jesus Himself said, "What you say flows from what is in your heart" (Luke 6:45). It would be wise to ask ourselves, what do our words say about the state of our hearts? Are we allowing the Holy Spirit to put a check on our words, to stop us before we say something hurtful? Are we listening closely enough to even notice (or care) when He prods us to keep a thought to ourselves?

Controlling our tongue is an ongoing task, but a worthy one. If we allow the Holy Spirit to be the filter on our mouths, holding in those hurtful words we might otherwise let fly like embers on the wind, we could avoid setting fire to people's feelings, or their self-esteem, or to our entire relationship with them.

June 05, 2023

Creativity

Devotion for the Week...

The countdown to the end of the school year is on! We have to get through three more weeks of regular schedule and then we're on summer break, and let me tell you we're all ready for the break! On top of the regular end of year exhaustion, I'm fighting a cold, so it wasn't a very productive weekend, though I did enjoy teaching a workshop on Saturday afternoon. All of that to say, I didn't have the mental capacity to finish a devotion for today, so I've pulled one from the archive. I hope you enjoy it!

___________________

Early one morning recently I woke up from a dream that had something to do with scrolling through Instagram on my phone and all I could think in that 'barely awake' state was that it's pretty amazing that someone was able to program a computer I carry around in my back pocket to recognize what I want to do based on where on the screen I touch. Not only that, but I can touch the a spot on the first page of apps and open one thing, then swipe to the second page of apps and touch the same place to open something different entirely. Who thought of that? And who figured out how to make it work?


Computers mystify me. I have no clue how they actually work or how to change what they can do and I'm grateful that other people have been able to create ways for me to work with computers without needing to know everything about their inner workings.

The same is true in a lot of other categories as well. I don't create new recipes, but I love following ones that other people create. I wouldn't know how to design a washing machine or a dishwasher, but I'm extremely grateful to the people who created them!

Throughout history, people have created so many amazing things, in so many different fields, that it's kind of mind boggling.

Genesis 1:26 says, "Then God said, “Let us make human beings in our image, to be like us." The 'in our image' part doesn't mean that we look like God, since He doesn't have a physical body for us to resemble. It's talking about His character. We are meant to be like Him in our character. Unfortunately, sin often gets in the way of that. We don't always express love and compassion, kindness, generosity and faithfulness as He does because our sinful nature is too selfish.

One expression of His character that we don't often think about imitating is His creativity, but it is a large part of who He is. Just think about the variety we see in flowers or in the animal kingdom, not to mention the huge variety of appearances and personalities among people. God created all of it and designed it all to work together flawlessly.
There is no limit to the creativity God has instilled in us  | DevotedQuilter.com
A lot of people protest that they're not creative at all, but I don't think that's true. Creativity doesn't have to be painting or writing books or designing quilts. One friend talks about her mother, who can go to almost bare cupboards and somehow still create a delicious meal. Other people think of ways to teach children who are having trouble understanding a lesson at school or they come up with ways to raise money to help a charity they believe in. Still others design apps and computer programs that do things never thought of before. There is no limit to the ways people can be creative, because there is no limit to the creativity God has instilled in us.

How are you creative most often?

June 04, 2023

100 Days of Scrappy Sewing Wrap-up

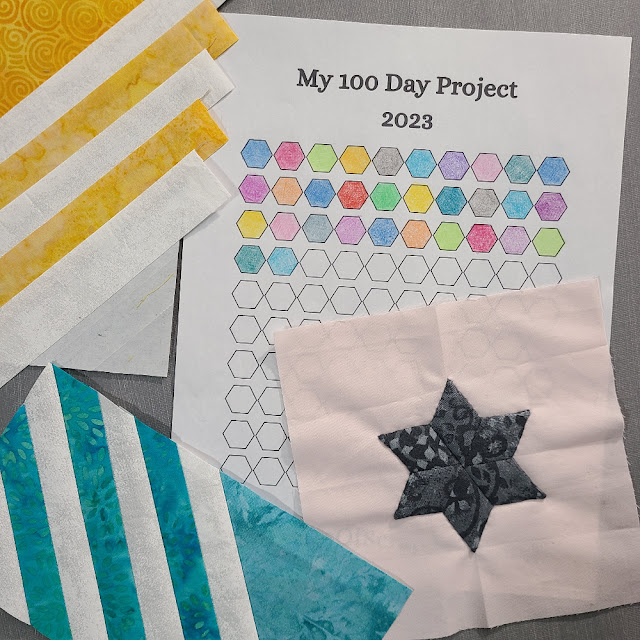
Thursday was the last day of this year's 100 Day Project. My plan for the Project was to spend at least 15 minutes working on any of my many scrappy projects each day, and I'm happy to say I only missed 3 days out of the 100. Here's my daily tracker as proof 😊
100 day project tracker - DevotedQuilter.com
I wrote a post about the projects I worked on over the first 50 days, which you can see here. The second half of the project was not quite what I expected when I planned it...Aiden and Zach both came home just before the end of April, which meant I moved my sewing machine back down to the kitchen so Aiden could sleep in the sewing room. We expected Aiden to only be home for two or three weeks, but he's still here over a month later, so I'm still sewing in the kitchen. That is not at all a complaint! I am so happy to have all three boys home together! It does mean less rummaging around in my scrap boxes, though, since I don't want to be invading his space all the time, and less leaving things out to be a leader/ender project, since we need the kitchen table for other things. It has also meant I've done a lot of hand stitching, since apparently I'm out of the habit of setting things up and putting things away constantly for sewing by machine, and lots of days I just worked on one of my two hand stitching projects.

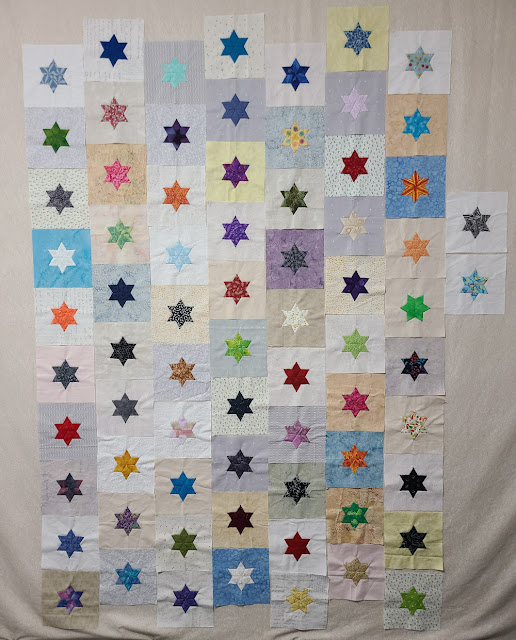
With all that hand stitching, I've added a lot more stars to the design wall! When I took the picture for the halfway post, I had 51 stars stitched to their backgrounds; I now have 71. 
EPP star blocks on the design wall | DevotedQuilter.com
That gives me about 63" in length, and I've started on column 8, which will give me about 48" in width when it's finished. I definitely want at least one more column. I haven't decided yet if I want to add another square to each column, too, for a little extra length. So, I either need 18 more stars, or 27. That may be decided by how many stars I have left! Next up, I need to cut some more background squares and count the remaining stars.

I made a good bit of progress on the frame around my Hexie Rainbow, too. I stitched three rows to two sides of the hexagon, which gives me as much width as I want, I think, and now I'm working to square up one of the corners. The next chunk of three rows is almost finished and ready to be added. The nice thing about squaring up the corner is that each row is shorter than the one before!
Hexie Rainbow progress | DevotedQuilter.com
I did do some machine sewing, too. I made my Sunshine on a Cloudy Day mini.
Sunshine On A Cloudy Day mini quilt | DevotedQuilter.com
I made Berry Pi, too. Read more about it, and get the free pattern here.
Berry Pi quilt pattern | DevotedQuilter.com
I pieced the back for Berry Pi, using some of the scraps from the front and the white pieces I cut incorrectly. I needed more than those pieces, though, so I used up even more of my 2 1/2" strips to make the back. I can't show the finished quilt yet, but I will say I've never pieced a back with so many seams before!
Pieced quilt back | DevotedQuilter.com
In the halfway post, I shared some scrappy 4 patches I had been making. Over the second half of the Project, they became a top that I absolutely love. Here's a sneak peek at how that looks, from when it was still on the design wall.
Scrappy Butterflies | DevotedQuilter.com
Scrappy butterflies! Aren't they cute? Looking at them makes me ridiculously happy. I need to get a back ready for them so I can get it quilted. And yes, the pattern will be coming soon 😊 Look for an announcement about that coming in a few weeks.

All in all, I'm calling the 100 Days of Scrappy Sewing a success. There weren't many finishes, but I made a lot of progress on a bunch of different things and I really enjoyed focusing on my scrappy projects. I found the hand stitching, especially, to be very relaxing, and I want to keep that going. Summer stitching in the backyard is calling my name!