February 27, 2023

Following His Example

Devotion for the Week...

Jesus tried to teach His disciples to serve rather than seeking to be served. He even told them straight out, “For even the Son of Man came not to be served but to serve others and to give his life as a ransom for many” (Matthew 20:28), but they tended not to get the point. Instead they argued over who was the greatest among them.

When the opportunity presented itself, Jesus served them to demonstrate what He meant. When there was no servant around to do the job, Jesus “got up from the table, took off his robe, wrapped a towel around his waist, and poured water into a basin. Then he began to wash the disciples’ feet, drying them with the towel he had around him” (John 13:4-5). 

People in those days wore sandals, they walked everywhere and the roads were dirty. Not only was there actual dirt, there would also have been animal droppings on the road, since animals were used both for transportation and to carry goods, so I don’t even want to think about how dirty their feet were. No wonder it was customary to wash your feet after entering a house! I can almost see the disciples sitting there, realizing no servant was coming to take care of their feet, nervously wondering who would have to do the job, and then going a little wide-eyed when Jesus stood and started getting ready.

Then, “After washing their feet, he put on his robe again and sat down and asked, “Do you understand what I was doing? You call me ‘Teacher’ and ‘Lord,’ and you are right, because that’s what I am. And since I, your Lord and Teacher, have washed your feet, you ought to wash each other’s feet. I have given you an example to follow. Do as I have done to you” (vv. 12-15).

Jesus is our example in so many things, but this is a big one and it’s possible we are still more like the disciples than we would like to admit. How often do we sit, looking around for someone else to do the job we don’t want to do? How often do we think, “Not my job” and wait for someone else to step up? Even worse, how often do we think a particular job is beneath us, so we don’t even consider doing it?
Are we following Jesus' example | DevotedQuilter.com
Jesus told us to follow His example and do as He did. That means being willing to step up to do the lowly jobs regardless of our status or position and to serve others by doing the work no one else wants to do. 

February 24, 2023

My First Quilt with...Me!

Today is the first in my new monthly interview series, My First Quilt! Today's isn't really an interview, though, since I'm the one sharing about my first quilt. Next month it'll be an interview, though, and I'm really looking forward to sharing the stories of how some of my quilty friends got started quilting 😊
My first quilt with Leanne Parsons | DevotedQuilter.com
Side note, I should update my picture one of these days!

I decided to make my first quilt as a wedding gift for my friends Michelle and Brian. At the time I had been cross stitching for a few years and quilting magazines started catching my interest whenever I stopped at a magazine rack to look at cross stitch ones. It's  true that one crafty interest can often be the gateway to another one!

The wedding was planned for September 1997, so my mom put a quilting magazine in my stocking for Christmas 1996. The magazine included a pattern by Judith Hughes Marte called Love & A Little Lunacy that Mom thought would be good for the wedding gift. Except when we looked more closely at the pattern, it was for a 25" mini quilt, which wasn't exactly what I had in mind.

Mom and I took the applique shapes from the pattern, added a few of our own, plus some hand embroidery, and came up with a personalized quilt that was almost double bed sized. Nothing like diving right in for your first quilt, right? 

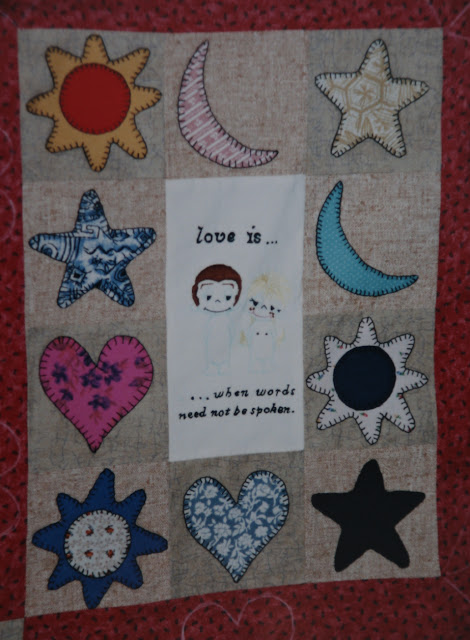
Mom has a few pictures from the day I basted the quilt together, so I had her take pictures of the pictures to send to me. The applique shapes on this block are all the original shapes from the pattern. I fused them in place and then hand stitched the edges with a blanket stitch using black embroidery floss. Mom has always been crafty, so she taught me how to sew and do embroidery, and the fabrics for the appliques all came from her craft stash. I still love a good scrappy quilt!
My first quilt with...Leanne Parsons | DevotedQuilter.com
The Love Is... cartoon was a newspaper clipping Mom had collected as a teenager. She has a whole box of them, so we selected two for the quilt. Everything stitched in the cartoon in this picture is hand embroidery and the blue lines for their bodies were eventually quilted with black thread.

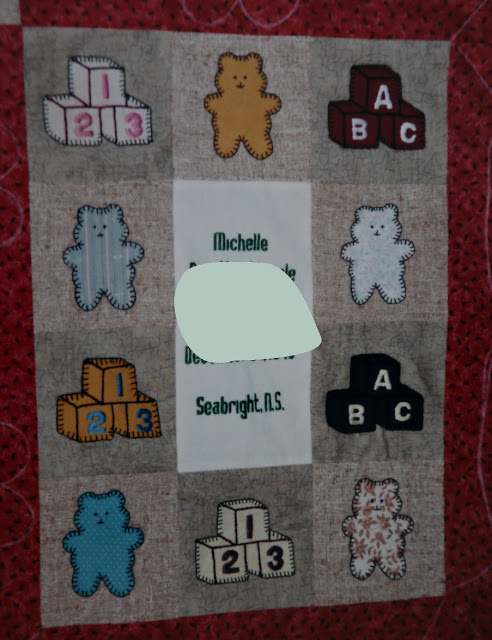
The applique shapes in this next block are some of the ones we added. The building blocks came from a colouring book, I think, but I can't remember where the teddy bear came from. In the center I embroidered Michelle's full name and birthdate, along with her birthplace. This was one corner block, with a block with Brian's info in the opposite corner, diagonally. The Love Is blocks were in the other two corners. The center block is embroidered with their wedding date and place. The appliques for that block are wedding bells and double hearts, but I don't remember where either of those came from.
My first quilt with...Leanne Parsons | DevotedQuilter.com
I worked on the blanket stitching and the embroidery while I was at university that semester, then sewed the top together at home after the semester ended. Here I am with the top, batting and backing ready to be thread basted. All the white lines in the red border and sashing are where the hand quilting would go.
My first quilt with...Leanne Parsons | DevotedQuilter.com
And here's me doing my first bit of hand quilting. I spent a large portion of that summer sitting under that hoop, quilting. We didn't have air conditioning, so I'm not sure how that didn't turn me off quilting entirely!
My first quilt with...Leanne Parsons | DevotedQuilter.com
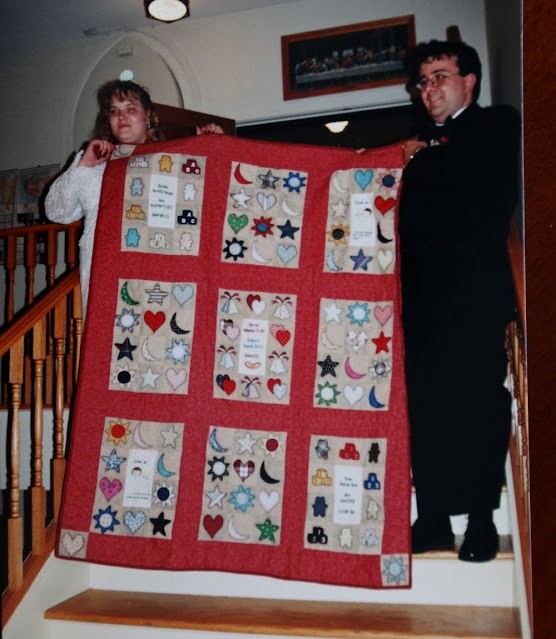
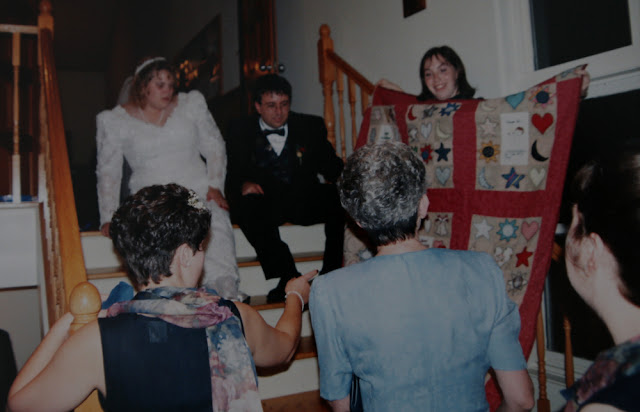
The only pictures I have of the finished quilt are from the wedding, when I gave it to Michelle and Brian.
My first quilt with...Leanne Parsons | DevotedQuilter.com
What doesn't show in this picture is the incredible number of ripples in the back of the quilt and the very rough binding job. I remember we bought double fold bias tape for the binding and I wrapped it around the edge of the quilt and stitched both sides at the same time, except the stitching missed on the back many, many times. Not knowing what else to do, I just went over those areas a second or even third time. My binding skills have certainly improved since then!

I have no idea what I was saying here, but I recognize the look of of a quilter excited to share what she made 😊 Never mind the mistakes and that sketchy binding, I was so proud of that quilt and I still am! 
My first quilt with...Leanne Parsons | DevotedQuilter.com
I'm so glad I dove into making this huge quilt with so much hand stitching, even though I had no clue what I was doing. I certainly had no idea where it would lead, but it sparked a love for quilting that is still going strong after more than 25 years! 

I'll have another My First Quilt post on the last Friday of each month. I hope you'll enjoy reading the stories of those first quilts!

February 21, 2023

Jelly Roll Twirl Top

This post contains affiliate links, which means I may earn a small commission if you make a purchase after clicking a link, at no extra cost to you.

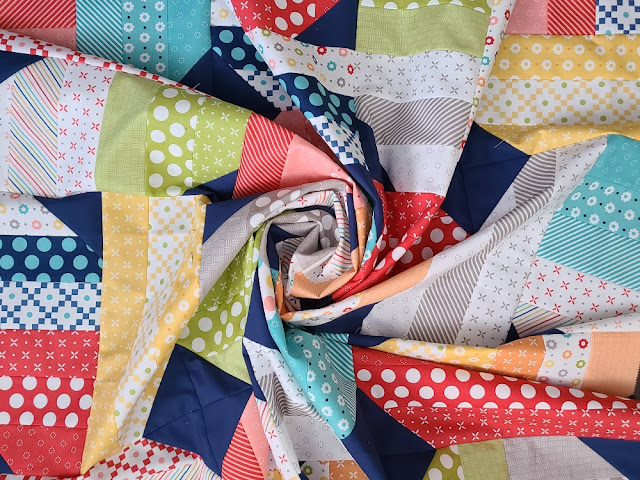
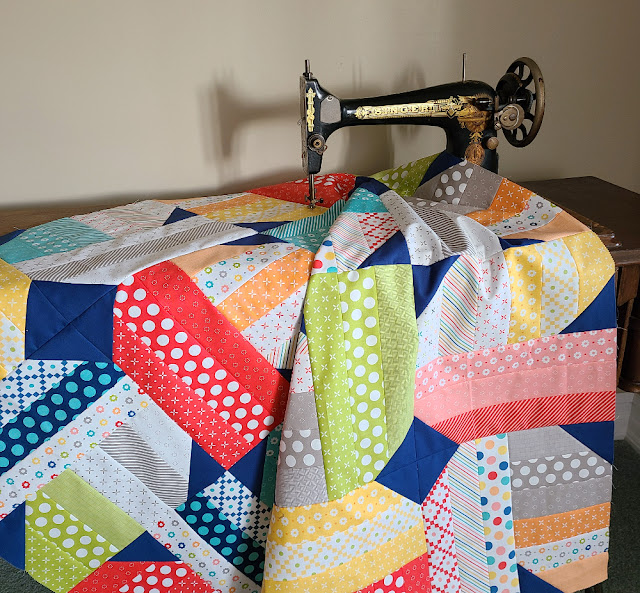
I have a new quilt top to share today! I've been sewing with Fat Quarter Shop to help share their new Jelly Roll Twirl pattern. It's a free pattern and you can get it here.
Jelly Roll Twirl quilt | DevotedQuilter.com
Before I share my full Jelly Roll Twirl quilt top, would you like to prepare to celebrate Easter by growing in wisdom while making a beautiful quilt? The Women of Wisdom QAL and devotional journey is a quilt along, plus 40 days of devotions delivered to your inbox, all focused on the wisdom of biblical women. While we learn from their stories, we'll also be making our quilts together 😊 The fun all starts on February 22!

Learn more and register here


Now on to the Jelly Roll Twirl quilt!
Jelly Roll Twirl quilt | DevotedQuilter.com
I don't usually use precuts, but I have to say it was super fun to be able to start sewing right away, without needing to cut anything first! I used a jelly roll of Simply Delightful, by Sherri and Chelsi for Moda. Aren't the colours...well...simply delightful? 😄 I think the flower print might just be my favourite. Because I had navy Bella solid for the accent, I removed most of the dark blue strips so they wouldn't blend into the navy. I don't mind at all that this means I have a few beautiful blue strips to use in some future project!
Simply Delightful fabrics | DevotedQuilter.com
The Jelly Roll Twirl pattern starts by sewing strip sets and I decided to colour coordinate my sets as much as possible, to help highlight the large shapes created by the piecing. Sewing the strip sets together was the perfect bit of mindless sewing on an evening I wanted to sew, but didn't want to have to think about it. We all have those times, don't we?

I love how bright and cheery the quilt top is!
Jelly Roll Twirl quilt | DevotedQuilter.com
The quilt top is 48" square, which is a perfect baby quilt size, and it'll make a great donation quilt once it's quilted (eventually!). I haven't decided how I want to quilt it yet and I seem to have accidentally started a collection of quilt tops waiting to be quilted. Oops! I think my WIPS-B-GONE 2023 might have to focus on quilting up at least some of those tops.
Jelly Roll Twirl quilt | DevotedQuilter.com
If you want to make your own Jelly Roll Twirl quilt, head over to FQS to get the free download! If you start with a jelly roll, the quilt top comes together quickly so it would be a great gift or donation quilt.

February 20, 2023

Confident

Devotion for the Week...

I have been looking after toddlers for about 20 years and I’m constantly amazed by their confidence. They sing (sometimes very loudly) while walking down the street; they tell you to watch their cool dance moves; they strike a pose to show off their muscles. There’s a reason there’s a meme floating around that says, “Whatever you do today, do it with the confidence of a 4 year old in a Batman shirt.” Wouldn’t you love to have that kind of confidence??
 
While I don’t have a magic wand to restore us all to toddler levels of confidence, I can tell you one thing we can be completely confident about - our eternity with God. Titus 3:4-7 says, “When God our Savior revealed his kindness and love, he saved us, not because of the righteous things we had done, but because of his mercy. He washed away our sins, giving us a new birth and new life through the Holy Spirit. He generously poured out the Spirit upon us through Jesus Christ our Savior. Because of his grace he made us right in his sight and gave us confidence that we will inherit eternal life.” 
 
God hasn’t left us guessing about whether or not we’ll spend eternity with Him. He tells us straight out that we can be confident we will inherit eternal life with Him because of our faith in Jesus as our Savior.
We can be confident we will inherit eternal life | DevotedQuilter.com
This confidence isn’t dependent on our righteousness, our works or our singing ability. It’s also not hopefulness or wishful thinking. Our confidence comes from the Holy Spirit, who “joins with our spirit to affirm that we are God’s children” (Romans 8:16).

February 18, 2023

My 100 Day Project Plan

Have you ever taken part in The 100 Day Project? I haven't, though I've watched others participating on Instagram for a few years and always thought it would be fun. I didn't have a project that interested me enough to commit to working on it for 100 days, though, so I just stayed on the sidelines watching. This year is different because I have a plan!

I'm going to do 100 days of scrappy sewing and my only requirement is that I spend at least 15 minutes each day working on some form of scrap project. I have so many scrap quilts already started and so many more in my head that I want to get to that I could easily do a 1,000 day project of scrappy sewing and probably still never get through them all. I'll start with 100 days for now!
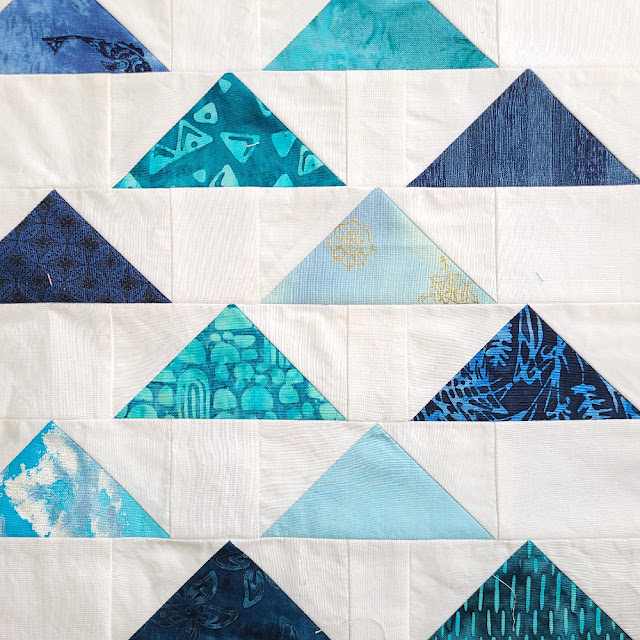
Scrappy Triangles | DevotedQuilter.com
One quadrant of a Scrappy Triangles block

This will be a lot like my WIPS-B-GONE challenge, since most of the things I'll work on have been hanging around for a while (years in some cases), but I'm not restricting myself only to old projects. In fact, I'm certain I'll be starting some during the project! Some of those new ideas are demanding attention, lol. They're also part of an exciting new thing I'm working on for later in the year, and making the quilts myself is the first step to being ready to share the new thing. It's a real hardship, as I'm sure you can appreciate 😊

Once I had my project figured out, my next thought was that I'd need to make myself a daily tracker. One of the things I learned doing WIPS-B-GONE is that it is oddly satisfying to see those coloured sections add up as the days go by. I chose hexagons for this tracker since my Hexie Rainbow quilt will make many appearances during the 100 days.
Hexie Rainbow detail | DevotedQuilter.com
Do you want a daily tracker for a 100 Day Project, whether you're joining the official one on IG or just doing your own thing? I created a version you can download, with space to fill in your own project's name at the bottom. Just enter your email address below and a link to download the tracker will be sent to your inbox.

Another thing I learned during WIPS-B-GONE is that just 15 minutes a day eventually adds up to finished projects. I was working on Illusion (on a deadline) during last year's challenge, so I had to find a way to work on my WIPS while also finishing Illusion on time. While I pieced Illusion, I used my Flying Together blocks as leaders and enders. Then each day I quilted Illusion, I started with 15-20 minutes quilting my Burst mini quilt and I was able to finish quilting the mini in only a few days. It's amazing how quickly things can get finished when I'm actually working on them! 
Flying Together quilt block | DevotedQuilter.com
Part of a Flying Together block. The pattern is available in my shop.
The 100 Day project officially starts on February 22, the same day as the Women of Wisdom QAL and devotional journey, so I know I'll be working on my QAL quilt as my primary project. By spending 15 minutes a day on my scrappy projects, I'll be able to get them moving forward, even when they're not my primary project.

Curious about the Women of Wisdom QAL and devotional journey? We'll be making a beautiful quilt while learning all about the wisdom of biblical women and I can't think of a better way to prepare to celebrate Easter! Learn all about it and register here.

With my daily tracker ready, I'm excited to dive into all of my scrappy projects over the next few months! 

February 13, 2023

Split 4 Patch Baby Quilt Tutorial

Welcome to my stop on the Chickadee blog hop! Today designers are sharing fun projects created with 10" squares of Chickadee, Heidi Pridemore's signature line with Island Batik. I was in the mood for a quick baby quilt, so I made the Split 4 Patch Block and I've written a tutorial for how to make the quilt.
Split 4 patch quilt tutorial | DevotedQuilter.com
Before I get into the tutorial, though, would you like to prepare to celebrate Easter by growing in wisdom while making a beautiful quilt? The Women of Wisdom QAL and devotional journey is a quilt along, plus 40 days of devotions delivered to your inbox, all focused on the wisdom of biblical women. While we learn from their stories, we'll also be making our quilts together 😊 The fun all starts on February 22!

Learn more and register here


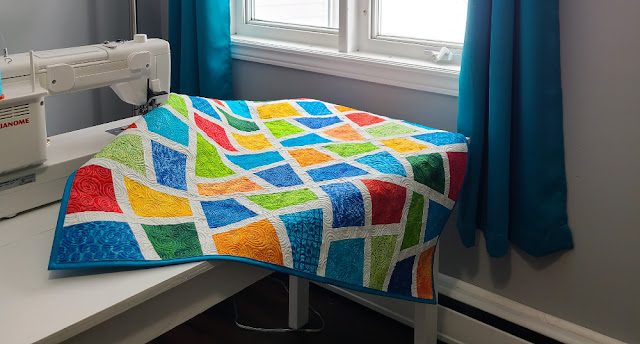
Now on to today's quilt! Here's the full Split 4 Patch baby quilt. I loved working with these bright colours! Actually, Nathan and Paul both commented how much they liked the colours, too, so I guess we were all in the mood for bright and cheerful.
Split 4 patch quilt tutorial | DevotedQuilter.com
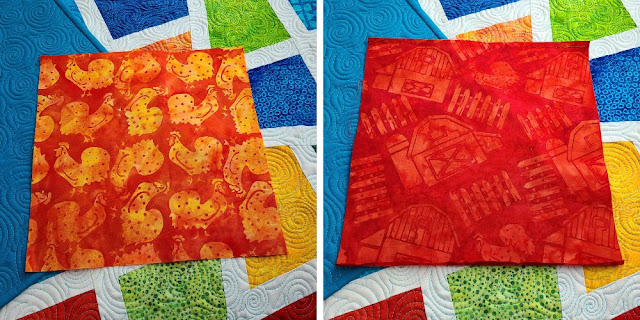
The Chickadee line also has some fun chicken and barn prints, but I didn't use them in this quilt where they'd have been cut too small to really be appreciated. I didn't want any beheaded chickens in my baby quilt! I'm sure I'll find the perfect project for them someday.
Split 4 patch quilt tutorial | DevotedQuilter.com
I was going to use the chicken and barn squares in a pieced back, until I realized I could just barely squeeze the whole quilt onto a piece of yardage, without needing to piece the back at all. If I can get away with a single piece for the back, that's what I'm going to do! This blue from my stash was the perfect choice, so much so that I used it for the binding, too. And the texture from the quilting is so good you just want to run your hands over it. Don't worry, I have many times already!
Swirl hook quilting detail | DevotedQuilter.com
With the spirals in some of the fabrics, it was easy to choose the quilting design. Swirl hooks are one of my favourite designs to quilt, which I know I say a lot. I guess I have a lot of favourite designs to quilt! I auditioned a few different Aurifil colours, but 5005 was the best one over all of the fabrics.
Swirl hook quilting detail | DevotedQuilter.com
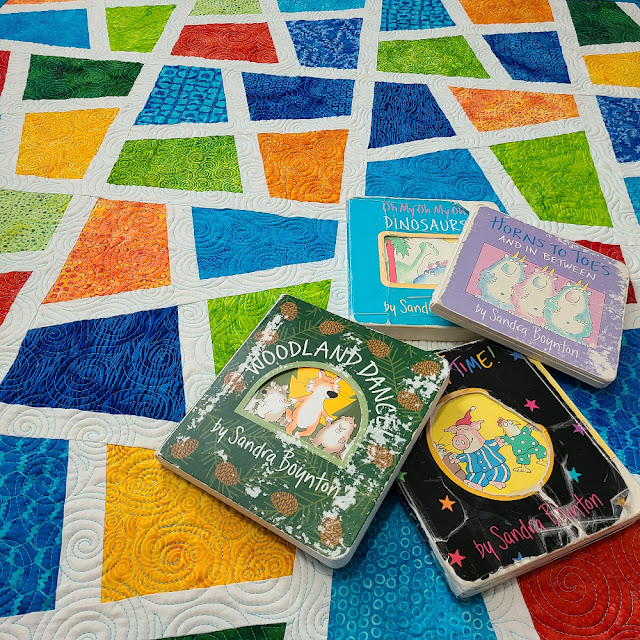
I love the thought of some little one curling up with their board books and this quilt!
Split 4 Patch quilt tutorial | DevotedQuilter.com
Want to make a Split 4 Patch baby quilt of your own? Let's go!

Fabric requirements and cutting


I made 16 blocks for my baby quilt, which finishes at 41" square with the sashing. You can make fewer or more blocks for your quilt, but it will always be a multiple of 4, because of the way the blocks are constructed.

To make a baby quilt like mine, you need:

Bright colours
  • 16 10" squares
White - ¾ yard. Cut into:
  • 15 1 ½" x WOF strips
    • Subcut into
      • 16 1 ½" x 11" rectangles
      • 16 1 ½" x 11½" rectangles
      • 12 1 ½" x 10" rectangles*
      • 1 ½" x 41" (pieced together, if necessary)*
* Wait to cut these until after your blocks are finished and trimmed, in case your blocks turn out smaller than mine.

Make the blocks


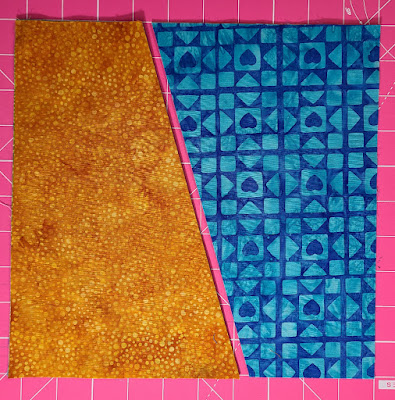
Stack 4 squares neatly on top of each other on your cutting mat, lined up with the lines of the mat. Position your ruler on the diagonal, approximately 3 ½" from the left corner at the top and 6 ½" from the left corner at the bottom. Cut through all 4 squares.
Split 4 Patch quilt tutorial | DevotedQuilter.com
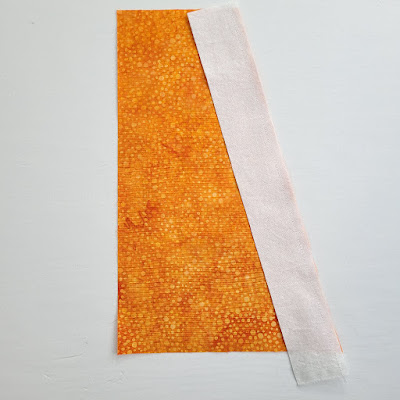
Without otherwise changing the order of the pieces, take the top piece on the left and place it at the bottom of the stack. Be careful throughout the assembly of the blocks to keep them in the same order. This will allow you to make 4 blocks with no fabric appearing twice in a single block.
Split 4 Patch quilt tutorial | DevotedQuilter.com
Stitch a white 1 ½" x 11" rectangle to the top piece in the stack on the left. The sashing piece is slightly longer so you should have a little bit of sashing sticking out past each edge. We're going to trim the blocks at the end, so the edges don't need to be neat now. Repeat with the remaining pieces in the stack. Press the seams either open or towards the sashing piece.
Split 4 Patch quilt tutorial | DevotedQuilter.com
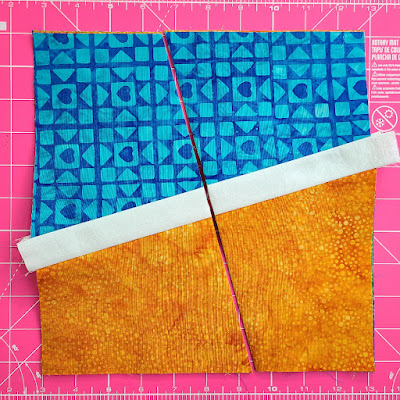
Stitch the top piece in the stack on the right to the top unit on the left. Because they were cut on an angle, it's a bit awkward to line these pieces up. I found it helpful to make sure the bottom corner of the new piece was roughly aligned with the bottom corner of the first piece across the sashing. Again, you don't have to be exact at this point, since we're going to trim them later, but you do want to be close, at least. Repeat with the remaining pieces in the stack and press the seams either open or towards the sashing piece.
Split 4 Patch quilt tutorial | DevotedQuilter.com

Split 4 Patch quilt tutorial | DevotedQuilter.com
Keeping the units in the same order, stack the 4 units neatly on top of each other on your cutting mat again, roughly lined up with the lines of the mat, with the sashing strip running from left to right. Because of the inserted sashing strip, the units won't match the lines on the mat perfectly, so just aim to have the blocks straight. Now make the same cut as before with the ruler on the diagonal, approximately 3 ½" from the left corner at the top and 6 ½" from the left corner at the bottom. Cut through all 4 units.
Split 4 Patch quilt tutorial | DevotedQuilter.com
Apparently I didn't take a picture of the next couple of steps. I guess I was too excited to see my blocks coming together! Oops!

Without otherwise changing the order, take the top two pieces on the left and put them at the bottom of the stack. At this point of each set of blocks, I checked to be sure I hadn't messed up the order of the units and that each block would have 4 different fabrics.

Just like before, stitch a white 1 ½" x 11½" rectangle to the top unit in the stack on the left. Repeat with the remaining units in the stack. Press the seams either open or towards the sashing.

Stitch the top unit in the stack on the right to the top unit on the left, lining up the bottom corners across the sashing as best you can. Repeat with the remaining units. Press the seams either open or towards the sashing.

Trim the blocks

You can see in this picture that the edges of my block aren't quite even, though they're close. Some of the other blocks were a bit more uneven, but it's fine because they're all perfect after they're trimmed.
Split 4 Patch quilt tutorial | DevotedQuilter.com
Once I finished all 16 blocks, I checked them to determine the largest size I could cut all of them, which turned out to be 10" unfinished (9 ½" finished). Depending on how uneven your edges are, you may need to cut your blocks to 9 ½" unfinished (9" finished), which is fine, too. Just be sure to check all of your blocks before you start trimming. It wouldn't be fun to trim half the blocks to 10" only to discover a couple aren't quite big enough, meaning you have to go back to the ones you already trimmed and trim them again to 9 ½".

I used my 12 ½" square ruler to easily trim my blocks. If you don't have a square ruler that's large enough, you can line your block up with the lines on your mat and use your regular ruler to trim one side at a time.

Assemble your quilt top


Arrange your blocks in a 4x4 layout, with white 1 ½" x 10" rectangles between the blocks. Note that if you trimmed your blocks to 9 ½" unfinished, you'll need these white rectangles to be 9 ½" long, not 10".

Stitch the blocks and sashing together to complete the rows. The completed rows should measure 41" long (or 39" if you trimmed your blocks to 9 ½") . Press the seams either open or towards the sashing.

With a white 1 ½" x 41" rectangle between the rows, stitch the rows together to complete the 41" square quilt top. Note that if you trimmed your blocks to 9 ½" unfinished, you'll need these white rectangles to be 39" long, not 41" and your completed quilt top will be 39" square.


If you make a Split 4 Patch quilt, I'd love to see it! 

All of the other designers participating in the Chickadee blog hop are sharing their projects today, too. Be sure to check them all out to see what fun things they've made with these bright and cheerful fabrics!

Split 4 Patch quilt tutorial | DevotedQuilter.com

Branches

Devotion for the Week...

In our backyard, just outside my sewing room window, there's a big birch tree. We've had a lot of wind the past few weeks and now there's a scattering of branches broken off the tree stuck in the snow all around that side of the yard. In a few months, we'll gather all the broken branches and twigs to burn in our firepit as part of the regular spring cleanup.

Looking out the window at those branches in the snow last week made me think of Jesus telling His disciples "a branch cannot produce fruit if it is severed from the vine, and you cannot be fruitful unless you remain in me. Yes, I am the vine; you are the branches. Those who remain in me, and I in them, will produce much fruit. For apart from me you can do nothing. Anyone who does not remain in me is thrown away like a useless branch and withers. Such branches are gathered into a pile to be burned. But if you remain in me and my words remain in you, you may ask for anything you want, and it will be granted! When you produce much fruit, you are my true disciples. This brings great glory to my Father" (John 15: 4-8).

Those birch branches thrown around my yard won't produce leaves when spring comes this year because they no longer have a connection to the sap running through the tree. Without that sap, they can't do anything.

Likewise, we can't produce spiritual fruit unless we stay connected to Jesus. Without that connection to Him, we can't do anything good. We stay connected through prayer, reading our Bibles, Christian music, meditating on His word, going to church...anything that helps us stay open and receptive to God. What I find interesting is that this isn't a one-and-done kind of thing. Remaining in Him implies continually choosing to stay connected. It's not something with a finish line or an end date, it's a lifestyle of choosing Jesus.
we can't produce spiritual fruit unless we stay connected to Jesus | DevotedQuilter.com
The fruit He refers to is the fruit of the Spirit, "love, joy, peace, patience, kindness, goodness, faithfulness, gentleness, and self-control" (Galatians 5:22-23). When we have an ongoing connection to Him, this fruit grows in our lives as we allow the Spirit to make us more like Jesus. When these things are evident in our lives, it brings glory to God.

Wouldn't you rather be a branch connected to the tree, drawing sap and producing fruit that brings glory to God than a broken branch on the ground, drying up and useless? I know I would!

February 09, 2023

Take a Break [Lessons From Quilting]

I've learned a lot of things in the more than two decades I've been quilting. I've learned about ¼" seams, partial seams, Y seams and curved seams. I can do applique, embroidery and paper piecing. I can make a quilt entirely by hand. I can quilt by hand or by machine, though these days I definitely prefer quilting by machine.

Along the way, I've also learned a lot of things about life and about myself, which have inspired an occasional series I'm calling Lessons From Quilting 😊 

Lessons from quilting | DevotedQuilter.com
For this first instalment of the Lessons from Quilting series, we're going to consider what to do when things aren't going right. 

It happens to all of us at some point. Whether it's points that just *won't* match up or we've made the same mistake three times in a row, sometimes quilting is more frustrating than fun. When that happens, it's a good idea to put it down and walk away for a while. 
Lessons from quilting - Take a Break! - DevotedQuilter.com
The pictures in this post are my Pinwheel Garden quilt. The pattern is available in my shop!

When I'm repeating mistakes, I'm just getting more and more frustrated and annoyed, which makes it less likely I can think clearly. If I'm not thinking clearly, I can't see the problem properly, so I won't figure out the solution. Of course, this isn't limited to quilting! Over the years, I've had to suggest this same thing to Nathan many times when he was getting frustrated with homework or an art project. Stepping away for a while has always helped us both.
Lessons from quilting - Take a Break! - DevotedQuilter.com
Walking away from whatever we're struggling with gives us a chance to calm down and then come back to it later with more patience and problem-solving ability. It's amazing what a difference that break can make! My husband even finds this to be true with his daily crossword puzzle. After a couple of hours away from it, he's often surprised by how easily he figures out answers that had eluded him earlier.

Unfortunately, when we're stuck in the frustration it can be really hard to make ourselves walk away. We can be so determined to fix the problem that we don't want to give up, even for a little while. But when we do convince ourselves to take that break, coming back to the problem refreshed often means finding the solution faster than if we had forced ourselves to power through the frustration.
Lessons from quilting - Take a break! - DevotedQuilter.com
Does taking a break work for you, too? Do you find it hard to step away when your frustration level is rising? I'd love to know!
Lessons from quilting - Take a Break! - DevotedQuilter.com

February 06, 2023

Working for Peace

Devotion for the Week...

I'm constantly amazed by how familiar verses, that I've read or heard dozens of times, can one day grab my attention in a totally new way. That happened this past week with Matthew 5:9, which is part of The Beatitudes: "God blesses those who work for peace, for they will be called the children of God." In particular, it was the word peace that caught my attention and my first thought went to those who call for peace in the midst of protests over the deaths of Black people at the hands of police.

In those situations, when say they want peace, what they really want is for the protestors to go home and stop protesting. They want the status quo, for things to stay the way they are and have always been. That's because they (as white people, mainly) have peace under the status quo. But Jesus calls us to work for peace, spreading peace to others, not just maintaining peace for those who already have it.

The Greek word translated as 'work for peace' in the NLT is also translated as 'peacemaker' in other versions and has its root in the word eirene. According to the NAS New Testament Greek Lexicon, eirene means "a state of national tranquility; peace between individuals; security, safety, prosperity, felicity." So the children of God should be working to increase national tranquility, to increase the peace between people and to increase the security, safety, prosperity and felicity of others.

In thinking about the racial application of eirene, working to increase the security, safety, prosperity and felicity of all BIPOC would also increase the peace between people and national tranquility (no matter which nation you live in). If we all embraced the idea of creating safety and prosperity for everyone, there would be less division between groups of people.

Interestingly, working for peace doesn't mean avoiding conflict or sitting on the sidelines and wishing everyone could just get along. Instead, it means stepping directly into the conflict, putting ourselves between the two parties in opposition, and working to bring them together. It means taking an active role in making the situation better.

As someone who hates conflict of any kind, this call to work for peace makes me uncomfortable. I am not usually the one to step into the midst of a conflict and try to find a resolution. On top of that, I have trouble seeing how I can make a difference to such a complex problem. Maybe you can relate to one or both of those feelings.
what could peacemaking look like in our lives | DevotedQuilter.com
Our feelings aside, though, this verse tells us plainly that God values the efforts of those who work for peace. That makes me wonder, what could peacemaking look like in our lives?