June 29, 2020

Where Are You Looking?

Before I get into this week's devotion, I want to let you know that I'll be taking the summer off from writing new devotions again this year. Last year was the first time I took time off from devotion writing and I found it very refreshing. This will be my last new devotion until September. Rest assured, I'll still be reading my Bible and planning out what to write when I come back 😊

Devotion for the Week...

I remember back when I had my beginner's driver's license and I was out driving with Dad one day. There was a group of people walking along the side of the road near our house and I was curious to see who they were, so I kept staring at them until Dad suddenly said, "Where are you going?" I snapped to attention and discovered that the car was veering toward the people! As I straightened back up, Dad pointed out that the car will go wherever the driver is looking, so you always have to pay attention to where you're looking.

What a concept to remember, and not only when we're driving! Our lives will go where we are looking, too. What you give your attention to will affect what you do.

Here's one small example: I love to read fantasy books, so that's the section I gravitate to first whenever I go to a bookstore, followed by the young adult fantasy. Because I'm paying attention to what is on the fantasy bookshelves, I often find new fantasy books to read. On the other hand, I haven't wandered through the mystery section in years, so I don't read mysteries.

On a much more important level, David wrote in Psalm 119: 9-16:

How can a young person stay pure?
    By obeying your word.
I have tried hard to find you—
    don’t let me wander from your commands.
I have hidden your word in my heart,
    that I might not sin against you.
I praise you, O Lord;
    teach me your decrees.
I have recited aloud
    all the regulations you have given us.
I have rejoiced in your laws
    as much as in riches.
I will study your commandments
    and reflect on your ways.
I will delight in your decrees
    and not forget your word.

By gravitating to God's word and His commands, David was keeping them front and center in his life.  He purposely studied and reflected on what God revealed in His word so that he wouldn't sin against God. He looked at what God wanted Him to do so he could aim his life in that direction.

Constantly looking towards God means we will move our lives in the direction God wants us to go. Not because people who look to Him are inherently better or more 'spiritual' than people who don't, but because if we are aware of what God wants and we are seeking to follow Him, then we are more likely to hear and then heed the promptings of the Holy Spirit. If we're not paying attention, we'll miss what the Holy Spirit has to say. 
Our lives will go in the direction we're looking | DevotedQuilter.com
Background quilt is Multiplication

Where are we looking today? Do we want to go in that direction?

June 28, 2020

2020 Mid-Year Review

This is by far the oddest year we've ever had, but somehow we have made it almost to the end of June 😊 That means it's time for a mid-year review of the goals I set back in December. This should be interesting!

1. Guitar quilts


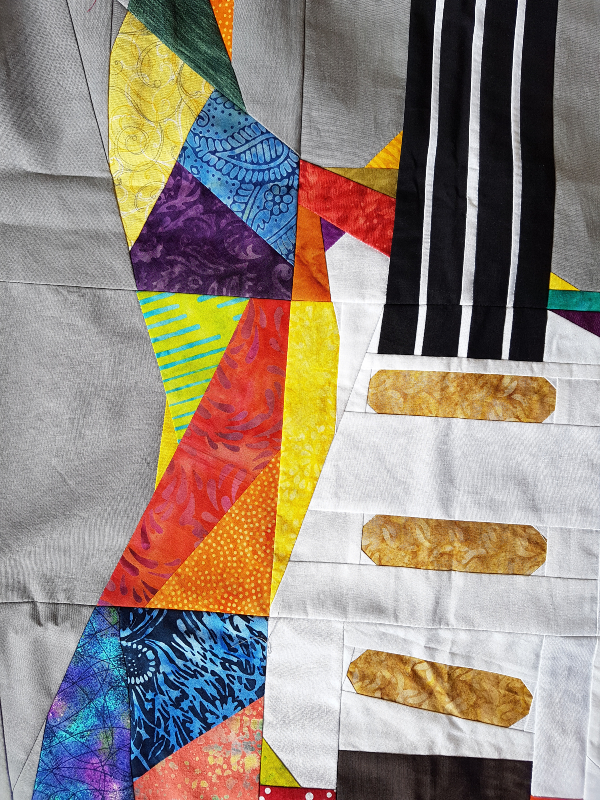
I said back in December that these would be priority number 1 in the New Year and they were...sort of. In early January I asked the owner of my LQS to order me a bolt of solid grey next time she placed an order, for the background and backings. She did, but there was a delay on the other end, so it was mid March before I actually had it in hand. By then, the world had gone topsy-turvy and school was closed. Since these are teacher gifts, getting them finished by the end of the school year didn't feel quite so pressing when school was already closed. That being said, I have finally finished the tops! I'll share them as my finish on Friday when I host TGIFF, so you'll have to come back then to see. Here's a sneak peek in the meantime.
guitar quilt sneak peek | DevotedQuilter.com

2. Finish my Quilter's Planner bag


Nope. Haven't touched it. Truth be told, I had even forgotten I have it as a goal! Good thing there are still six months of the year to go.

3. More patterns, in more shops


I have released 6 new patterns so far in 2020. My goal was 10, so I'm well on the way there 😊
Pinwheel Garden quilt pattern | DevotedQuilter.com
As for more shops...so far I've had one new shop carry my patterns. Since my goal was simply 'more' I guess that counts, but it's kind of underwhelming, don't you think? I haven't been reaching out to new shops since the pandemic started, but it's something I need to get back into doing now that things are starting to open up again. Hopefully I'll have more 'more' to report before the year is out.

4. Teach a class


Well...kind of, yes. I started teaching a beginner's class in our church basement back in February. I had 9 students and we were having a blast. They had their quilt tops partially pieced and would probably have finished piecing them at our next class, but then everything shut down. We will definitely resume classes at some point, but I'm not sure when exactly that will be.

On the other hand, since the pandemic started, I have offered two free virtual workshops and absolutely loved teaching live online! I will be doing more of that for sure. If you want to be notified when I'm doing another online workshop, sign up for my newsletter. I always let subscribers know what I'm planning 😊

5. Tame the UFO situation


I have finished two of my UFOs so far this year. Both were quilt tops that needed to be quilted and patterns that needed to be written, so they're like dual finishes. It feels great to have Formal Garden and Burst both finished and released. There are still plenty of UFOs waiting patiently, though. 
Burst quilt pattern | DevotedQuilter.com

6. Make more little quilts


This one I have been doing! By my count, I've made 7 projects that used up smaller pieces of batting. 
Blue scrap basket | DevotedQuilter.com
You're a Star mini quilts | DevotedQuilter.com
Plus, my quilting class students made scrappy pincushions from my 2 ½" squares, then we stuffed them with batting that I had cut into tiny bits with my rotary cutter. Yay for using up more of those long, skinny strips trimmed off after quilting! You can see my sample one I made last fall in this post.

7. More garment sewing


Check, check and check ✔ I have been having so much fun making myself clothes! I haven't blogged about all of them, but this is what I've made so far this year:

  • Another Summer Basics dress (not blogged yet). That's four dresses from this pattern so far.
  • A Summer Basics tank top (not blogged yet). It's from the same pattern as the dresses. I've gotten my money's worth from that pattern, for sure, and I will be making more 😊 
  • Two Tessa Sheath dresses. I blogged about one here and you can see the other in the family pictures here.
  • A Slim Fit Raglan from fabric left over from my first two Summer Basics dresses and another from blue fabrics that I never blogged about.
The Summer Basics and Tessa dresses are both from Love Notions (affiliate link) and the Slim Fit Raglan is from Patterns for Pirates.

I have fabric coming for shorts, a skirt and a top, all using patterns from Love Notions. I've also bought a pattern for making underwear from Patterns for Pirates because the scraps of fabric that are too small for a shirt, but too big to throw away, were begging to be used for something. I haven't made any yet, but I did buy the elastic that I need. There won't be pictures of those, though, lol 😄

8. Make a sewing machine cover


Nope. I've thought of it off and on over the past few months, but haven't started yet. There's still time. Plus, I haven't actually put my machine away and put the cover on it since school closed in mid March. It goes from the table to the floor in the corner near the table and back again, so there's no pressing need for a cover right now. 


Wow, after listing it all out, it feels like I've been making good progress this year! Somehow the to-make list never seems to get any shorter, though. I'm not sure how, but it just keeps growing and growing and growing. Not that I'm complaining. I love having an abundance of projects that I'm excited to make.

How about you? Are you making good progress on your goals for the year?

June 25, 2020

Tessa Dress

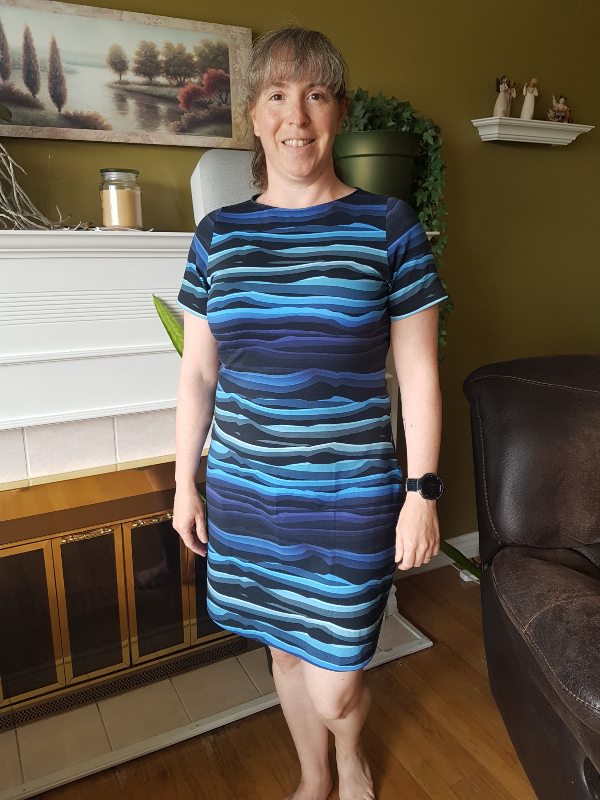
I made another dress a few weeks ago, but forgot to share it. I've worn it a few times now and I loooove it! It's like wearing secret pajamas, lol.
Tessa dress | DevotedQuilter.com
This is the Tessa dress pattern, from Love Notions. This is actually the second one I've made and I don't think I ever blogged about the first one, either, now that I think about it. It's the dress I wore for our family pictures on Aiden's graduation day.

The dress is super simple to make and Love Notions patterns are written so that even beginners can be successful with them. I'm definitely still in the camp of "explain everything to me and assume I know nothing" when it comes to garment sewing, but I'm getting better 😊

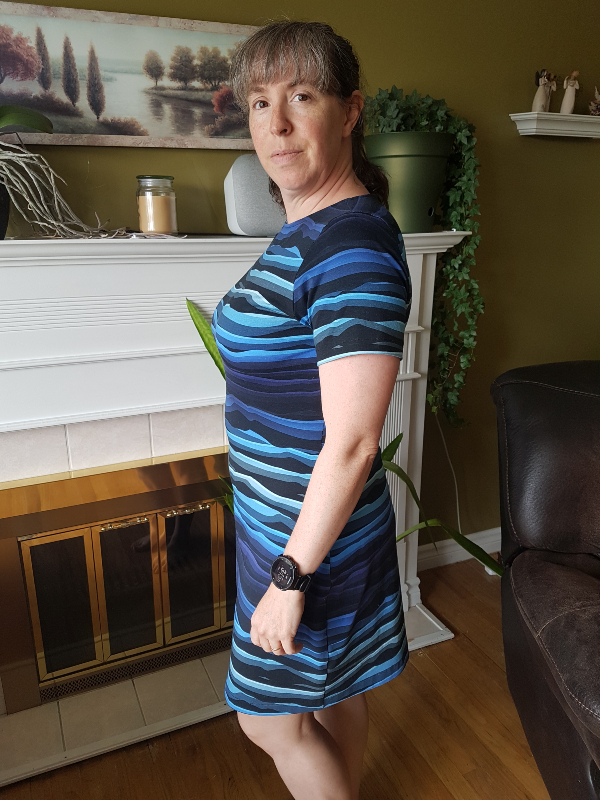
This fabric is a cotton/lycra jersey knit, which is T shirt fabric essentially, so it's really comfortable to wear all day. I love all the blues that are in it and the irregular waves are fun. Actually, I used a pink/purple version of the same fabric for a Summer Basics dress last summer
Tessa dress | DevotedQuilter.com

I cut out another Summer Basics dress earlier today, which I'm hoping to get sewn together this evening. That pattern also includes a tank top, and I cut one of those out, too, using the scraps from another dress I made last summer, which was also a Love Notions pattern. Can you tell I love their patterns?? 😂

I'm still having a blast learning to sew my own clothes and I really enjoy being able to wear something I've made myself. The next challenge will be making a pair of Allegro shorts. I've heard that fitting pants/shorts is a whole new ballgame in terms of the different adjustments that may need to be made to get them to fit perfectly, so this should be interesting.

Do you sew any clothes? If not, are you wanting to try, but you're a little nervous? I believe quilters can learn to sew clothes, too! Click on the link to learn why 😊


Note, this post contains affiliate links, which means if you click on a link and then make a purchase, I may receive a small commission. This does not affect the price you pay.

June 22, 2020

Last Place

Devotion for the Week...

We've taken to playing MarioKart8 as a family most evenings. It's always good for a laugh. My husband yells out "Banana!" whenever he runs into one and the boys love mixing the craziest looking characters with the most unlikely vehicles. As for me, I'm consistently bad at it. If there's a place to fall off the road, I will fall off. Where there are railings to keep you from falling off, I will careen back and forth from one side to the other, banging into the railings. Though only four people can play at a time, the computer fills in with other characters so there are always 12 racers and I am rarely in the top 6. It's a good thing real driver's licenses are not handed out according to your driving record on MarioKart!

At the end of each race, when your character crosses the finish line, the computer takes over control and the character continues to drive along the racecourse. If they finished in the top 6, they wave or thump their chest or pump their fists in celebration. If they finished in the bottom 6, they hang their head in shame or beat on the handlebars of their bike. In the case of Peach, the character I usually play as, she covers her face with her hands and says a rather pathetic, "Oh, no!"

In our races and competitions, we're always trying to be number one. Are we trying to do that in our lives, too? The Bible tells us that being first shouldn't be our life's goal. Jesus and His disciples were walking along the road one day and He could hear that the disciples were arguing. When they were relaxing in the house later that evening, "Jesus asked his disciples, 'What were you discussing out on the road?' But they didn’t answer, because they had been arguing about which of them was the greatest" (Mark 9:33, 34). Doesn't that sound exactly like something that would happen today? Maybe it wouldn't be quite so explicit, but people today are still prone to argue over who should get the most credit for an idea or for a project, or who said something first or who won the most awards back in 6th grade...We really love to call attention to all of the ways we are great.

Of course, Jesus knew what their discussion had been about, so "He sat down, called the twelve disciples over to him, and said, 'Whoever wants to be first must take last place and be the servant of everyone else.'" (v. 35). 

Jesus' teaching that we must be the servant of everyone else goes deeper than just doing things for other people. It's looking into the heart and attitude behind those actions, too. Are we doing things for others grudgingly and because we feel like we have to do it? Are we serving because it's expected of a 'good Christian' and to not help out in some way would make us look bad? Serving others like that is nothing more than serving ourselves and trying to make ourselves look better. It's not 'being the servant of everyone else.'

On the other hand, if we are serving out of love for the other people and a genuine desire to make their lives better or easier in some way, then we are being a servant. In Philippians 2:4, Paul wrote, "Don’t look out only for your own interests, but take an interest in others, too." Serving others because we have to isn't the same as taking an interest in them. Taking an interest means care and compassion. It means setting ourselves aside so that we can focus on someone else and it means a willingness to let go of the pursuit of being 'the greatest' and to accept being in last place.
Are we pushing and racing, trying to be first in everything | DevotedQuilter.com
Background quilt is You're a Star
It's time to take a good look at ourselves. Are we pushing and racing, trying to be first in everything? Or are we looking around to see who might need help or care, then taking the time to meet those needs?

June 19, 2020

You're a Star Mini Quilts

Today I'm happy to be a part of the project tour for Conservatory, a gorgeous fabric line designed by Jill Finley for Riley Blake Designs. The flowers and the blues are right up my alley! 

The main print in the line was practically calling my name through the computer screen, which was kind of odd for me. The print and the colours are beautiful, but the scale is larger than I usually work with. I'm more a blenders kind of quilter, especially since I tend to like to cut things into really small pieces (right, Anja? 😄). 
Conservatory fabric | DevotedQuilter.com
This picture isn't great for showing the colour. I snapped it quickly, indoors, before cutting into the fabric.
I think it was a combination of the shapes of the flowers and the bright, cheerful colours that made me need to include this fabric in my quilt. I'm so glad I did! Even just ironing it and cutting it made me happy.

The same print also comes in a blue and white version and I love that one, too. While I was designing the mini quilt I'd make for today, in EQ8, I kept trying to include both the multi-colour and the blue and white versions, but it never seemed to work for the small quilt. The only solution, of course, was to make two mini quilts!

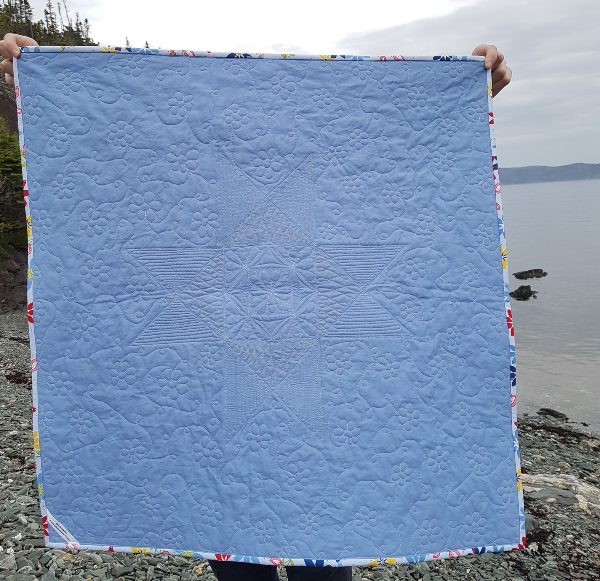
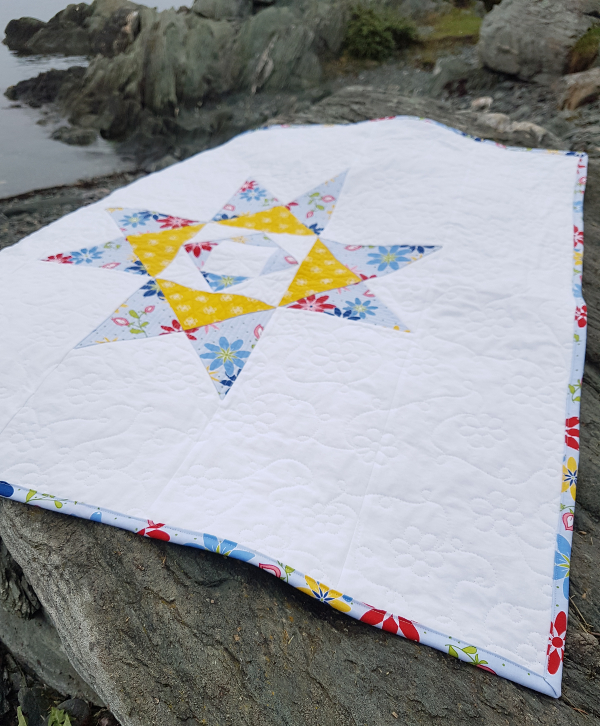
Here are my two You're a Star mini quilts, which finish at 30" square. The white background is Riley Blake's Confetti Cotton solid. I had so much fun making these!
You're a Star mini quilts | DevotedQuilter.com
The yellow from Conservatory is a happy, sunny colour and it adds a bright pop to the star with the multi-colour print. This one just feels like summer to me 😊
You're a Star mini quilts | DevotedQuilter.com
And the green with the blue and white makes this one feel more sophisticated.
You're a Star mini quilts | DevotedQuilter.com
Do you want to make your own You're a Star mini? Enter your email address in the form below to get the free pattern. Doing so will also subscribe you to The Bulletin, which I send out twice a month. I hope you'll enjoy reading it! 😊

Once they were pieced and basted with scrap pieces of Warm and Natural batting (yay for getting to use up some of those scrap pieces!) and more Confetti Cotton solids for the backings, it was time to play with some fun quilting. I had no clue how I would quilt them, except that I wanted the two stars to be completely different. In my usual fashion, I just made it all up as I went along.

I used Aurifil 50 wt thread for all of the piecing and the quilting. I started with 2600 for the multi-coloured star, quilting back and forth lines to accentuate the star, and some continuous curves in the triangles of the center economy block.
You're a Star mini quilts | DevotedQuilter.com
Then I added wishbones in 2135 in the yellow triangles (I can't find a link for just the yellow, but here's a 12 spool box that includes it along with 11 other gorgeous colours). Then I had fun adding various flowers in 2024 in the white parts inside the star. For the background, I quilted a loops and flower meander. This one is so simple to stitch, but looks so good. It adds to the carefree, summer vibe of this mini, I think.
You're a Star mini quilts | DevotedQuilter.com
For the blue and green quilt, I used 2780 to quilt continuous curves in the blue star points, then filled them in with quick back and forth lines. Then I quilted some flower petals in the blue triangles of the center economy block. I used 1231 to quilt straight-ish lines in the green triangles. I used my free motion foot for them, to avoid turning the quilt a million times and just used the width of the foot as my guide. None of them are perfectly even or straight, but I like the imperfections.
You're a Star mini quilts | DevotedQuilter.com
Then it was time to quilt the background and I wanted to do lines radiating from the center. I used my long ruler and my hera marker to mark the lines in ⅛ of the quilt, aiming for the lines to be about 1" apart at the outside edge of the quilt. Somewhere along the way I went astray, though, so the lines were slightly closer together in the corner than in the center. I wasn't about to rip anything out, so I just measured the distance at the edge between the quilted lines and marked the rest of the quilt so the lines would be more or less the same. Turns out I really like the way it looks with the lines more concentrated in the corners.

I don't like how quilts poof up when a whole bunch of radiating lines converge in one place, so I opted to reduce the number of lines in the white portions of the star. In the center of the economy block the lines are only horizontal, vertical and diagonal to the corners. In the next white sections, there are five lines in each triangle. I marked them with the hera marker again, with the lines matching up with the lines outside the star. I think I went a little astray again, and those lines don't quite match up if you look closely, but I'm probably the only one who will ever look that closely, though I'll forgive you if you looked since I pointed it out, lol.
You're a Star mini quilts | DevotedQuilter.com
I chose the mutli-colour flower print for one binding and the green for the other, to give both quilts a nice frame.
You're a Star mini quilts | DevotedQuilter.com
Zachary, my 16 year old, loves to get out to practice driving, so about 15 minutes after I finished the bindings we headed out the door for the beach to hopefully get some pictures. It was raining a little when we left, but I was really hoping the rain would stop by the time we reached the beach, which is about 20 minutes away, and it did! Beach rocks and ocean make the perfect backdrop for quilts, don't you think?
You're a Star mini quilts | DevotedQuilter.com
I couldn't resist taking a picture of the quilts on the bright blue picnic tables. There are bright pink tables, too. I'll need to make a quilt to match them sometime.
You're a Star mini quilts | DevotedQuilter.com
Don't forget to get your free pattern using the form above! I can't wait to see what colours you choose for your version 😊
You're a Star mini quilts | DevotedQuilter.com
Thank you to Riley Blake for supplying the fabric for these mini quilts. They really make me smile 😊

I'm linking up with Sarah's Show Me Something with Stars party.

June 16, 2020

Burst Pattern Release

It's pattern release day again! Actually, this pattern is kind of getting a double release because I released it to the folks taking my Foundation Piecing with Freezer Paper workshop last week, but didn't get around to blogging about it until now. I don't know how it happens...I'm not currently working (Covid), but still the time seems to just vanish!

This is Burst 😊
Burst quilt pattern | DevotedQuilter.com
Burst is a fun, foundation pieced pattern with lots of negative space. I love how the design radiates!
Burst quilt pattern | DevotedQuilter.com
The pattern includes three size options - the 54" square throw size shown, plus a 27" mini and a 72" large lap size. I really wasn't sure what to call the largest size...it's not long enough to be a twin, but it's quite a bit wider than my usual throw. Actually, it's as wide as a twin, just not as long, if that helps give you a better frame of reference.

Burst is great for scrap busting! The more fabrics, the better, right? 😊 My original version was made with my Island Batik scraps, as an ambassador project last year, which I only recently managed to get quilted. 
Burst quilt pattern | DevotedQuilter.com
I'm currently working on a mini version, too. That was what I sewed during the freezer paper workshop and I love how it's looking with this navy solid from Riley Blake and the bright orange and yellow scraps. The scraps just seem to glow against the navy. I've also seen some units and one complete mini quilt top made by participants in the workshop and I love every version. 
Burst quilt pattern | DevotedQuilter.com
Spiral quilting seemed like the perfect way to accentuate the radiating design. This was my first spiral quilting experience and I managed to get myself going the wrong way, so that the part of the quilt that was already quilted built up inside the machine's throat space, rather than to the left of the needle. Definitely a beginner mistake! Next time I will be more careful about which way I'm going when I start. Thankfully my Janome 6700 has an 11" throat space, so it wasn't too hard to squeeze the bulk of the quilt in there as I got closer to the end.

I quilted the spiral with Aurifil 50 wt in white (2024). With all the white background, that seemed like the best choice, and I figured the white thread wouldn't distract too much from the bright scrappy fabrics. I quilted the lines about 1" apart.
Burst quilt pattern | DevotedQuilter.com
To celebrate the release, Burst is available through June 21st at the introductory price, so be sure to pick up your copy today. If you would prefer a printed copy, I offer free shipping on them.

PDF Burst pattern

Printed Burst pattern


It's a big help to small businesses like mine when you pin our images on Pinterest. Thank you so much if you've pinned one of my quilt patterns (or anything else!). And thank you again if you choose to pin this one 😉😄 Your support is very much appreciated!
Burst quilt pattern | DevotedQuilter.com

June 15, 2020

Soil for Tulips

Devotion for the Week...

I planted tulip bulbs in our front yard a couple of falls ago. The first spring, they came up and bloomed in a beautiful line in front of the brick wall. The next spring, they came up again, but there was a gap in the line of about a foot where nothing came up. I meant to plant a couple more bulbs there that fall, to fill it in, but I forgot. Then came this spring and I have only 7 tulips. There are spots where tiny leaves came up, but no bud ever formed. Along most of the wall, though, there is no sign of tulips at all. I'll need to plant new bulbs this fall, for sure.

I'm no expert gardener, so I'm not exactly sure what happened. I know that deer commonly eat tulip bulbs, but there are no deer in Newfoundland, so I know that's not the problem. I have a feeling that I didn't give the tulip bulbs the proper nutrients that they needed. I've read about tulips needing bone meal, but never actually added any to my soil and I'm guessing that negatively affected their ability to continue growing.

Jesus told a parable about a farmer scattering seeds and the different types of soil the seeds landed on: "Listen! A farmer went out to plant some seeds. As he scattered them across his field, some seeds fell on a footpath, and the birds came and ate them. Other seeds fell on shallow soil with underlying rock. The seeds sprouted quickly because the soil was shallow. But the plants soon wilted under the hot sun, and since they didn’t have deep roots, they died. Other seeds fell among thorns that grew up and choked out the tender plants. Still other seeds fell on fertile soil, and they produced a crop that was thirty, sixty, and even a hundred times as much as had been planted! Anyone with ears to hear should listen and understand" (Matthew 13: 3-9).

This was then followed up by the explanation: "The seed that fell on the footpath represents those who hear the message about the Kingdom and don’t understand it. Then the evil one comes and snatches away the seed that was planted in their hearts. The seed on the rocky soil represents those who hear the message and immediately receive it with joy. But since they don’t have deep roots, they don’t last long. They fall away as soon as they have problems or are persecuted for believing God’s word. The seed that fell among the thorns represents those who hear God’s word, but all too quickly the message is crowded out by the worries of this life and the lure of wealth, so no fruit is produced. The seed that fell on good soil represents those who truly hear and understand God’s word and produce a harvest of thirty, sixty, or even a hundred times as much as had been planted!" (vv. 19-23).

Here's the thing about this parable - the seed is always the same. What affects whether or not the seed sprouts and the plant thrives is the soil it is planted in, not the quality of the seed. Likewise, God's word is always the same and whether or not it will produce fruit in someone's life is determined by that person's heart, not by the quality of the Word.

I've always thought of the people mentioned in the parable's explanation as being static, but the reality is that people are always changing. We may be too focused on the worries of this life one day, but another time we may be receptive to God's message. Or we may be receptive today, but too worried about what people think another day. Or maybe we don't understand one day, but another time the words click and we get it.

The question is never whether or not God's message good. It is always good. The question is whether or not we are able to receive the message and produce fruit because of what we hear. In other words, is our soil good for the seed? 
Are you good soil for God's message today | DevotedQuilter.com
Background quilt is Burst

What makes us good to receive the message and produce fruit? According to Jesus' explanation of the parable, we are good 'soil'
  • when we understand it. We need to be paying attention to the message, whether we're listening to a sermon, reading a book or reading the Bible. If we don't understand what we hear or read, we should look into it more so that we can understand.
  • when we grow in our faith. If we stay with only a shallow faith, then we're in danger of turning away from God when there is trouble or when people challenge our beliefs.
  • when we don't put too much emphasis on worry or chasing 'stuff'.
How is your soil today?

June 11, 2020

Yoga Poses for Quilters


I am really excited today to have my first guest blogger visit my blog 😊 Sandra Walker, of MMMQuilts, makes gorgeous quilts, with beautiful free motion quilting (keep your eyes peeled for her Centered quilt, which shows up in one of the pictures. It's one of her designs, and she just released the pattern for it!). She writes monthly like/love posts, in which she shares things she has found that she has liked or loved since the last post. I always enjoy reading those posts! Sandra is also generous with her quilts, supporting the Hands 2 Help challenge, donating cat mats to a local shelter and making plenty of meaningful quilts for people who need a quilty hug of comfort. I am happy to call her a friend, even if we've never actually met in person.

In addition to all that, Sandra is a yin yoga teacher and she's here today to share some yoga poses that will be particularly helpful for combating the stresses that quilting puts on the body. We need to stretch and move! Sandra will show us how, so let's turn it over to her 😊

***********************************************************************************


I was pretty tickled when Leanne asked me to do a guest post on her blog about yoga poses to help quilters. Leanne and I go way back to the New Quilt Bloggers group of 2015, so we've known each other for some time. We've come sooo close to meeting up in person, but never quite have made it happen. Yet.


Yoga has really caught on with the past 10-15 years in the West, so I'm sure that many of you have tried a class, whether in person or online with YouTube. Maybe you think, nope, no can do, much too stiff, I can't get down on the floor, I'm not flexible, I'm not into that chanting stuff, yada yada.


Well, I'm here to hopefully show you that you can press 'mute' on that voice that is saying all of those negative anti-productive sentiments, and try some Yin yoga. No, we won't be wrapping our legs behind our head but we will be doing some deep tugs on our connective tissues. Briefly, connective tissues are ligaments, tendons, the white string-like fibres you see running through a package of a meat cut, the opaque white film you see encasing certain cuts, whether those cuts were muscle or organs, the opaque white film behind a pack of ribs. We have all of that 'white stuff' inside of us and if we don't gently but steadily tug on it, through pressure as in deep tissue massage or myofascial release, or Yin, it tightens up, and yep, we get really stiff. The great news? No matter whether you are 10, 30 or 70 or 80 or whatever age, you can become less stiff! Our bodies are amazing. AHH-mazing.


As for 'that chanting stuff', yoga actually was developed thousands of years ago (you read that right, as in 5000) in order to quiet the mind, so it is originally a spiritual practice, using the body to get into the mind. Before you leave, though, wait! You can easily and simply just focus on the body aspect. Who knows, maybe you will find you start to enjoy that inner stillness and quiet, especially in this noisy loud world of ours!


As quilters, we tend to sit for extended periods of time at our machines, head bent, shoulders rounded. Heck, I know many who purposely set their pressing and even cutting/trimming stations up so that they don't even have to stand up or barely move, maybe just roll the chair over, to do all parts of the quilting process. The first thing you can do is to make one or both of those two stations somewhere in your sewing space that forces you to stand up walk over, and press, or cut. Movement is so important.


Here are just a few poses from Yin yoga that you may like to try as a break between long sessions of quilting, before you begin to quilt, or after. Some of these also can help with sleep troubles by doing them just before you go to bed! Use the timer function on your phone to time the minutes for these. Key word is relax into the pose; never force, no pulling, muscles are soft, and no pain at all. Back off, or modify or do not do the pose if there is pain. Discomfort? Good! As long as it is manageable and you can slowly and calmly breathe!


  1. Shoulder stretch: Eagle Arms


You don't even have to get out of your chair for this! Set your right elbow inside your left elbow eye. See if you can continue twisting your arms around each other, bringing your palms together in prayer. If you can't go that far, fake it: grab your pinky with your thumb. Try to keep your wrists straight, not bent, pointing your fingers up to the ceiling. Enjoy the pull across your shoulder blades for a minute, over several slow steady breaths, evening out your inhales and exhales. Then, if you like, eagles fly, so slowly and mindfully raise your arms up to the ceiling, trying to keep the shoulders down. Hold arms up for about a minute. To come out, bring your arms down slowly, unwind slowly, enjoying the ahhhh! feeling of release, and press your palms out to the side, straightening your arms, as if pushing back imaginary walls that are closing in. Then gently shake out your arms. Repeat, setting the left elbow inside the right.

Yoga poses for quilters - Eagle arms | DevotedQuilter.com

  1. Outer-rotating of hips: Butterfly Pose


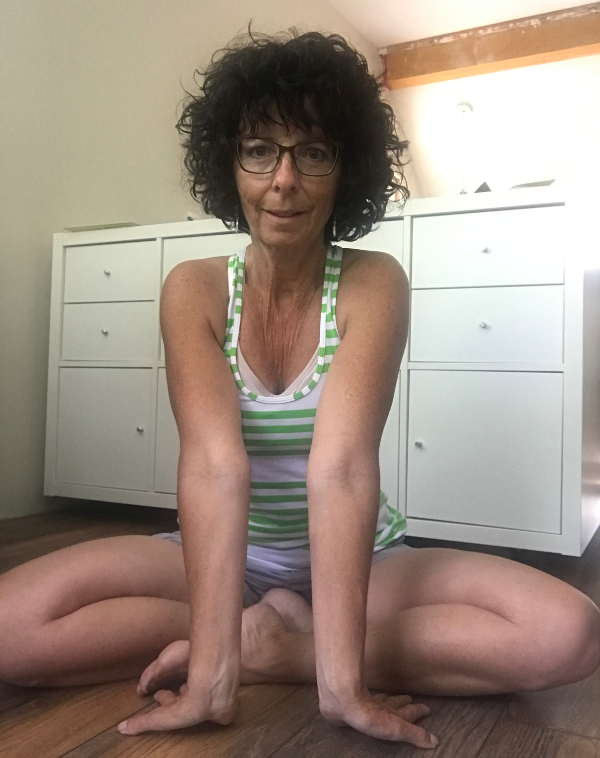
Sadly, we don't live on the floor here in the West. As a result, we rarely rotate our hips, specifically, our femurs (thigh bones) inside our hip sockets. This leads to a hip replacement rate off the charts as compared to the East, where sitting on the floor is commonplace. You can do this on your couch, but try getting down onto the floor. If you have a coffee table or chair nearby, you can use it to help yourself up and down. Bring your foot soles together, letting the knees fall open, so you make a diamond shape with your legs. Don't bring your feet in close to the groin; in Yin they are much further away. If this pulls too much, place a block, or a couple of books, a pillow or a rolled up quilt under the side of your thigh. If it hurts the ankle bones, then set them on a quilt. Sit your sit bones (the bumps of bones in the centre of your butt cheeks) on the edge of a folded up quilt or a fairly flat cushion, especially if you have sciatica issues. This also helps with tight hamstrings, as it will elevate and forward tilt the pelvis. Lean forward, relaxing, not pulling, allowing your back to gently round if you have no disc issues.
Yoga poses for quilters - Butterfly | DevotedQuilter.com

If you have disc issues, do not round but lean from the hips, keeping your tummy pulled in to protect your low back. Hold for 3 minutes, allowing your head to dangle if it's okay for your neck. This will give your neck a lovely stretch. If you get close to the floor you can rest your head on a block or a cushion, or your feet ha! Come out very slowly. Lean back on your hands and do what feels natural: stretch out the legs and just be still and enjoy the rebound of the pose, or bend the legs and do windshield wipers a few times. Doing this pose reclined before going to bed can help with sleep issues.

Yoga poses for quilters - Butterfly | DevotedQuilter.com

  1. Wrist stretches


These could even be done while in Butterfly pose. 


Stretch 1: Hold out your arms with the palms up as if someone is giving you a stack of freshly folded quilts. Drop your fingertips towards the floor (or low table, if you are doing this while seated on the couch or a chair). Bring them in a little closer to your groin and then, keeping the elbows as straight as possible, send the palms towards the floor. Wrists are fine joints, so we only hold this a minute and we are very gentle with our wrists. This is helpful for carpal tunnel syndrome. Come out slowly, making fists, by folding in each finger, thumb on top and squeeze gently. Rotate the wrists each way 2-3 times and shake it out.

Yoga poses for quilters - wrist stretch | DevotedQuilter.com

Stretch 2: Hold out your arms with the palms down. Drop your fingertips to the floor, this time sending the backs of your hands towards the floor. Easy does it, again trying to keep your elbows straight. Hold for one minute. Come out as before.

Yoga poses for quilters - wrist stretch | DevotedQuilter.com
  1. Backbends - Sphinx Pose


Lie down on the floor. You know, I had a yoga student once who, through a friend who was already in my classes, told me she wouldn't come to yoga, much as she wanted to, because she couldn't get up and down off the floor easily. Well most of Yin is ON the floor, so I said to tell her, sit at the back if you like, and I bet you will find that you can do this, and I can help you get up when you need to, at the end of the class. She came, because she was avoiding getting a knee replacement, and six or maybe it's seven years later now, she still hasn't had a knee replacement, and she's finding it a lot easier to get up and down off the floor. And it helps with her sailing apparently as well! You could try this one on your bed I suppose, though it isn't the firm support we actually really need.


This is 'kid watching TV pose' I tell my students. Prop yourself up on your forearms, with your elbows stacked beneath your shoulders. Your palms can be on the floor, or in prayer, or you can clasp opposite elbows. This pose can help with slipped or herniated disc issues, but do not stay if there is any kind of pain whatsoever. Try to relax your butt and leg muscles so the work transfers to your low back. Hold for 3 minutes or longer. If you want a little more intensity, trying bending the legs at the knees so your feet are up in the hair and hold there. It can be wonderful after many hours bent over a machine or a cutting table, or basting a quilt. To come out, slowly, slowly lie back down, turn your head to one side and draw up that same leg, so you're lying with one bent and one straight. If you crave some movement, come down but place your forehead on your stacked hands, and bend both of your legs up into the air, waving them gently back and forth in windshield wipers.

Yoga poses for quilters - Sphinx | DevotedQuilter.com

If that pose is too intense, try Baby Cobra pose. It is much the same, but you place your hands under your shoulder heads, so only your head, shoulder heads, and collar bones are off the floor. The ribs are still on the floor so the backbend is not as intense. As in Sphinx pose, try to relax your butt and legs.

Yoga poses for quilters - Baby cobra | DevotedQuilter.com

  1. Spinal Twist


We naturally twist our spine throughout the day when we feel we need to release tension. That is exactly what a twist does! More than that, though, is the rejuvenation that occurs when we twist, and if we hold that twist with our muscles relaxed, we can further deepen the benefits. You can do this seated in your chair or on the floor. It is a good one to do before bed to help you sleep. If on the floor, lie down with your arms in a T position, and bend both knees. Slowly drop them over to the right. Try to keep your left shoulder in contact with the floor. You can put a rolled up quilt or a pillow under your knees to help keep that shoulder down. If your neck is okay, turn your head and look to the left. If you want a deeper twist, straighten out the bottom leg. Hold this for 2-3 minutes breathing slowly and deeply. Slowly unwind and then repeat on the other side. When you've finished that side, you can hug your knees into your chest. If you're doing this in your chair, hold the pose and don't pull yourself around.

Yoga poses for quilters - Spinal twist | DevotedQuilter.com
If these poses interest you and you'd like to try a one-hour sequence of yin poses, I have been teaching on Instagram @mmmquilts on Tuesday and Thursday mornings at 6:30-7:30 EST. I uploaded several of the flows to my YouTube channel Sandra Walker. You also can find several more poses and more details about these under the tab Yoga Posts and Recipe Links on my blog. And, be sure to check out Bernie Clark's website, yinyoga.com for a wealth of information, articles and links to his YouTube channel as well. I did my first teacher training using his book as our text, and recently did a second teacher training with him as my teacher.

********************************************************************************************************************

Thank you so much, Sandra! We will all be less stiff and achy after doing these poses 😊

If you haven't already, I encourage you to check out MMMQuilts and to follow Sandra in all the places she linked above. You won't be sorry when her beautiful quilts pop up in your IG feed!

I'd love it if you'd pin this post, to help other quilters find it. Plus, then you'll be able to find it again when you need to remember how to do the poses!
Yoga poses for quilters | DevotedQuilter.com

June 08, 2020

It's a Commandment

Devotion for the Week...

I've had a hard time deciding what to write this week. On the one hand, I want to use this space to say unequivocally that Black lives matter and I can't understand how some people don't get that. On the other hand, I don't want to write anything that is just virtue signalling, ie, the practice of writing or speaking in support of something to show that you are a good person. In the end, speaking up feels important.

Black lives matter. It's pure and simple, really. When asked, "Teacher, which is the most important commandment in the law of Moses?” Jesus replied, “‘You must love the Lord your God with all your heart, all your soul, and all your mind.’ This is the first and greatest commandment. A second is equally important: ‘Love your neighbor as yourself.’ The entire law and all the demands of the prophets are based on these two commandments” (Matthew 22:36-40). Earlier, during the Sermon on the Mount, He said, "Do to others whatever you would like them to do to you" (Matthew 7:12).

While we might each individually be treating the Black people we know just the same as we would want to be treated, there is no denying that the system does not treat them the way we would want to be treated. Jane Elliott is an anti-racism activist and there's a short video of her speaking to a group of white people and asking them to stand up if they would want to be treated the same way that Black people are treated.

Not one person stands up.

That alone speaks volumes, doesn't it? The truth of the matter is, I wouldn't have stood up. If you are a white person, would you have stood? If we can acknowledge that we wouldn't want to be treated the way the Black community is treated, we have to acknowledge that as a society we have failed to follow what Jesus calls one of the two most important commandments.
Black lives matter | DevotedQuilter.com
Background quilt is Intersections

The question becomes, what now? How will we act now that we have recognized this? Jesus tells us to do to others what we would like for them to do to us and to love our neighbours as ourselves. It's past time to start following those commandments.