July 28, 2020

Surprise Printed Pattern Sale!

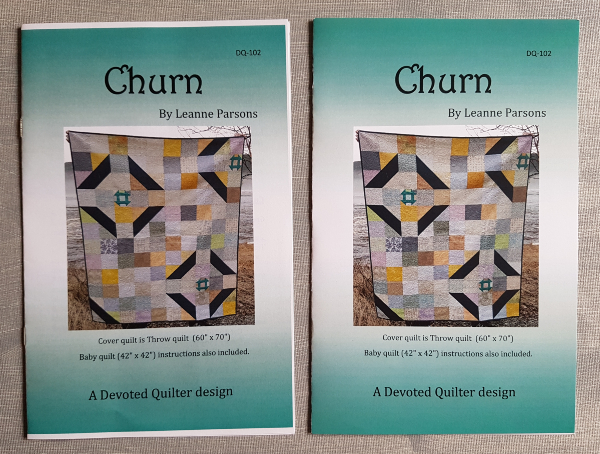
When I first started having my patterns printed, I didn't understand the significance of printing with no-bleed vs full bleed. No-bleed means the printing does not extend to the very edges of the paper, leaving a white strip along the edge, whereas with a full bleed, the printing does go right to the edge. Since I've learned the difference, I've been printing all of my new patterns and doing re-prints of my old patterns as needed with the full bleed. Here's an example of the difference.
Churn quilt pattern | DevotedQuilter.com
This means that I now have only a few of the no-bleed style of my older patterns left that I'd like to move out of my inventory so that all of my patterns look the same. That creates an opportunity for you!

I'm selling *only* these no-bleed printed patterns for 50% off, while supplies last. That means you can get a pattern for only $7 CAD, which is roughly $5.25 USD. The content of the pattern is exactly the same. It's only the look of the cover that is different. 

There are only 2 or 3 copies of some of the patterns, though, so if you want one, speak up quickly! And even though the pattern is 50% off, I'm still offering free shipping 😊

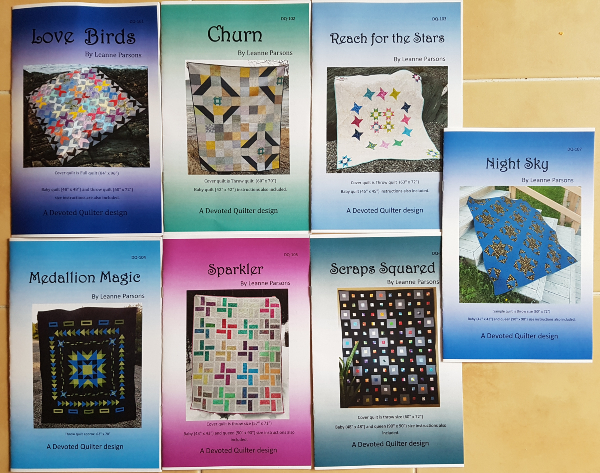
These are the patterns I have available for the sale: (Edited to say, Love Birds and Churn are now sold out)
Quilt patterns | DevotedQuilter.com
If you want a pattern (or several!) send me an email or comment below. I'll send you a Paypal invoice, which you can pay with a credit card even if you don't have a Paypal account. Canadian orders can also be paid by e-transfer, if you prefer.

Remember, the 50% off only applies to a limited number of copies of these 7 patterns and when they're gone, the discount will be gone with them, so get your order in today!

July 24, 2020

More Adventures in Garment Sewing

This post includes affiliate links, which means that if you click on a link and make a purchase I may receive a small commission. This does not affect the price you pay.

Garment sewing is so quick, compared with making a quilt! I've been sprinkling in making some new clothes lately and I love getting to wear the things I've made 😊 My parents were here for a weeklong visit, so Mom and I did a little photography session this morning before they left. Usually I have to get Paul or one of the boys to do these pictures, but Mom has a lot more skill and patience than they do.

Before I show you what I've been making, let me just say it feels really odd to write a blog post that includes so many pictures of me. I'm much more comfortable with having an abundance of pictures of my quilts!

First up, I made another Summer Basics dress, pattern by Love Notions. This is the fourth of these dresses I've made and I love wearing them. This one is made of a polyester jersey knit that is really light and flowy, so it feels great on. Being the novice that I am, it never even occurred to me to try to match up the print at the front of the dress. Oh well! I think the print is busy enough that it doesn't really matter. That's what I'm going with anyway, lol.
Summer Basics tank dress | DevotedQuilter.com
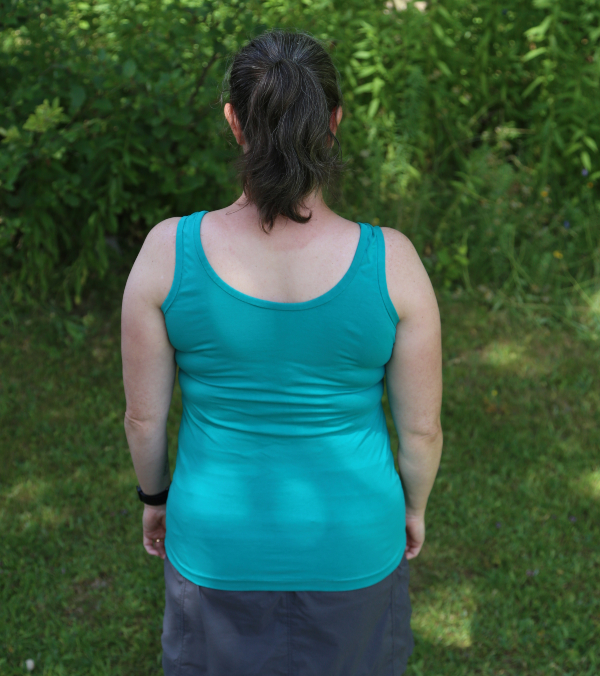
I've also used the Summer Basics pattern to make a couple of tank tops. The first one is made of a rayon jersey knit and it flows nicely, too. Bonus that it was fabric left over from making myself a dress last summer! Once a scrap lover, always a scrap lover, right?
Summer Basics tank | DevotedQuilter.com
With this one I have a really hard time telling which is the front and the back. I need to sew a label into the back to make it easier, lol.
Summer Basics tank | DevotedQuilter.com
I decided to get a little creative with the next tank top and added a bit of reverse applique to the front. I wish I had positioned the heart just a little higher, but it was hard to tell where to put it before the top was sewn together. At least it's easy to tell which is the front and the back on this one!
Summer Basics tank | DevotedQuilter.com
I started by drawing the heart on the front piece of the tank, then pinned the pink behind it. I stitched around the heart, then drew lines across the heart and stitched them. Cutting away the green, then, was a little nerve-wracking as I was worried I'd cut through stitches 😊

This version is made with cotton-lycra jersey knit, so T-shirt fabric, essentially, and it's a fair bit clingier than the rayon version even though they were both made with the same size of the same pattern. In the FB groups for Love Notions and Patterns for Pirates, I've read so many times that fabric choice makes a big difference and I can really feel the proof in these two tank tops.
Summer Basics tank | DevotedQuilter.com
Before Mom came over from Nova Scotia, she went fabric shopping for me, bringing me a few different athletic knits (the type of fabric that workout clothes are made from). She brought some for her, too, so I have a few things to make for her while I make mine.

While she was here, I made us tank tops using the Essential Tank pattern by Patterns for Pirates, which has the racerback style straps that Mom wanted. This pattern has a looser fit than the Summer Basics pattern, mostly around the waist and hips.
Essential Tank | DevotedQuilter.com
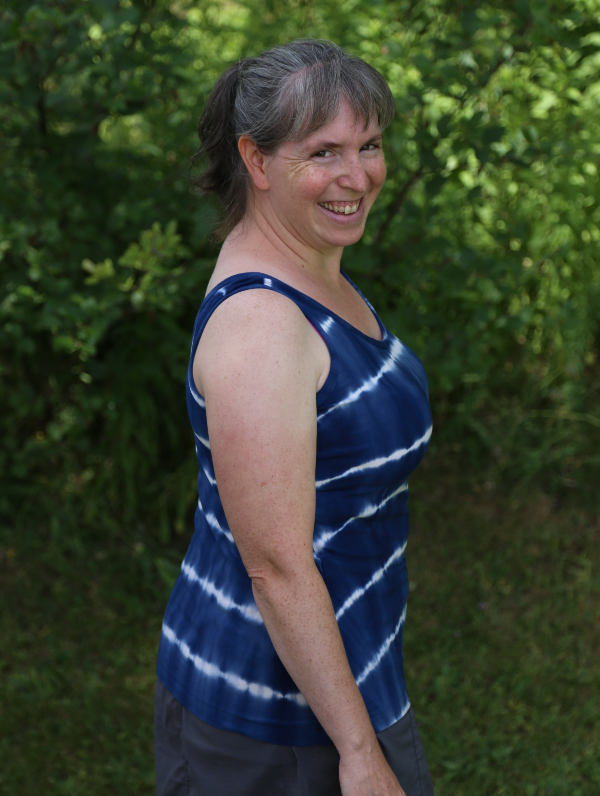
I made mine with the straight straps. It's quite a dramatic difference! I need to work on getting rid of the ripples around the edges of the straps. I'm not sure what's causing them, but they happen on every tank I sew, though sometimes the fabric or the print makes them a little less noticeable.
Essential Tank | DevotedQuilter.com
This pattern also includes dress options and I could definitely see me making a dress version someday. I love how many options most patterns include, whether it's for sleeve length or dress length or the style of the hem or neckline. So many options!

Next up, Mom wants another tank top, with the straight straps this time. Then I plan to make some shorts for both of us, using the Peg Legs pattern (it's a free one). After that...who knows? 
Essential Tank | DevotedQuilter.com
It's fun to mix garments in with my quilts, that's for sure 😊 I've always liked having different projects at different stages so I could work on what I wanted and I guess this is just another version of that. Do you make things other than quilts?

July 16, 2020

Flying Together - Designer Shop Hop

It's my day to share my block for the Moving Forward designer's shop hop! This week 10 designers are each sharing a 12" block, plus a layout that uses all of the blocks. So that's 10 free (for now) blocks and 10 possible layouts! The theme for the hop is "Moving Forward - separate, but together, inspired by quarantine." Immediately when I read the theme, I thought of flying geese blocks. Traditionally, though, flying geese blocks are connected to each other. I separated them, giving them all a bit of space, but kept them all moving in the same direction. Here is my Flying Together block. You can download the pattern here.
Flying Together 12" quilt block | DevotedQuilter.com
This is what the block looked like when I originally drew it in EQ8: 
Flying Together 12" quilt block | DevotedQuilter.com
I had all intentions of making it with ALL the colours, just as it's shown, until I pulled out my scraps and the blue and teal ones were right on top. They started singing their siren song and I just couldn't resist. So I went back to EQ8, coloured the whole block with blues and teals and then tiled them together to make a whole quilt. I loved it! No surprise there, if you know me at all 😊

I have 6 blocks made so far. I'm trying to keep a bit of balance between the blues and teals and I'm making sure no fabric repeats in a given block, though there are plenty of repeats spread throughout the blocks. I'll need 30 blocks for the quilt I have in mind, so it will be easy enough to spread out the repeat fabrics.
Flying Together 12" quilt block | DevotedQuilter.com
I have white solid fabric from at least three different manufacturers in my stash and scraps and I'm not worrying at all about combining them. Though there are subtle differences between them, they all read as white, so I'm okay with the variations. Plus, it's a scrap quilt, so scrappiness in the background is a good thing.

When it came time to create my layout with all 10 blocks from the hop, I wanted the quilt to be bigger than just 10 blocks, so I used multiples of most of the blocks plus sashing and plain blocks. The quilt would finish at 60" x 68". I created the layout first in greyscale, so I could concentrate on balancing the shapes, rather than worrying about colours.
Sampler quilt layout | DevotedQuilter.com
Greyscale isn't very exciting, though, is it? Blues, teals and a pop of magenta make it much more interesting!
Sampler quilt layout | DevotedQuilter.com
If you wanted to make this layout, the sashing is cut at 2 1/2" and there are two 12 1/2" plain squares and four 6 1/2" x 12 1/2" rectangles, along with the blocks.

All of the blocks are free from now through July 18th, then they will be $2 each. Visit each designer to get the pattern for their block. Don't forget to download your copy of Flying Together, too!


July 13 Tamarinis                    https://www.tamarinis.com
July 13 Laura Piland               https://www.sliceofpiquilts.com/
July 14 Sherry Shish              https://poweredbyquilting.com
July 14 Amy Friend                 https://www.duringquiettime.com/
July 15 Kate Colleran             https://seamslikeadream.shop
July 15 Becky Jorgensen       https://patchworkposse.com
July 16  Leanne Parsons        https://www.devotedquilter.com   
July 16 Patti Carey                 https://pattispatchwork.com/
July 17 Swan Sheridan          https://www.swanamity.com     
July 17 Cherry Guidry            https://www.cherryblossomsquilting.com/  

Happy shop hopping and sewing!
Flying Together 12" quilt block | DevotedQuilter.com

Linking up with NTT

July 13, 2020

Moving Forward - Designer Shop Hop

I have a fun designer shop hop to share with you today! Ten designers are each sharing a free 12" block this week, plus a layout that shows how all 10 blocks could be used together to create a fabulous sampler quilt 😊 That's 10 blocks and 10 possible layouts!
The theme for the shop hop is "Moving Forward, separate, but working together" and it was inspired by life in quarantine. The hop starts today and all of the blocks are free only through the 18th, so be sure to visit everyone to get their blocks before the price goes up. 

July 13 Tamarinis                    https://www.tamarinis.com
July 13 Laura Piland               https://www.sliceofpiquilts.com/
July 14 Sherry Shish              https://poweredbyquilting.com
July 14 Amy Friend                 https://www.duringquiettime.com/
July 15 Kate Colleran             https://seamslikeadream.shop
July 15 Becky Jorgensen       https://patchworkposse.com
July 16  Leanne Parsons        https://www.devotedquilter.com   
July 16 Patti Carey                 https://pattispatchwork.com/
July 17 Swan Sheridan          https://www.swanamity.com     
July 17 Cherry Guidry            https://www.cherryblossomsquilting.com/  


As you can see in the schedule, I'll be back on Thursday (my birthday!) to share my block and layout. In the meantime, here's a little peek at the fabrics I'm using.
quilt block pieces | DevotedQuilter.com
If you looked at all those pieces and thought it looks like an awful lot for one 12" block, you'd be right! I love the scrappy potential of my block so much that I decided to make a whole quilt's worth. They won't all be done for Thursday, though. So far I have two finished and the components made for another 4, I just need to assemble those.

Off you go, now, to hop around and collect your shop hop blocks! I'll see you back here on Thursday 😊

July 07, 2020

Quilt Block Mania - Starfish Dance

Welcome to Quilt Block Mania! I'm happy to be a part of the group of designers sharing their Summer Fun blocks today 😊

Allow me to introduce my Starfish Dance block! Because I'm trying to avoid growing my collection of orphan blocks these days, I even finished my block into a mini quilt 😊 This is a rather picture heavy post, but we quilters always enjoy lots of quilty pictures, right? Here's the finished mini...
Starfish Dance quilt block | DevotedQuilter.com
And here's what the block looked like before it was quilted.
Starfish Dance quilt block | DevotedQuilter.com
Starfish Dance is a 12" block that is made using fusible raw edge applique. It is perfect for scraps or random charm squares you have left from other projects.

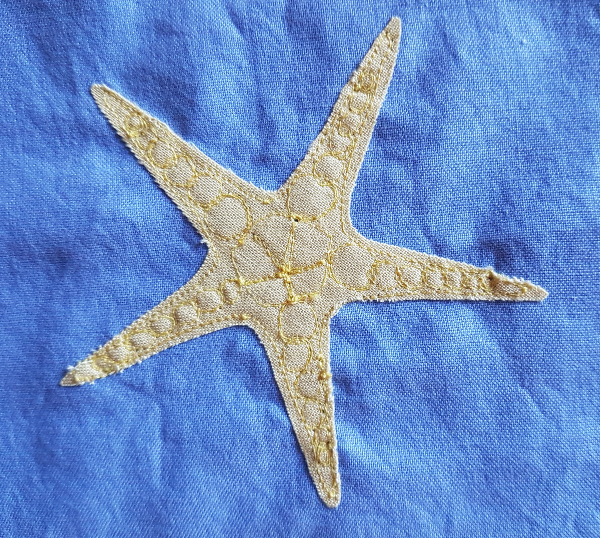
After the applique is done, you have stars, but they don't really look like starfish to me. I mean, they're the right shape, but starfish have such amazing details and markings and these fabric ones needed some of that, too.
Starfish Dance quilt block | DevotedQuilter.com
I chose 5 matching, or almost matching, Aurifil threads to do some free motion embroidery. That's exactly the same as free motion quilting, except without batting and backing.
Starfish Dance quilt block | DevotedQuilter.com
Here are the colours I used - 1135, 2610, 1158, 2390, 4140.
Starfish Dance quilt block | DevotedQuilter.com
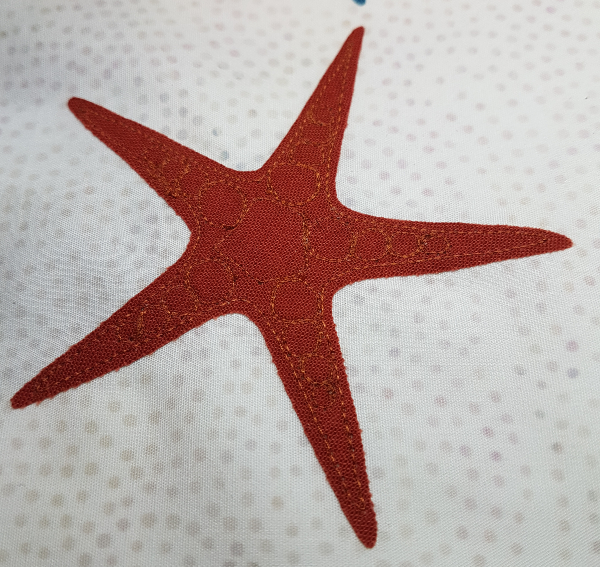
I made a test block, with only one star, to see if the free motion embroidery would distort the block. I was afraid it would, but I didn't want to use interfacing or stabilizer if I didn't need to. I'm glad I made the test block as the embroidery didn't distort it much at all. Doesn't it look much more like a starfish with the embroidery?
Starfish Dance quilt block | DevotedQuilter.com
After a successful test block, I stitched around the edge of the starfish on the block.
Starfish Dance quilt block | DevotedQuilter.com
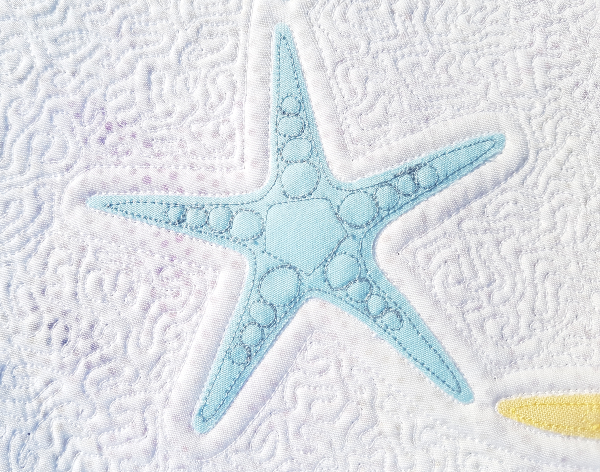
Then I stitched a straight-ish line not quite at the base of each arm, creating a pentagon in the center. I chose to leave it empty, to make it stand out a little better, rather than stitching inside it as I had on the test block. Then I stitched four small pebbles in each arm.
Starfish Dance quilt block | DevotedQuilter.com
I asked Nathan (my 12 year old) what he thought of my starfish and he said, "I don't see starfish. I just see stars." Ah well, not everyone gets it! Anyway, once they were looking properly starfish-like, to me at least, I pulled out a scrap of Warm and Natural batting and some white solid for the backing.

I used Aurifil 2024 for the quilting. I started by quilting around the starfish and then echoing around them, using the width of my free motion foot as a guide. Then, since it's only a 12" square, I dove in for some micro stippling 😊
Starfish Dance quilt block | DevotedQuilter.com
I remember once hearing that if you echo a shape, then whatever you quilt outside the echo needs to have the lines closer together than the echo or you lose the effect. I think I succeeded in having the stippling lines close enough together, lol. I love how the starfish puffs up.
Starfish Dance quilt block | DevotedQuilter.com
The stippling reminds me of the shapes in this coral.
coral | DevotedQuilter.com
And here's the quilting from the back 😍 A beach photo shoot seems like a requirement for a mini quilt of starfish.
Starfish Dance quilt block | DevotedQuilter.com
A white quilt is hard to photograph well, but just look at all the wonderful texture.
Starfish Dance quilt block | DevotedQuilter.com
I took a lot of pictures at the beach. This one might be my favourite.
Starfish Dance quilt block | DevotedQuilter.com
Not wanting to leave out the little test block, I finished that one as a mini mini 😊 It's about 6" square and got treated to some matchstick quilting.
Starfish Dance quilt block | DevotedQuilter.com
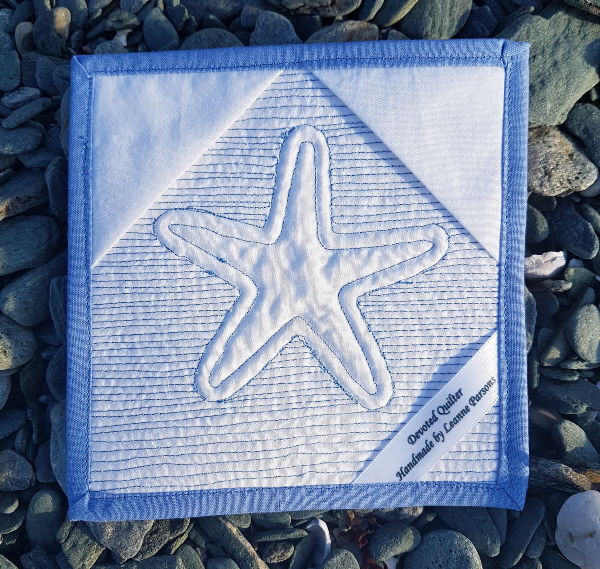
I followed a tutorial by Yvonne at Quilting Jetgirl to bind the mini mini and it worked like a charm. I added small hanging triangles and my label and I love how they frame the starfish on the back. It makes me wish I had added something to the fourth corner.
Starfish Dance quilt block | DevotedQuilter.com
The mini mini deserved a special picture, too, I thought.
Starfish Dance quilt block | DevotedQuilter.com
I told you there were a lot of pictures! 

Enter your email address here to download the Starfish Dance pattern. Doing so will also subscribe you to The Bulletin, which I hope you'll enjoy reading!

Here are links to all the blocks in the Quilt Block Mania Summer Series:
Camping Tent by Carolina Moore
Beach Umbrella by Jennifer Fulton
Flip Flops by Becca Fenstermaker
Summer Cocktail by Marian Pena
Beach Ball by Laura Piland
Popsicle by Sherry Shish
Curvy fish by Velda Roy
Angelfish by Lisa Amundson
Bucket and Shovel by Heidi Pridemore
Wonky Beach Umbrella by Jamie Siel
Starfish by Leanne Parsons
Sailboat at Sunset by Glenda Wilder
Yacht by Sue Griffiths
Food/Ice Cream Truck by Laura Strickland
Crab by Afton Warrick
Sleeping bag and star by Sarah Vanderburgh
Funky Flower by Kathryn LeBlanc
IceCream Cond by Sarah Marcina
Sunglasses by Celine Perkins
Sun by Charisma Horton
Hello Summer by Amarar Creacions
Tall Ships by Kris Driessen
Life Saver Preserver by Sandy Fitzpatrick
Dragon Fly by Julie Luoma
Up in The Air by Judit Hajdu
Surfboard by Susan Arnold
Beach Treasures by Linda Bratten
Two Scoops by Shari Butler
Free to Fly by Marcea Owen

Just because, here's one last shot of Starfish Dance 😊 I hope you get to enjoy some summer fun, too.

Starfish Dance quilt block | DevotedQuilter.com


July 02, 2020

TGIFF - Rock On!

Welcome to TGIFF! I almost accidentally missed my day to host and the start of my month to manage TGIFF...oops! It's so hard to keep track of the days of the week, let alone which month we're in, these days, I find. Nevertheless, here we are at the beginning of July and I have two finished quilt tops to share today 😊 

Before I get to those, though, I want to mention that there are a lot of weeks open for hosting TGIFF during the rest of the year. We'd love to have you sign up to host, which you can do here. Don't worry if you've never hosted before! Anja, Laura or I (whoever is managing the month your date falls in) will be more than happy to help you get it all figured out AND it's actually a very simple process. So go sign up, then come on back here.

Okay, so these two quilt tops are on their way to becoming teacher gifts for two guys who have put a lot of time and energy into encouraging the musical talents of the students at our school. Both have been a huge influence on Aiden and I decided a couple of years ago that when he graduated, they would get quilts. I had intended for them to be finished for the end of school, but since school ended suddenly back in March, that certainly didn't happen. The goal now is just to get them finished sometime over the summer.

Let me just say that I know I'm breaking every quilt blogger photography rule with these pictures. I completely forgot about needing them until today, when it is pouring down rain, so there's zero chance of getting good outdoor light. So, taped up in the family room it is. Better to have photographic proof that they're actually finished quilt tops, even if that proof isn't as pretty as it could be. At least that's what I'm telling myself. Trust me, they're nicer than they look here and there will be good pictures with proper lighting when they're finished quilts!
Rock Concert quilt top | DevotedQuilter.com
The pattern is Rock Concert, by On Williams Street. It requires 6 prints - one each in red, green, blue, yellow, orange and purple. I chose to go scrappy, but I stuck with those same colours. 
Rock Concert quilt top | DevotedQuilter.com
The guitar itself is paper pieced and on the templates it says what colour should go in each section, so I just followed instructions. If the A1 section said red, I used a red; if it said yellow, I used a yellow. Instead of just one of each colour, though, there's an abundance of different shades and prints for all six colours. It was a lot of fun raiding my scraps! The result is that the two guitars look very much alike, without being completely identical. Here they are, side-by-side, so you can see what I mean.
Rock Concert quilt top | DevotedQuilter.com
I love how vibrant and fun they both are!

Now I need to figure out how I'm going to quilt them. The background will be getting an all-over design of some sort, possibly music notes if I feel comfortable trying to quilt those after some sketching. I haven't decided, though, if the all-over design will continue over the guitars or if they'll get a different treatment. If they do get something different (and that's how I'm leaning right now), I have no idea what it should be. Suggestions would be most appreciated!

That's it for me, which means now it's your turn! Link up your finishes and go visit some of the other links to see what your fellow quilters have finished recently. And don't forget to sign up to host 😊

You are invited to the Inlinkz link party!

Click here to enter