March 29, 2024

My First Quilt with Sarah Goer

It's the last Friday of the month, which means it's time for another My First Quilt interview! Today Sarah Goer is sharing the story of her first quilt with us. Sarah is a quilter, artist, and teacher who helps quilters learn improv piecing skills.
My First Quilt with Sarah Goer | DevotedQuilter.com
You can connect with Sarah at her website, on Instagram, and on Facebook.

And now, here is Sarah's first quilt! Isn't it pretty? I may have laughed when I first saw it, though, because the colours are not at all what I would expect to see from Sarah (and you'll learn why below) 😄
My First Quilt with Sarah Goer | DevotedQuilter.com

What year did you make your first quilt? What prompted you to make it?


2002. Post-college we had two family friends who were avid quilters. I was drawn in to the geometry and color of quilting.

What techniques were used in that first quilt? Did you quilt it yourself?


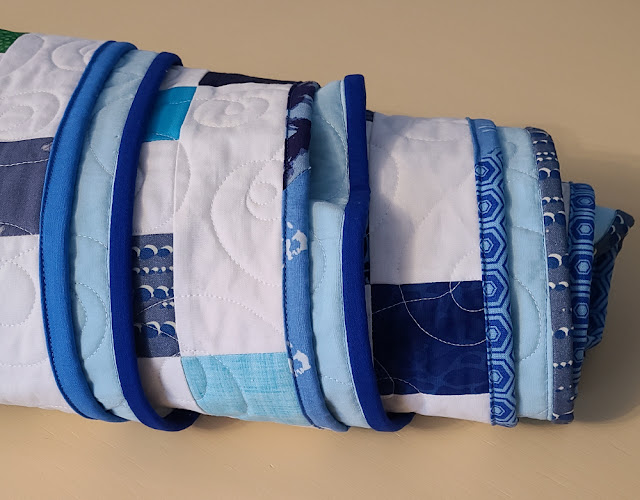
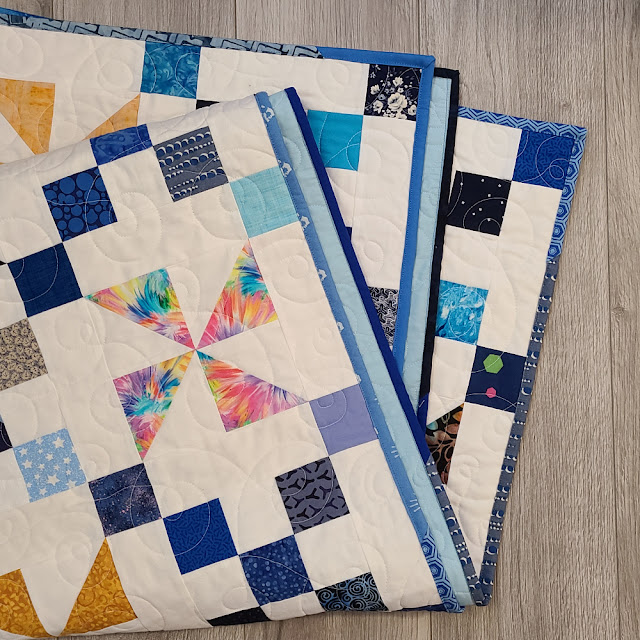
My first quilt had four 9-patch blocks set on point. I quilted it myself with stitch in the ditch straight line quilting. I'm pretty sure I didn't even have a walking foot yet then.
My First Quilt with Sarah Goer | DevotedQuilter.com

Who taught you to make the quilt?


I already knew how to sew and I borrowed books from a family friend quilter to learn how to make a quilt. The patterns I used for my first two quilts were out of the book Quilting for Dummies. For years I was convinced that the pattern was incorrect on my first quilt and that's why I lost all my points, but I eventually realized it was probably because my 1/4" seam allowance wasn't super accurate.
My First Quilt with Sarah Goer | DevotedQuilter.com

Are the colours you chose for your first quilt ones you would still choose today?


Oh no! I think I was using a lot of fabric that my mother had on hand, so my first couple quilts were much more her colors - dusty rose and country blue. My first project featured a large print floral background in those colors and I chose solid or near solids for the rest of the fabrics.
My First Quilt with Sarah Goer | DevotedQuilter.com

Did you fall in love with quilting right away? Or was there a gap between making the first quilt and the next one?


Right away. I started my second quilt before I finished the first one. That began a long chain of having multiple projects in the works at once.

Where is the quilt now?


I gave my first quilt to my mother. It is a small table topper that matched her aesthetic. That quilt is back in my possession now. In a closet. Because it really does not match my aesthetic.


Is there anything you wish you could go back and tell yourself as you made that first quilt?


I guess since I was striving for precision, I could give my past self some tips on that front. And I had no idea at the time that quilting would be a lifelong passion and eventually a business for me.


Anything else you want to share about your first quilt?


It was the first quilt I started, but the second quilt I finished. I've included a picture of my "second" quilt as well since it was officially the first quilt I finished.
My First Quilt with Sarah Goer | DevotedQuilter.com

Thanks for sharing your first quilts with us, Sarah! I loved seeing how you got started quilting ❤

March 25, 2024

What Is Our Default?

Devotion for the week...

One day last week, I read 1 John 3:17, which says, "If someone has enough money to live well and sees a brother or sister in need but shows no compassion—how can God’s love be in that person?" There's so much to think about in that one sentence!

John creates a kind of hypothetical person for us to imagine. John doesn't say this person is wealthy, but that they have enough money to live well. I take that to mean a person who isn't just barely scraping by; it's someone who can pay the bills and put food on the table. They may not have enough to go on fancy vacations, or be always shopping for new clothes, but they have the resources to meet their needs. By that definition, most of us likely have enough money to live well. Is that how we feel about our financial situation?

Then this person sees a brother or sister in need but shows no compassion. There might be a lot of reasons why one person might not reach out to help another. Maybe they don't feel like they have enough to be able to share (entirely possible if they're only just paying their own bills), maybe they don't feel the other person is deserving (why aren't they working?), or maybe they're focused on trying to reach some goal of their own and giving to someone else would set them back (saving for a big purchase, for example). Whatever the reason, John's hypothetical person sees the need, but chooses not to help meet that need.

If you're like me, you've seen needs you didn't try to meet because of those reasons I mentioned and more. Sometimes we end up feeling like we can't possibly meet all the needs around us, so we block them out. 

Then John asks a question - how can God's love be in that person? Ouch! That really packs a punch, doesn't it?

John follows his question with an exhortation: "Dear children, let’s not merely say that we love each other; let us show the truth by our actions" (v. 18).
Is our default position one of reaching out to help others | DevotedQuilter.com
I don't think John was saying that not meeting every need around us means that God's love isn't in us. I think he was trying to prompt us to think about how we live, and how we see the needs of others. Is our default position one of reaching out to help others, or one of hoarding and saving for ourselves? And if we don't reach out to help by default, how could we change that, to make our actions reflect the love of God?

March 21, 2024

TGIFF - Pattern Cover Redesign

Welcome to this week's TGIFF party! Today I have a different finish to share, one that involved time at my computer rather than my sewing machine, but it is quilt related.

In November 2018, I released Love Birds and Churn as my first printed patterns. At the time, I really liked how the covers looked, but over the past year or two, I've been wanting to redesign them. Unfortunately, I wasn't sure how I wanted them to look. I also knew I wanted to update my logo first, so I could add the logo to the cover, but I wasn't sure how I wanted that to look either. That meant that for a long time, nothing got done.

Then last month I finally updated my logo, so it was time to tackle the pattern covers! For reference, here's how my patterns look now.
Scrappy Playground quilt pattern cover | DevotedQuilter.com
And here's how they'll look going forward. I love that it looks more sleek and modern than my existing covers do.
Illusion quilt pattern cover | DevotedQuilter.com
I create my patterns in Microsoft Publisher, and one day last week I noticed there's a place to click to open up a menu of "page parts." When I clicked on it, I found all kinds of already created things that could be added to a document, including the header I ended up using for the pattern title. I had to tweak it a little, removing some parts I didn't need, but I love the blocks of colour, which I can change to match each cover quilt. Finding that menu of 'page parts' gave me exactly the starting point I needed to get moving. 

I'm working now on getting my three most recent patterns ready to send to the printer (Illusion, Merry Mini, and Hot and Cold). Those three quilts feature very different colour palettes, so I'm looking forward to seeing them all printed together. Case in point, here's how the redesigned cover looks for Hot and Cold. I love how they're the same, but different.
Hot and Cold quilt pattern cover | DevotedQuilter.com
By the way, these patterns are all available in my shop along with a whole lot more 😉

Once these three are sent to the printer, I need to work on updating the existing pattern covers, too. This kind of feels like an "If you give a mouse a cookie" moment...If you update your logo, it'll be time to update your pattern covers. And if you update your pattern covers, you'll need to print new covers for your existing patterns. With 30 patterns already available in print, it'll take a little while to get them all switched over.

In the meantime, I'm celebrating having the cover redesign finalized. What finish are you celebrating this week? Link it up below, then visit some of the other links to celebrate their finishes, too.

You are invited to the Inlinkz link party!

Click here to enter

March 19, 2024

How To Make A Daisy Chain Banner

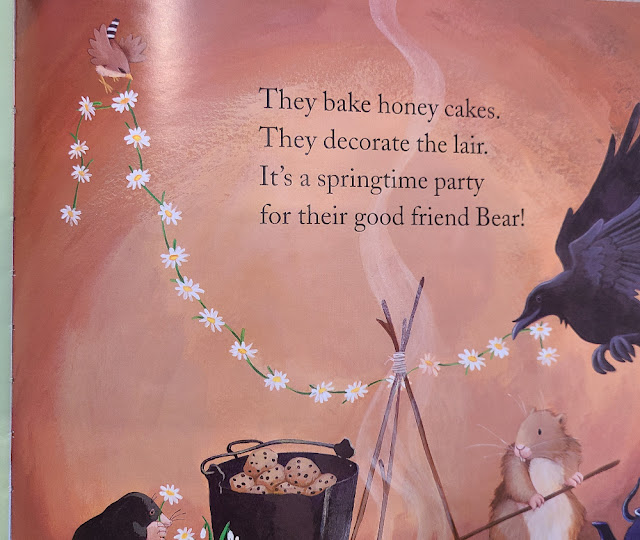
I take the childcare littles to the library every week or two, and a few weeks ago the 3 year old picked out Bear Wants More, by Karma Wilson. It's a cute little book, with adorable illustrations by Jane Chapman. In a few of the illustrations, there's a daisy chain strung along the wall of Bear's den that I kept staring at.
Illustration from Bear Wants More, by Karma Wilson and Jane Chapman
A couple of times I found myself opening the book just to look at the daisy chain again, and thinking about how I could make one for myself. Then, while making the Hope block for the Moments with Jesus QAL, I realized that one of the applique flower templates would work for a daisy chain, too.

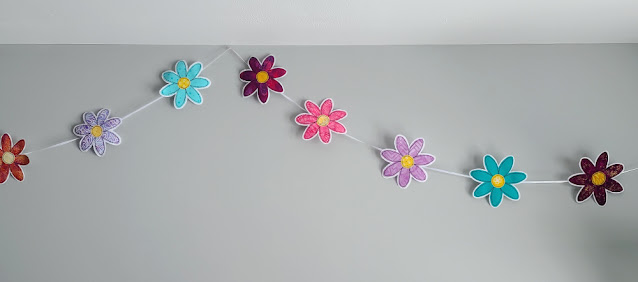
I made a test flower, which I loved so much I immediately dove in to making enough flowers to string up in the sewing room. Now this colourful daisy chain makes me ridiculously happy every time I set foot in the sewing room, or even just glance in from the hallway.
Daisy Chain banner tutorial | DevotedQuilter.com
Taking pictures of the whole side of a room is hard! How do home décor bloggers make their pictures look so nice?
Daisy Chain banner tutorial | DevotedQuilter.com

Daisy Chain banner tutorial | DevotedQuilter.com
As I made my daisy chain banner, I took pictures of my process so I could share a tutorial with you. While I adore mine in my sewing room, I picture it in little girl bedrooms or playrooms, too.

What you'll need


  • A flower template. Enter your email address below to get the link to download mine or draw your own.

  • Scraps of fabric in your chosen colours for the flowers. I used pink, purple, and teal. For my template, the scraps need to be about 4 1/2" square.
  • Scraps for the flower centers. I used yellows for mine, and for my template, these scraps need to be about 1" square
  • White fabric
  • Fusible adhesive like Heat N Bond (what I used) or Lite Steam A Seam 2
  • Thread to match your fabrics or to contrast with them. I chose black so the stitching would stand out on all the fabrics.
  • Ribbon - mine is 1/8" wide
  • Glue - I used a glue stick

Make your flowers


How many flowers you'll need will depend on how long you want the chain to be and how closely you position your flowers. I used 31 flowers to cover about 17' of wall, but I used more than 17' of ribbon to allow for the draping. I didn't think to measure how long the ribbon actually was before putting it up on the wall.

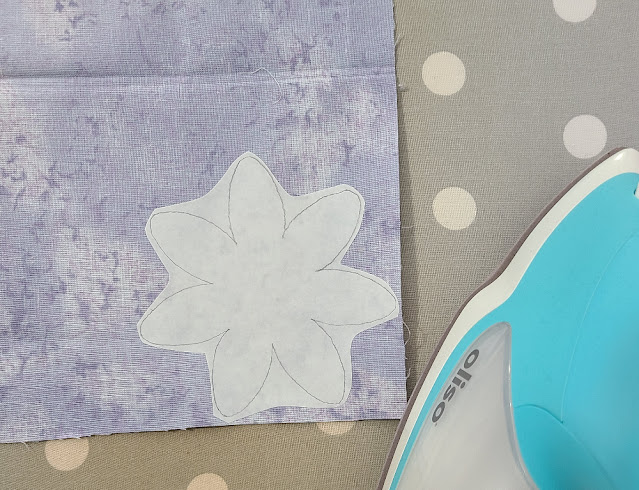
Trace your flowers and flower centers onto the paper side of your fusible adhesive, nesting them close together. Cut them out roughly.
Daisy Chain banner tutorial | DevotedQuilter.com
Following the manufacturer's instructions, fuse the flowers and flower centers to the back of your chosen fabrics.
Daisy Chain banner tutorial | DevotedQuilter.com
Here my new sewing room mascot is showing why I keep scraps as small as 1" square. Sometimes they're the perfect size for a flower center! Side note, this guy is still in need of a name...any suggestions?
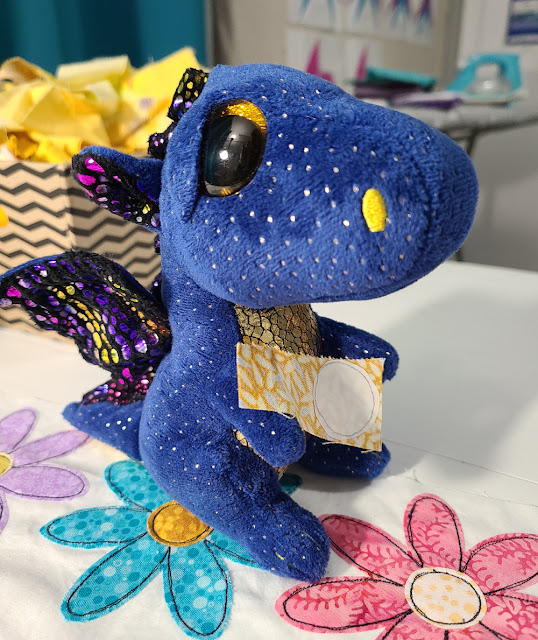
Sewing room mascot | DevotedQuilter.com
He's a blue, sparkly dragon! How could I resist?
 Cut out the flowers and flower centers directly on the lines.
Daisy Chain banner tutorial | DevotedQuilter.com
Position the flowers with the adhesive side down on the white fabric. I nested them pretty closely to conserve fabric, while leaving a little bit of space around each one so I could cut them out with margin of white. Position the flower centers in the center of each flower. Again following the manufacturer's instructions, fuse the flowers to the white fabric.
Daisy Chain banner tutorial | DevotedQuilter.com
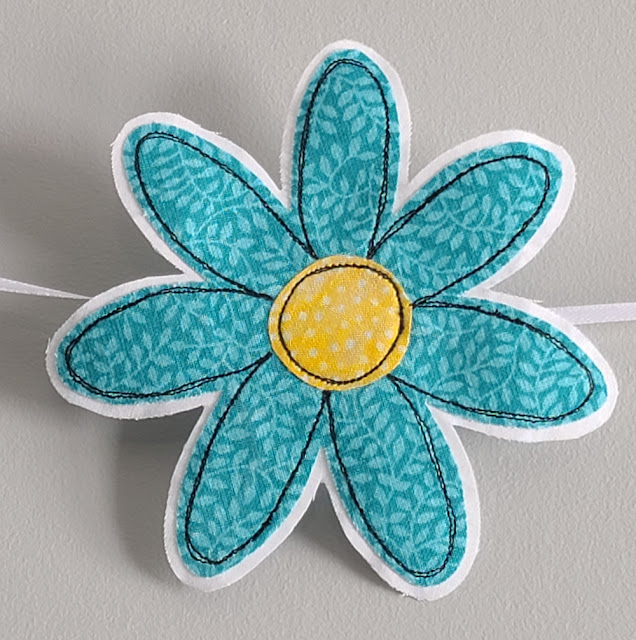
Stitch around the flowers and flower centers, just inside the edge. Do this before you cut the flowers apart, to make it easier to handle them. I used my free motion foot so I wouldn't have to turn the appliques as I stitched, but you can use a straight stitch if you prefer. If you're using a straight stitch, I recommend reducing the stitch length a bit, stitching slowly, and stopping often with the needle down to turn the flowers slightly to get smooth curves.
Daisy Chain banner tutorial | DevotedQuilter.com
I stitched around each flower and flower center twice, purposely not trying to travel over the first stitched line perfectly as I went around the second time. I find when I only stitch around once all the wobbles are super noticeable, especially when I'm using such a high contrast thread colour. Stitching around a second time adds more wobbles, which somehow makes it all look intentional and gives it a charming sketched quality.
Daisy Chain banner tutorial | DevotedQuilter.com

Daisy Chain banner tutorial | DevotedQuilter.com
I'm always amazed how different applique looks before and after stitching!
Daisy Chain banner tutorial | DevotedQuilter.com
After you've stitched around all the flowers, cut them apart, leaving about 1/8" of white fabric all the way around. I love how they look a bit like stickers!
Daisy Chain banner tutorial | DevotedQuilter.com
After I made a bunch of flowers, I laid them out on the floor in a rough approximation of how I wanted them to look on the wall, so I could see how many more I needed to make. That also allowed me to get a feel for the balance of colours, and made me even more excited to get it finished and up on the wall.

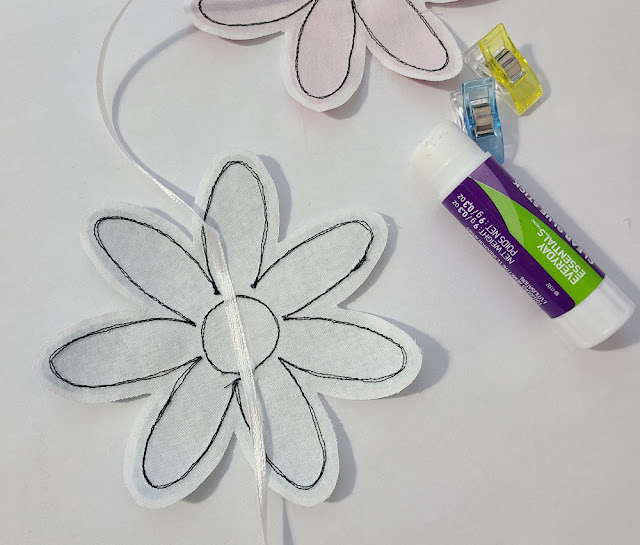
Once all my flowers were finished, I clipped them to the ribbon and then taped the ribbon to the wall to check the fit.
Daisy Chain banner tutorial | DevotedQuilter.com
Once I was happy with the positions, I glued the ribbon to the backs of the flowers. I only glued approximately the width of the flower center, not all the way across the flower.
Daisy Chain banner tutorial | DevotedQuilter.com
I wasn't sure a glue stick would be strong enough, but it was all I had and I was too impatient to wait until I could buy something different. After the first couple dried, I did shake them a little to be sure they would hold through the manipulation required to get them on the wall. They've been up for a few days now, and none of the flowers have fallen, so I guess they're good. I also don't expect them to be handled much (if at all) now that they're in place.
Daisy Chain banner tutorial | DevotedQuilter.com
I had my husband help me put them on the wall. Before we started, I stacked all the flowers neatly so they were easier to handle. I stood on the floor holding the stack of flowers while he stood on a stool to reach near the ceiling, and I stayed close to him so there were only a few flowers dangling at any given time. That way they weren't getting caught on anything or tangled around each other.

He used a thumbtack to poke a hole in the drywall, then used a short sewing pin to hold the ribbon. I could have just used the thumbtacks to hold it up, but I didn't have white ones and they're quite a bit larger than the heads of the pins we used, so the pins are less noticeable. 

And that's it! Once the daisy chain is up on the wall, you may find yourself tempted to stand and grin at it, or at least that's what I did! 
Daisy Chain banner tutorial | DevotedQuilter.com


Linking up with Quilting Jetgirl's Favorite Finish

March 18, 2024

God's Varied Grace

Devotion for the week...

Mostly when we talk about grace, we do so in terms of forgiveness, but the Bible also uses the word grace when talking about the gifts God has given us. It’s so easy to focus on the gifts other people have, while feeling like we don’t have any special gifts at all. The Bible is clear that isn’t the case, though. Peter wrote, "As each has received a gift, use it to serve one another, as good stewards of God’s varied grace" (1 Peter 4:10). 
 
We learn two things from this one verse. First, we all have some gift or talent. Notice that Peter wrote, 'as each has received a gift' and not 'those select few who have received a gift'. That’s because God didn’t leave any of us out, even if sometimes we feel otherwise. What are you good at? It may not be a thing that gets much attention, but that doesn’t mean it’s not valuable. Sometimes we don’t recognize our gifts because they come to us so easily that we just think everyone can do what we do. That is definitely not true!
 
Second, we are to use the gifts we have to serve one another. They were never meant for us alone, but were given to us to serve a purpose in this world. Some of us will serve a few people in our immediate circle of influence. Some will serve hundreds, and some will serve even more. How many people we reach with our gift isn’t a reflection of the value of the gift (or the person!), but only of the purpose God had for it.
We are to use the gifts we have to serve one another | DevotedQuilter.com
I love that Peter refers to it as us being good stewards of God’s grace. Stewards don’t own the thing they’re stewarding. They’re like the caretaker of it, doing the best they can with it for the one who does own it. In our case, we have God’s grace given to us in the form of a skill or talent we can use to benefit others. We are to do the best we can with our gift, in service to others, for the glory of the One who gave it to us.

March 14, 2024

Pinwheel Irish Chain (Take Two)

Back in 2019 I made my Pinwheel Irish Chain quilt top for an Island Batik ambassador challenge. Then, as part of Sarah's Hands 2 Help Comfort Quilt Challenge, I donated the top to Victoria's Quilts Canada, a group that accepts only quilt tops, then finishes them to give to people going through cancer treatments. 

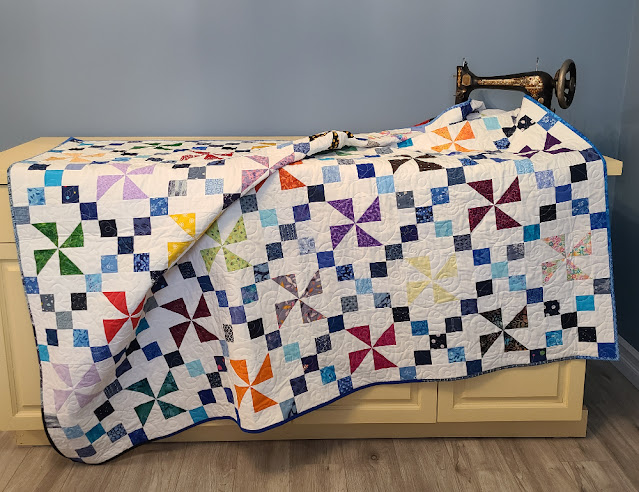
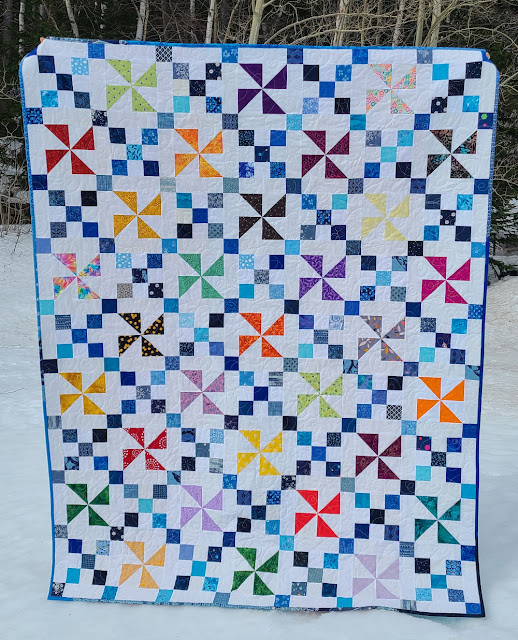
Since then, every few months I get a request from someone looking for the pattern, but I hadn't written the pattern. And since I had donated the top, I also didn't have pictures of a finished quilt to use for the cover of a pattern. I knew I'd have to remake the quilt someday, and now I'm happy to say that day has finally arrived! Here is my Pinwheel Irish Chain (take two).
Pinwheel Irish Chain quilt | DevotedQuilter.com
The weather hasn't been great for outdoor pictures, but Nathan and I did manage to get out to the backyard one afternoon.
Pinwheel Irish Chain quilt | DevotedQuilter.com
Not only did I remake the quilt, I also finished the pattern, and Pinwheel Irish Chain is the Stash Artists pattern for March. If you're not a Stash Artists member yet, we'd love to have you join us when the doors open again in a few months. You can get on the waitlist here so you'll be notified when the doors are open. Stash Artists is for quilters who love stash-friendly patterns like this one.

I cut the the squares for the Irish Chain blocks using child labour, aka the childcare littles. They love to use my Accuquilt Go!, so they think it's great fun when I suggest we do some fabric cutting. I kept a ziptop bag for the blue squares and they helped me cut them from my scraps over a few cutting sessions. We were able to cut all the white squares for the chain blocks from my scraps, too. I have no idea how many different solid whites made their way into the quilt, but I know there are a few. 
Pinwheel Irish Chain quilt | DevotedQuilter.com
One of my favourite things about scrap quilts is remembering where all the fabrics came from or where I've used them before. Some of the blues in this picture are from my time as an Island Batik ambassador, some are from quilts I made for Riley Blake blog hops, and the light blue with leafy shapes was donated when I sent out a call for quilt blocks after the senior's home across the road burned down back in 2017. That blue backed at least one of the many quilts made with the donated blocks, and I kept the strips trimmed off the sides after the quilting was done. There are fun fabric memories scattered all over this quilt!
Pinwheel Irish Chain quilt | DevotedQuilter.com
With the Irish Chain done in blues, I used every colour except blue for the pinwheels. I love the bright, fun prints.
Pinwheel Irish Chain quilt | DevotedQuilter.com
I started a new cone of Aurifil 2024 (white) for the quilting, and chose my go-to double loop design. It just seems to suit pinwheels so well. If you use thread cones, do you keep track of when you first use them? It's absolutely useless information, but I love knowing how long I've been using the same cone. I write the date on a piece of tape and stick it to the inside of the plastic cone.
Aurifil thread cone start | DevotedQuilter.com
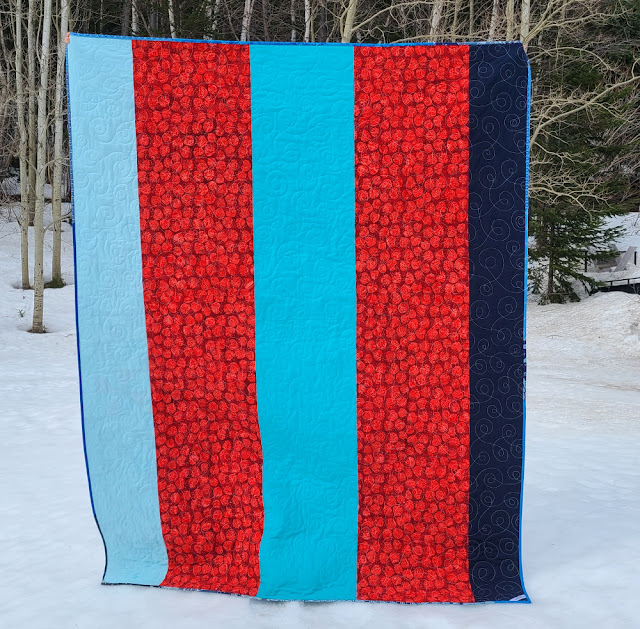
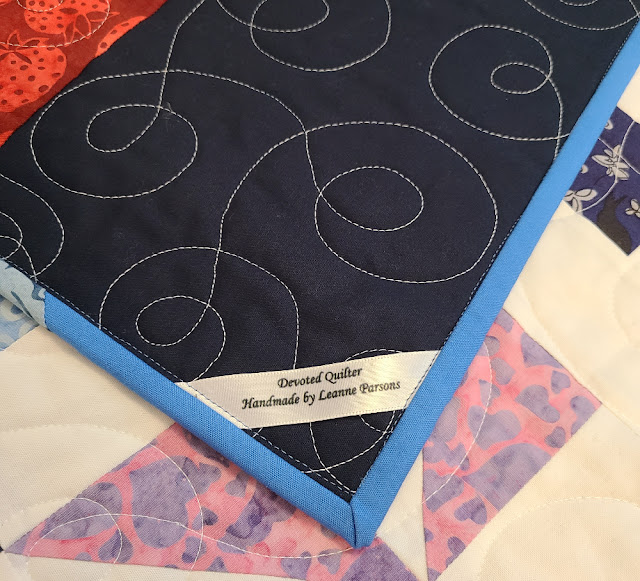
I usually try to avoid piecing backs, but I decided to put in the extra time on this one. I used three different blue solids, plus a fun strawberry fabric from Island Batik. 
Pieced quilt back | DevotedQuilter.com
And, of course, there's a label on one corner.
Devoted Quilter quilt label | DevotedQuilter.com
When it came time for the binding, I knew I wanted a scrappy binding, but couldn't decide if it should use all the colours or only blues. I put the question out on social media, where the responses were split pretty evenly, with a few people suggesting either a stripe or a single colour. One person asked if I wanted the binding to draw the eye (in which case use all the colours) or blend in with the Irish Chain (in which case use just blues). I found that so helpful! I decided I didn't want the binding to draw the eye, so I went with the blues, and I'm very happy with the result.
Scrappy blue quilt binding | DevotedQuilter.com
Now when people ask if there's a pattern for the Pinwheel Irish Chain, I can finally say yes (and invite them to become a Stash Artists member when the doors are open 😉).
Pinwheel Irish Chain quilt | DevotedQuilter.com

March 12, 2024

Paper Piecing with Freezer Paper Workshop

Do you love the precision of paper piecing, but hate ripping out the papers when you're finished? I hear ya! That was me, until I started using freezer paper.
Burst quilt blocks | DevotedQuilter.com

The freezer paper method is like magic! 
  • My favourite advantage is that you can simply peel the freezer paper off the back of the block when you finish it. A second or two and it's done, instead of tediously removing each little piece of paper. I'll never go back to using regular paper for this reason alone.
  • You can reuse the templates (saving so much paper and ink if you're making repeats of the same blocks). I've used templates up to 16 times before, and even then, they were still good to use, I just didn't need more blocks.
If you'd like to learn this magic, too, join me for a Paper Piecing with Freezer Paper workshop on March 23rd. In the 2 hour virtual workshop, we'll use my Burst pattern (included in your registration) to learn how freezer paper lets you keep the precision of paper piecing, but without the hassle of removing the bits of paper at the end.
Paper Piecing with Freezer Paper workshop | DevotedQuilter.com
The workshop is suitable for paper piecing pros who want to ditch the hassle of removing the papers AND for paper piecing newbies. I love hearing the gasps from everyone when they see how simple the process is, whether they've tried paper piecing before or not!

Learn more and register here


I hope to see you in the workshop!

March 11, 2024

No Record of Wrongs

Devotion for the week...

When you’ve done wrong in the past, have you ever been blindsided by the person you hurt bringing it up again, long after you thought you were forgiven? It doesn’t feel good. Even worse, after that happens it’s hard to not worry it will be used against you again in the future, so you feel like you always have that hanging over your head.
 
God doesn’t do that to us. He doesn’t hold anything against us after we have been forgiven. He doesn’t keep a record of our wrongs so He can remind us of how we hurt Him before and He doesn’t use those past wrongs to make us feel bad about ourselves today. We know this because Paul wrote, “So now there is no condemnation for those who belong to Christ Jesus” (Romans 8:1). 
 
God could heap condemnation on our heads for all the wrong we’ve done, but He chooses not to. He could remind us of our sins, but He chooses not to. He could make us feel guilty every day, but He chooses not to. Instead, He tells us that, once we belong to Jesus, He doesn’t condemn us at all.  
Instead of condemnation, God offers us grace; freely given and without limit | DevotedQuilter.com
Instead of condemnation, He offers us grace. Freely given and without limit, He gives us grace to cover all the wrong we have done and will ever do, with no chance of those wrongs being thrown in our faces at some point in the future. How amazing is that?

March 04, 2024

A Day's Wage

Devotion for the week...

I worked at Tim Horton’s (a Canadian coffee and donut chain) for a few summers in university and our hours worked were, of course, carefully tracked. While I loved the evenings we weren’t busy and I got sent home early, I didn’t love that my next pay would be smaller because of it. Not that it ever motivated me to say I wouldn’t leave early, though!
 
Jesus told a parable about a man who owned a vineyard. He went out early one morning and hired some people to work for the day. "He agreed to pay the normal daily wage and sent them out to work" (Matthew 20:2). Later, he went out again and hired some more people, "telling them he would pay them whatever was right at the end of the day" (v. 4). Then he went out two more times and hired people for the day. Finally, an hour before quitting time, he hired a few more people. 
 
When the work was done for the day, the workers went to the foreman for their pay, starting with those who had been hired last. They were given a full day’s wage, which made those who had been hired first think they would be paid more. When they weren’t, they got angry and "protested to the owner, 'Those people worked only one hour, and yet you’ve paid them just as much as you paid us who worked all day in the scorching heat.'" (vv. 11-12).
 
I’ve always found the owner’s answer interesting: "I haven’t been unfair! Didn’t you agree to work all day for the usual wage? Take your money and go. I wanted to pay this last worker the same as you. Is it against the law for me to do what I want with my money? Should you be jealous because I am kind to others?" (vv. 13-15).
 
Since this is a parable, it’s not about money at all, but rather about the kingdom of God. Someone who serves God only briefly before their death doesn’t get less salvation than a person who served Him for decades (remember the thief on the cross next to Jesus?). This makes perfect sense, since it’s not our work that earns our salvation, but His generosity that bestows it upon us.
 
The question is, though, are we jealous of people who will receive the same salvation we received? What about if they serve God only for a short while? Or what about if they were horrible people, who did horrible things? How do we feel about them receiving the same salvation? 
Because of His mercy and love for us, God gives us all the same salvation | DevotedQuilter.com
Because of His mercy and love for us, God gives us all the same salvation, regardless of how long we serve Him or what we did before accepting Jesus as Savior. We have to be careful not to feel we deserve more if we have served Him longer.

March 02, 2024

Hot and Cold Pattern Release, Plus an Anniversary Sale

It's a big day here at Devoted Quilter headquarters - it's a pattern release day and it's my 11 year blogging anniversary!
I decided this was a good time for a logo update. I created my first logo by myself in 2019, using Canva. I didn't know what I was doing, and it showed. This time I used Looka, an AI driven logo design website, where the AI knows what it's doing so I don't have to. I'm so happy with the new look!

A lot sure has changed since I published that first post in 2013. Back then I knew almost nothing about working on the computer beyond basic word processing; Paul had to teach me how to transfer pictures from the camera to the computer, and I had no idea how to edit or resize the pictures! While I'm still no computer expert, I have learned to do so much because of the blog and pattern writing.

The biggest change, though, is this incredible online quilting community I connected with through the blog and then Instagram. I love you, my quilty friends! I love seeing the things you're making, discussing fabric choices or quilting designs, and learning tips from you. You are a constant source of inspiration and one of the reasons my to-make list never seems to get any smaller. I enjoy my quilting so much more because I get to share it with you.

To celebrate 11 years of blogging, my annual Anniversary Pattern Sale is on now through Friday, March 8th. Visit my pattern shop to save 25% off all patterns, no coupon code needed.

I'm also celebrating the release of my Hot and Cold pattern today. Hot and Cold was originally published in Make Modern magazine back in 2022, and I finally have it ready for release in my own shop. And yes, it's included in the Anniversary Sale!
Hot and Cold quilt pattern | DevotedQuilter.com
Hot and Cold makes a 60" x 72" throw size quilt (my favourite size!) using the classic pineapple block in a modern setting.
Hot and Cold quilt pattern | DevotedQuilter.com
The pineapple blocks are paper pieced, and the pattern includes what size to cut each piece of fabric, so there's no guessing whether the piece you've cut will fit or not. This is an advanced beginner pattern, and assumes knowledge of how to paper piece.

Hot and Cold has lots of negative space, which lets those pineapple blocks shine, and provides a canvas for some fun quilting. I quilted swirls in the negative space for fabulous texture, and to add curves to all the straight piecing lines.
Hot and Cold quilt pattern | DevotedQuilter.com
For now Hot and Cold is only available as a PDF pattern. I'm thinking about redesigning the look of my print patterns, so I'm holding off on printing new patterns until that's done. The logo redesign was kind of a 'if you give a mouse a cookie' thing, as that has prompted the pattern redesign. Trying to figure out how I want them to look is the hardest part!

Don't forget to shop the pattern sale now through March 8th 😊

Thank you for being part of my quilting, blogging, and designing journey! I'm looking forward to seeing what we make and learn next!

March 01, 2024

Split 4 Patch in Romance Garden Fabrics

Welcome to my stop for the Romance Garden blog hop, hosted by Sherry Shish of Powered By Quilting! Romance Garden is Sherry's signature fabric line with Island Batik. It has butterflies and dragonflies and gorgeous colours, oh my!
Split 4 Patch baby quilt in Romance Garden fabrics | DevotedQuilter.com
I decided to make a Split 4 Patch baby quilt, using the free tutorial I wrote last year. It's almost as simple as making a regular 4 patch block, but the angles make it look so much more interesting. As a bonus, the tutorial uses 10" squares, so it's perfect if you're looking for a project for a layer cake.
Split 4 Patch baby quilt in Romance Garden fabrics | DevotedQuilter.com
Here's the full baby quilt top. These colours were such a joy to work with when our outside world is still snow, snow, and more snow.
Split 4 Patch baby quilt in Romance Garden fabrics | DevotedQuilter.com
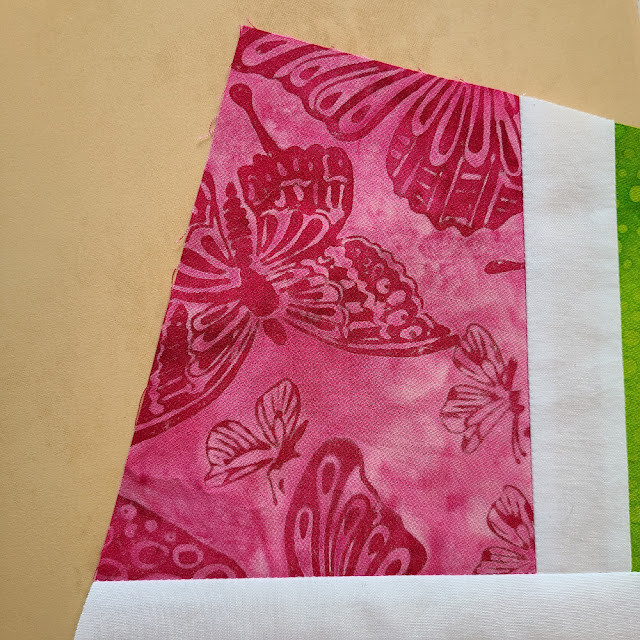
I think this pink with butterflies is my favourite fabric in the line.
Split 4 Patch baby quilt in Romance Garden fabrics | DevotedQuilter.com
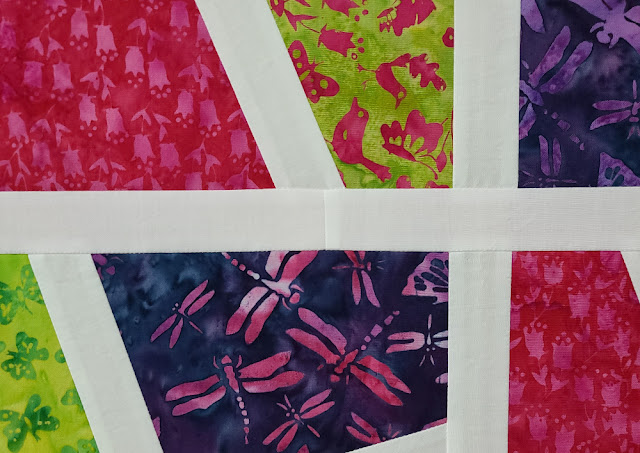
Those same butterflies look good in purple, too, though.
Split 4 Patch baby quilt in Romance Garden fabrics | DevotedQuilter.com
And the dragonflies are fun!
Split 4 Patch baby quilt in Romance Garden fabrics | DevotedQuilter.com
I made a slight mistake when cutting for the first inset strip in the first set of blocks, lining up the ruler 2 1/2" from the corner on one side instead of 3 1/2". Rather than recut the squares for those blocks, I cut a second set the same way (the blocks are made in groups of 4), and the other two sets are cut at the 3 1/2" line. Then when I made the cut for the second inset strip, I cut them all at the 3 1/2" line as the tutorial says. The difference is pretty subtle, but you can see it if you look at the shape of the bottom right fabric of these two blocks.
Split 4 Patch baby quilt in Romance Garden fabrics | DevotedQuilter.com
I had three of the four rows assembled when I went to my friend Michelle's house to sew on Monday evening. When I packed everything up to go, I grabbed the strips for the sashing between rows off my cutting table, or at least I thought I did. When it came time to sew the rows together to finish the top, I discovered I had actually grabbed the pieces leftover after cutting the shorter sashing strips. There was enough length there, it would just mean having a seam in each of the long sashing strips. I debated for a moment (piece the strips and go home with a finished top, or no seam in the sashing, but not have a finished top that night) and decided to piece the strips. It's a baby quilt, after all, and will never be entered into a show where it might matter. In the end, the seams are barely noticeable.
Split 4 Patch baby quilt in Romance Garden fabrics | DevotedQuilter.com
I guess the moral of this story (quilt) is that sometimes it works to just roll with the mistakes!
Split 4 Patch baby quilt in Romance Garden fabrics | DevotedQuilter.com
I'm thinking I'll quilt either a flower meander (like on this Formal Garden quilt) or a curvy flower (like on my Tilted Flowers quilt), using Aurifil 1231. While I wouldn't normally call myself a fan of lime-y greens, I do love this one they call Spring Green, and it fits these fabrics perfectly.
Split 4 Patch baby quilt in Romance Garden fabrics | DevotedQuilter.com
Now the only question is, will this baby quilt be quilted before this year's WIPS-B-GONE challenge starts in October? 😅 I guess we'll have to wait and see!

Lots of quilty friends are sharing projects made with Romance Garden over the next couple of weeks. Here's the full schedule so you can hop around and see them all.

March 1: Sherry Shish at Powered By Quilting
March 1: Leanne Parsons at Devoted Quilter (you are here!)
March 2: Kate Starcher at Katie Mae Quilts
March 3: Jen Strauser at Dizzy Quilter
March 4: Elizabeth DeCroos at Epida Studio
March 5: Sally Willams and Sally Jewell at Sallys' Sewing Circle
March 6: Brianna Roberts at Sew Cute and Quirky
March 7: Jennifer Fulton at Inquiring Quilter
March 8: Anja Clyke at Anja Quilts
March 9: Tammy Silvers at Tamarinis
March 10: Kathryn LeBlanc at Dragonfly's Quilting Design Studio
March 11: Sarah Vanderburgh at Sew Joy Creations
March 12: Sherry Shish at Powered By Quilting