Welcome to my stop on the Chickadee blog hop! Today designers are sharing fun projects created with 10" squares of Chickadee, Heidi Pridemore's signature line with Island Batik. I was in the mood for a quick baby quilt, so I made the Split 4 Patch Block and I've written a tutorial for how to make the quilt.
Before I get into the tutorial, though, would you like to prepare to celebrate Easter by growing in wisdom while making a beautiful quilt? The Women of Wisdom QAL and devotional journey is a quilt along, plus 40 days of devotions delivered to your inbox, all focused on the wisdom of biblical women. While we learn from their stories, we'll also be making our quilts together 😊 The fun all starts on February 22!
Learn more and register here
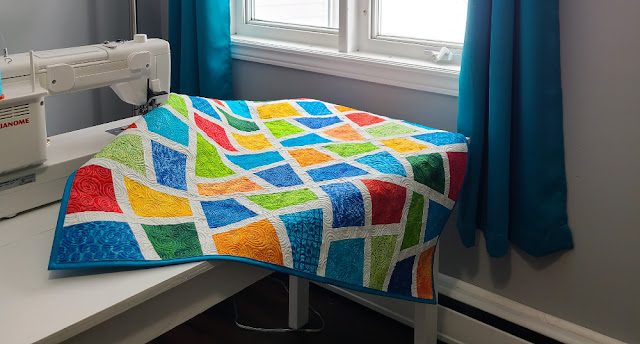
Now on to today's quilt! Here's the full Split 4 Patch baby quilt. I loved working with these bright colours! Actually, Nathan and Paul both commented how much they liked the colours, too, so I guess we were all in the mood for bright and cheerful.
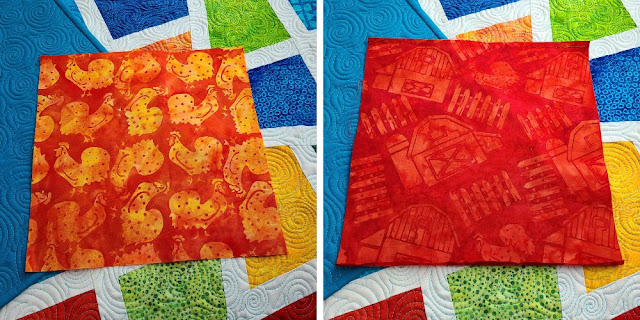
The Chickadee line also has some fun chicken and barn prints, but I didn't use them in this quilt where they'd have been cut too small to really be appreciated. I didn't want any beheaded chickens in my baby quilt! I'm sure I'll find the perfect project for them someday.
I was going to use the chicken and barn squares in a pieced back, until I realized I could just barely squeeze the whole quilt onto a piece of yardage, without needing to piece the back at all. If I can get away with a single piece for the back, that's what I'm going to do! This blue from my stash was the perfect choice, so much so that I used it for the binding, too. And the texture from the quilting is so good you just want to run your hands over it. Don't worry, I have many times already!
With the spirals in some of the fabrics, it was easy to choose the quilting design. Swirl hooks are one of my favourite designs to quilt, which I know I say a lot. I guess I have a lot of favourite designs to quilt! I auditioned a few different Aurifil colours, but 5005 was the best one over all of the fabrics.
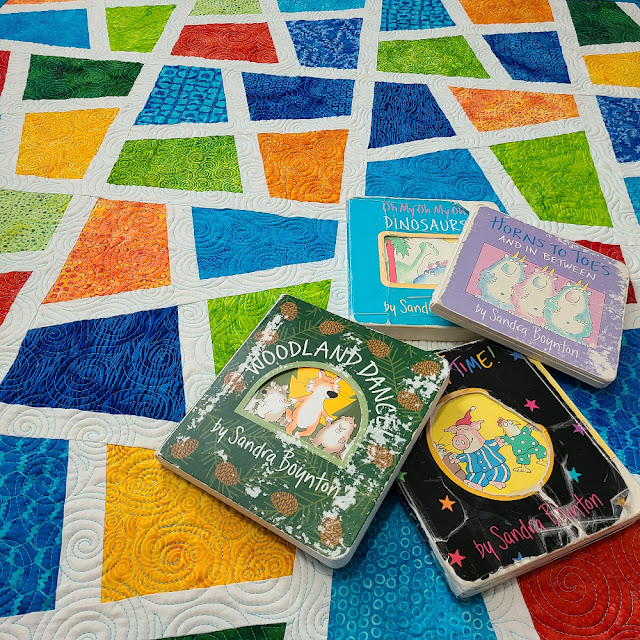
I love the thought of some little one curling up with their board books and this quilt!Want to make a Split 4 Patch baby quilt of your own? Let's go!Fabric requirements and cutting
I made 16 blocks for my baby quilt, which finishes at 41" square with the sashing. You can make fewer or more blocks for your quilt, but it will always be a multiple of 4, because of the way the blocks are constructed.
To make a baby quilt like mine, you need:
Bright colours
- 16 10" squares
White - ¾ yard. Cut into:
- 15 1 ½" x WOF strips
- Subcut into
- 16 1 ½" x 11" rectangles
- 16 1 ½" x 11½" rectangles
- 12 1 ½" x 10" rectangles*
- 3 1 ½" x 41" (pieced together, if necessary)*
* Wait to cut these until after your blocks are finished and trimmed, in case your blocks turn out smaller than mine.
Make the blocks
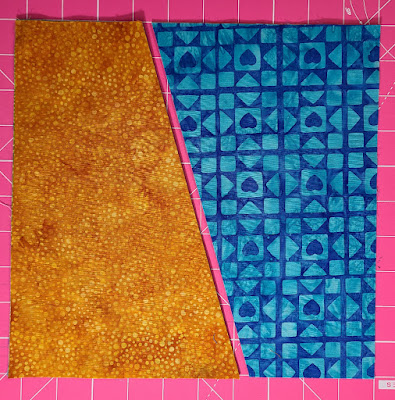
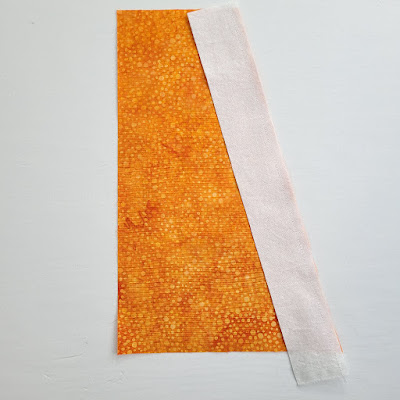
Stack 4 squares neatly on top of each other on your cutting mat, lined up with the lines of the mat. Position your ruler on the diagonal, approximately 3 ½" from the left corner at the top and 6 ½" from the left corner at the bottom. Cut through all 4 squares.
Without otherwise changing the order of the pieces, take the top piece on the left and place it at the bottom of the stack. Be careful throughout the assembly of the blocks to keep them in the same order. This will allow you to make 4 blocks with no fabric appearing twice in a single block.
Stitch a white 1 ½" x 11" rectangle to the top piece in the stack on the left. The sashing piece is slightly longer so you should have a little bit of sashing sticking out past each edge. We're going to trim the blocks at the end, so the edges don't need to be neat now. Repeat with the remaining pieces in the stack. Press the seams either open or towards the sashing piece.
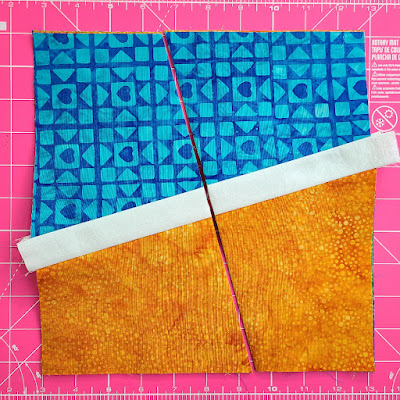
Stitch the top piece in the stack on the right to the top unit on the left. Because they were cut on an angle, it's a bit awkward to line these pieces up. I found it helpful to make sure the bottom corner of the new piece was roughly aligned with the bottom corner of the first piece across the sashing. Again, you don't have to be exact at this point, since we're going to trim them later, but you do want to be close, at least. Repeat with the remaining pieces in the stack and press the seams either open or towards the sashing piece.
Keeping the units in the same order, stack the 4 units neatly on top of each other on your cutting mat again, roughly lined up with the lines of the mat, with the sashing strip running from left to right. Because of the inserted sashing strip, the units won't match the lines on the mat perfectly, so just aim to have the blocks straight. Now make the same cut as before with the ruler on the diagonal, approximately 3 ½" from the left corner at the top and 6 ½" from the left corner at the bottom. Cut through all 4 units.
Apparently I didn't take a picture of the next couple of steps. I guess I was too excited to see my blocks coming together! Oops!
Without otherwise changing the order, take the top two pieces on the left and put them at the bottom of the stack. At this point of each set of blocks, I checked to be sure I hadn't messed up the order of the units and that each block would have 4 different fabrics.
Just like before, stitch a white 1 ½" x 11½" rectangle to the top unit in the stack on the left. Repeat with the remaining units in the stack. Press the seams either open or towards the sashing.
Stitch the top unit in the stack on the right to the top unit on the left, lining up the bottom corners across the sashing as best you can. Repeat with the remaining units. Press the seams either open or towards the sashing.
Trim the blocks
You can see in this picture that the edges of my block aren't quite even, though they're close. Some of the other blocks were a bit more uneven, but it's fine because they're all perfect after they're trimmed.
Once I finished all 16 blocks, I checked them to determine the largest size I could cut all of them, which turned out to be 10" unfinished (9 ½" finished). Depending on how uneven your edges are, you may need to cut your blocks to 9 ½" unfinished (9" finished), which is fine, too. Just be sure to check all of your blocks before you start trimming. It wouldn't be fun to trim half the blocks to 10" only to discover a couple aren't quite big enough, meaning you have to go back to the ones you already trimmed and trim them again to 9 ½".
I used my 12 ½" square ruler to easily trim my blocks. If you don't have a square ruler that's large enough, you can line your block up with the lines on your mat and use your regular ruler to trim one side at a time.
Assemble your quilt top
Arrange your blocks in a 4x4 layout, with white 1 ½" x 10" rectangles between the blocks. Note that if you trimmed your blocks to 9 ½" unfinished, you'll need these white rectangles to be 9 ½" long, not 10".
Stitch the blocks and sashing together to complete the rows. The completed rows should measure 41" long (or 39" if you trimmed your blocks to 9 ½") . Press the seams either open or towards the sashing.
With a white 1 ½" x 41" rectangle between the rows, stitch the rows together to complete the 41" square quilt top. Note that if you trimmed your blocks to 9 ½" unfinished, you'll need these white rectangles to be 39" long, not 41" and your completed quilt top will be 39" square.
If you make a Split 4 Patch quilt, I'd love to see it!
All of the other designers participating in the Chickadee blog hop are sharing their projects today, too. Be sure to check them all out to see what fun things they've made with these bright and cheerful fabrics!









Great tutorial and beautiful finish, Leanne. The texture you created with your quilting looks so good!
ReplyDeleteLove those bright colors in your quilt. Good instructions for a fun quilt.
ReplyDeleteThe colors of the batiks really shine in this quilt, Leanne. Thanks for the tutorial. I think this will be an easy quilt to make, the next time I have a layer cake to work with.
ReplyDeleteWhat a fun quilt - the colours feel like spring! I'm going to tuck this pattern away for a donation quilt.
ReplyDelete