July 28, 2021

Divided in Dream

When Kristy Lea, of Quiet Play and Make Modern, says she has a new fabric line coming out, I immediately start making plans for what I want to make with it. I love the bright colours and happy prints that Kristy creates! 
Divided quilt pattern | DevotedQuilter.com
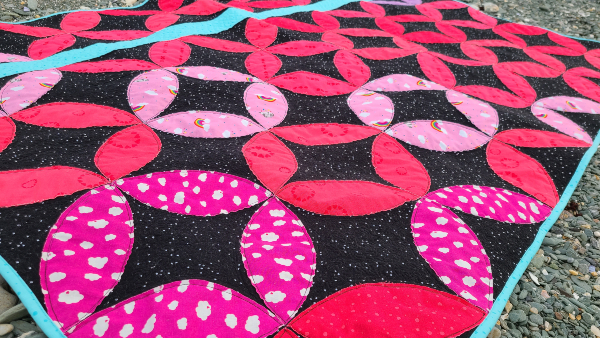
I used Kristy's Create line to make my Level Up quilt and today I'm sharing a Divided quilt made with her brand new line, Dream, which is shipping to stores now. The Divided pattern is available as a PDF or a printed pattern.
Divided quilt pattern | DevotedQuilter.com
Dream has so many gorgeous fabrics, it was hard to narrow down which ones I wanted for my new version of Divided. My usual inclination is to go with the blues, but I chose the pinks and a purple this time around and I love the result. That being said, I'll probably see about getting my hands on some of those blues before too long 😊
Dream fabrics | DevotedQuilter.com
Along with the Dream fabrics, I chose Blossom in black for the background. Blossom makes a great background because the tiny little flowers scattered over it add a nice bit of movement to the background without competing with the main design. 
Divided quilt pattern | DevotedQuilter.com
Divided is an orange peel applique pattern, no curved piecing required! The pattern originally included only this throw size, but I'm working on updating it and it will also include a baby size option (I'm planning the fabric for my first baby sized version already!). The newly updated pattern will re-release on August 3rd. I'll have a discount code available exclusively for newsletter subscribers, so be sure to subscribe to The Bulletin to be notified when Divided is available and get the code. Edited to say, that pattern is now available! Visit my Etsy shop to get it and make your own Divided quilt.

I chose to stitch down my appliques with the quilting, rather than going around them once to stitch them down and again to quilt them. 
Divided quilt pattern | DevotedQuilter.com
I will admit that quite a few of them were coming partially unglued off the background by the time I got to them, because of all the folding and smooshing that happens during quilting. Because they are simple shapes, though, it was easy enough to just add a little more glue to the parts that were lifting up and stick them back down. For an applique design with more pieces, or smaller pieces, I would recommend using a fusible product rather than a glue stick if you want to stitch them down with the quilting.

The other thing about doing applique this way is that the edges will fray. Some people don't like that, but I like the extra bit of texture it adds to the quilt over time. 

I stitched around the orange peels with my free motion foot with Aurifil 50 wt in black, going over each line twice. A wobble in a single line looks like a mistake, but go over it a second time, most likely adding more wobbles, and it somehow looks intentional. I tried to keep the stitching about ¼" from the edge, but that wobbled a little either way, too.
Divided quilt pattern | DevotedQuilter.com
After saving all that time by only stitching around the appliques once, I decided the background needed to be stippled. I told myself that I would do a larger stipple than usual, so it wouldn't take too long, but I seem to be incapable of anything other than a tiny stipple. And so, tiny stipple it is. Which looks exactly how I wanted it to look and was definitely worth the hours I spent quilting it. 
Divided quilt pattern | DevotedQuilter.com
With a solid pink on the back, that tiny stipple in black thread shows up beautifully.
Divided quilt pattern | DevotedQuilter.com
Long narrow sections like sashing, borders, or the stripe that divides this design and gives it its name, almost always end up quilted with wishbones. They're quick, simple and so relaxing to stitch. No two wishbones are exactly the same, but they're similar enough to look good.
Divided quilt pattern | DevotedQuilter.com
I used the same teal fabric for the binding as for the dividing stripe and I love how it frames the quilt.
Divided quilt pattern | DevotedQuilter.com

Divided quilt pattern | DevotedQuilter.com
My husband and I took Divided to the beach Monday evening for pictures. It was a beautiful, still evening, perfect for hanging out at the beach and perfect for quilt pictures, too 😊
Divided quilt pattern | DevotedQuilter.com
If you want to make a Divided quilt, get the pattern here.
Divided quilt pattern | DevotedQuilter.com
Thank you to Riley Blake for providing the fabrics for this quilt and to Kristy for designing such fabulous fabrics 😊
Divided quilt pattern | DevotedQuilter.com

July 26, 2021

Fruit of the Spirit -Part 6

While I'm taking my annual summer break from writing new devotions, I'm sharing this series on the fruit of the Spirit, which was originally published in 2016.


Devotion for the Week...

It's time for the sixth installment of our fruit of the Spirit devotion series! If you missed the previous devotions, click to read the introduction, about love, about joy, about peace and about patience. This week we're moving on to kindness, which marks the halfway point of this series. 

Once again, here is our verse for this series: "But the fruit of the Spirit is love, joy, peace, forbearance, kindness, goodness, faithfulness, gentleness and self-control. Against such things there is no law" (Galatians 5:22,23).

In thinking about kindness for today's post, I thought of this story. Rather than summarizing it, I'll just post the whole story here. This is John 8:2-11:


At dawn he appeared again in the temple courts, where all the people gathered around him, and he sat down to teach them. The teachers of the law and the Pharisees brought in a woman caught in adultery. They made her stand before the group and said to Jesus, “Teacher, this woman was caught in the act of adultery. In the Law Moses commanded us to stone such women. Now what do you say?” They were using this question as a trap, in order to have a basis for accusing him.

But Jesus bent down and started to write on the ground with his finger. When they kept on questioning him, he straightened up and said to them, “Let any one of you who is without sin be the first to throw a stone at her.” Again he stooped down and wrote on the ground.

At this, those who heard began to go away one at a time, the older ones first, until only Jesus was left, with the woman still standing there. Jesus straightened up and asked her, “Woman, where are they? Has no one condemned you?”

“No one, sir,” she said.

“Then neither do I condemn you,” Jesus declared. “Go now and leave your life of sin.”

So, let's start with the teachers of the law and the Pharisees. They were the religious leaders of the day. The church people, so to speak. They have caught a women 'in the act of adultery' and have dragged her into the temple courts.

Can you imagine her shame? Her humiliation? Her fear? Surely she knew the Law of Moses, and that it required an adulterer be stoned.

How is it they caught her 'in the act' anyway? And why haven't they dragged her...accomplice...into the temple courts? There are some who think this poor woman was set up, that the man was in on it with the religious leaders who needed someone to use in their attempt to trap Jesus. Lovely, right?

Their treatment of someone caught doing wrong has to be the perfect example of anti-kindness. Unfortunately, modern-day church people can be just as bad. We aren't so likely to throw stones at people, but there's no denying we throw words that do at least as much damage as a stone could. Think about the gossip that swirls when someone has an affair, or when someone's kids are in trouble with the law. People are often more than ready to believe the worst, to spread the story near and far and to separate themselves from those who are being accused. When people need kindness they are often given condemnation and shame instead.

Now consider Jesus' response. The religious leaders are hoping Jesus will condemn this woman just as they have. Instead, without saying a word, He starts to write on the ground with His finger. How I wish we knew what He wrote! Many speculate that He started writing words like 'liar' or 'gossip,' words that would make these self-righteous men realize that they are not perfect either. Obviously, we don't know if that's the case or not.

Whatever He wrote, the crowd kept pushing Him to make a ruling on the woman's fate, so Jesus stood and told them to go ahead and stone her...so long as the one among them who has never sinned is the first to throw a stone. Then He goes back to writing on the ground.

Slowly the crowd disperses. I love that it's the older ones who leave first. Are they the ones who are most aware of their own sins? Are the younger ones still determined to focus on the sins of others rather than their own? Eventually, though, they all slip away, leaving Jesus and the woman alone.

And He, the only one who had the right to throw a stone at her, the only one who could have condemned her, doesn't.

I picture a smile on His face as He looks around where the crowd had stood, then turns to the woman and tells her He doesn't condemn her. I can almost hear the kindness in His voice, can't you?

The next time we're confronted with someone who has done wrong, who will we imitate? The religious leaders and Pharisees, who heaped shame and humiliation on the woman (who assuredly already knew she had done wrong), or Jesus, who refused to condemn her?
Who will we imitate - the Pharisees or Jesus | DevotedQuilter.com
Jesus won't be standing there in that moment, ready to stoop down and write on the ground. But we do have the Holy Spirit within us, ready to remind us of our own sins and the kindness of our Savior, which could stop the stones we might otherwise have thrown.

July 22, 2021

TGIFF - A Secret Finish

 It's time for TGIFF! I have to admit that, since I'm off all summer, it's a little hard to keep track of the days right now, lol. It's always good to celebrate a finish, though, so let's get to it 😊

I do have a just finished quilt top to share today...but I can't actually show you the whole thing yet. I know...Sneak peeks are fun, but not fun at the same time, right?

I'm updating my Divided quilt pattern, getting it ready to be a printed pattern available to shops, so I've remade the quilt. This time I used the Dream fabric line, designed by Kristy at Quiet Play for Riley Blake Designs, along with Blossom in black for the background, also from Riley Blake. This version looks drastically different from the original, which you can see here! Here's my proof that my quilt top is actually finished. Aren't the fabrics dreamy (I couldn't resist!)?
Divided quilt top | DevotedQuilter.com
I love doing orange peel applique. The shape is simple, but you can use it to create so many fun designs. I used the orange peel shape in my Flower Path quilt pattern, too, in an entirely different look.

You may notice there is no stitching around the applique yet. That is one of my favourite time saving tricks! I'll stitch the appliques down with the quilting, so I only have to go around them all once. Sometimes I do stitch down my applique shapes before putting the top together, especially if I want to do a different stitch around them for emphasis, but a lot of times I just leave it to be done with the quilting. If you do this, be aware that you do need to be careful that the appliques don't separate from the background before they're stitched. If they do start to come off, you can press them again briefly, if you used a fusible product, or just add a little more glue, if you used a glue stick like I did for these.

I'll be sharing the finished quilt next Wednesday, which probably means I should get this top basted and quilted. If you need me this weekend, you'll know where to find me.

Link up your finishes from the week, then be sure to visit a few of the other links to celebrate their finishes, too. They'll probably even show you the whole thing, unlike some people...

Before you go, here's a pretty quilt swirl picture. 
Divided quilt top | DevotedQuilter.com


You are invited to the Inlinkz link party!

Click here to enter

July 21, 2021

EPP Star Ornament - 12 Days of Christmas in July

Hello and welcome to my stop on the 12 Days of Christmas in July blog hop, hosted by Sarah at Confessions of a Fabric Addict. Sarah is doing a quilt along during the hop, plus there are great projects being shared every day, so be sure to check it all out.

If this is your first time visiting me, I'm glad you're here! I'm a quilt pattern designer (see all of my patterns here) and a Christian. I share devotions here every Monday morning (read my most recent one here) and my quilting adventures all the time 😊 Sign up for The Bulletin to get my newsletter, which is filled with news from here, a delicious recipe and fun things to make.

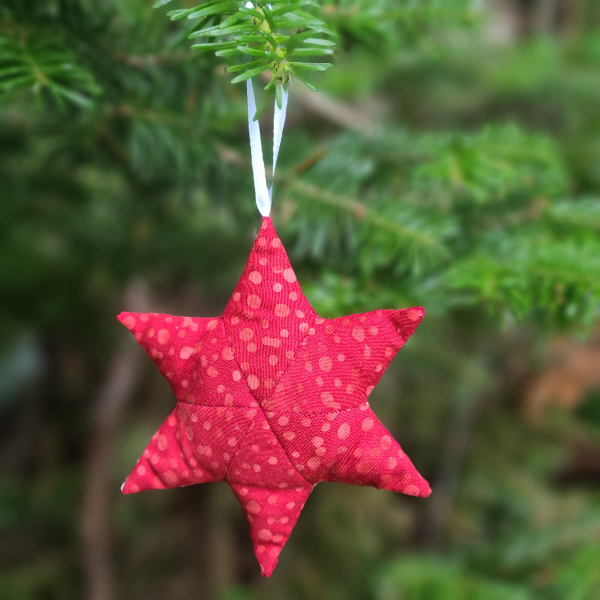
For today's post, I made a cute EPP star ornament and wrote up a tutorial so you can whip up a galaxy of ornaments in plenty of time for Christmas. I made three similar ornaments for my grandmother for last Christmas, but this one has more room for stuffing so it's a little more pillow-like.
EPP star ornament tutorial | DevotedQuilter.com


To make your ornament, you'll need:


  • fabric scraps. They can be the same fabric or two different fabrics. The best choices will be solids or small prints, since large prints will disappear when cut into these small pieces. That being said, I chose to use the red with white dot circles even though the whole circle design would be lost because I liked the randomness of the white dots when they were cut up.
  • small pins
  • needle for hand stitching
  • thread for basting. This doesn't need to match the fabric, since it will all be hidden on the inside of the finished ornament. I love to use up old bobbins or almost empty spools for basting EPP pieces. Here's how I store thread from nearly empty bobbins.
  • diamond template. You can download the template here. Warning: don't try to make a quilt out of these diamonds as they will not lie flat when stitched into stars!
  • scissors - both for fabric and paper
  • not pictured, because I forgot about them when I took the picture - thread to match your fabric, ribbon for hanging the ornament and stuffing or batting scraps.
EPP star ornament tutorial | DevotedQuilter.com


Let's get started!


Carefully cut out your paper templates. You need 12 diamonds per ornament, which means there are enough diamonds on the template to make two ornaments.
EPP star ornament tutorial | DevotedQuilter.com
Pin a template to the wrong side of your fabric, then cut around it leaving a ¼" margin. I just cut that with scissors, eyeballing the seam allowance as it really doesn't matter if it's off by a bit or if it's not straight. Cut 6 matching fabric diamonds for each star.
EPP star ornament tutorial | DevotedQuilter.com
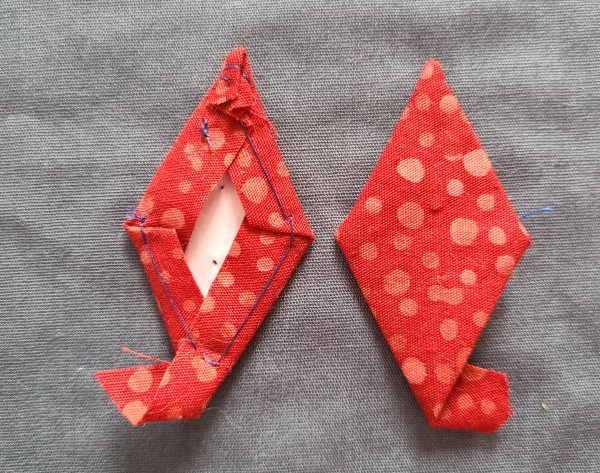
Baste all the way around the diamond, without going through the paper. I have a full tutorial here showing how I baste EPP shapes using hexagons, but it's the same method for diamonds, too. Remove the pins once the diamonds are basted.
EPP star ornament tutorial | DevotedQuilter.com
The one thing I do differently for these ornaments is to baste down the extra fabric at one pf the diamond points, which will be the outer point of the star. I do that by flattening down the extra fabric, then bringing my needle up through the center of the flap.
EPP star ornament tutorial | DevotedQuilter.com
Then I fold one side over and tack it down so all of the fabric is hidden.
EPP star ornament tutorial | DevotedQuilter.com
Repeat for the other side. I don't bother doing this for the other point, since that point will be the star center and that extra fabric won't be visible. See how all that extra fabric is hidden when viewed from the front?
EPP star ornament tutorial | DevotedQuilter.com
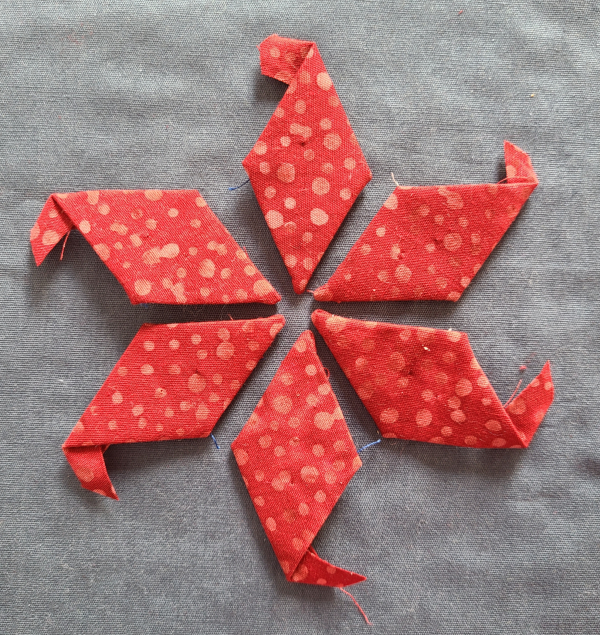
Do that for all 12 fabric diamonds.
EPP star ornament tutorial | DevotedQuilter.com
Using a whip stitch, stitch three diamonds together into a half star, making sure the basted points are towards the outside, not the center. Repeat with the other diamonds to make 4 half stars.
EPP star ornament tutorial | DevotedQuilter.com
Then join them together to make two stars, again using a whip stitch. You can see here that these stars do not lie flat at all. Instead they puff up in the center. This would be awful if we were trying to make a flat quilt out of them, but is perfect for these pillow-y ornaments 😊 Take the papers out now.
EPP star ornament tutorial | DevotedQuilter.com
I forgot to take a picture of this step, but cut a piece of ribbon about 6" long and baste it to the back of one of the star points. That will make it a lot easier than trying to hold the ribbon in place while stitching the stars together (learned that the hard way with the first ornament I made back in December!).

With the stars wrong sides together, start stitching about halfway up one of the points, using a ladder stitch. Keeping the stitches small will keep the stuffing from showing through the gaps later. Stitch all the way around the star, until you are going down the point before the one where you started. This will leave a gap along one of the "valleys" between points so you can stuff the ornament.
EPP star ornament tutorial | DevotedQuilter.com
I used a strip of batting trimmed off a quilt for my stuffing. I put the strip on my cutting mat and run my rotary cutter over it, cutting the batting into tiny strips (which don't show very well in the picture, unfortunately).
EPP star ornament tutorial | DevotedQuilter.com
Then I cut across the strips in the other direction, creating small bits of batting that are perfect for stuffing the ornament.
EPP star ornament tutorial | DevotedQuilter.com
Start by stuffing the star points, then keep filling the star until it is as firmly stuffed as you want it to be. I am always surprised by how much stuffing this actually takes! Close the opening with a ladder stitch. I found that when I reached the center of the "valley," I wanted a little more stuffing in the point I had just finished closing, so I poked a bit more through the hole that was left. Then, when there were only three or so stitches left to go, I poked in another tiny bit to really fill that last point. 
EPP star ornament tutorial | DevotedQuilter.com
I used the sticky side of a bit of tape to remove all the batting fluff left on the outside of the ornament.

There you have it, one finished EPP star ornament, ready to hang on the tree!


EPP star ornament tutorial | DevotedQuilter.com


As I said before, there are plenty of great projects being shared as part of the blog hop, so go check them all out and get your Christmas crafting list started early 😊

Wednesday, July 14th
Joy of Days Filled With Joy
 
Thursday, July 15th
Moira of The Quilted Snail
 
Friday, July 16th
Jamie of L'Fair Quilts
 
Saturday, July 17th
Bonnie of In Stitches With Bonnie
 
Sunday, July 18th
Joanne of Everyone Deserves a Quilt
 
Monday, July 19th
Kate of Katie Mae Quilts
Shasta of High Road Quilter
 
Tuesday, July 20th
Vicki of Vicki's Crafts and Quilting
 
Wednesday, July 21st
Leanne of The Devoted Quilter (that's me!)
 
Thursday, July 22nd
Kathy of Kathy's Kwilts and More
Sandra of Musings of a Menopausal Melon
 
Friday, July 23rd
Carole of From My Carolina Home
 
Saturday, July 24th
Joanne of Everyone Deserves a Quilt (Part 2)
 
Sunday, July 25th
Karrin of Karrin's Crazy World

July 19, 2021

Fruit of the Spirit - Part 5

 While I'm taking my annual summer break from writing new devotions, I'm sharing this series on the fruit of the Spirit, which was originally published in 2016.


Devotion for the Week...

It's time for the fifth installment of our fruit of the Spirit devotion series! If you missed the previous devotions, click to read the introduction, about love, about joy and about peace.

Once again, here is our verse for this series: "But the fruit of the Spirit is love, joy, peace, forbearance, kindness, goodness, faithfulness, gentleness and self-control. Against such things there is no law" (Galatians 5:22,23).

Okay, so this translation says forbearance, but other versions use longsuffering or, as I first learned it, patience. I find the nuances of those words to be interesting. Though they are synonyms, they don't quite mean exactly the same thing. Google dictionary defines forbearance as "patient self-control; restraint and tolerance" while longsuffering is "having or showing patience in spite of troubles, especially those caused by other people" and patience is "the capacity to accept or tolerate delay, trouble, or suffering without getting angry or upset." One puts the emphasis on controlling ourselves, another on the source of the trouble we are being patient about and the third on the reaction we are not exhibiting because we are being patient instead! 

Really, the translators used these different words in different translations because the original word, makrothumia, carries the connotations of all three English words. So, then, Paul wrote the word makrothumia meaning that the fruit of the Spirit is 'controlling ourselves in spite of troubles, especially those caused by other people, while exhibiting the capacity to accept those troubles without getting angry or upset'. Wow! That's a lot for one word to convey, isn't it?

Would you say you have makrothumia? Or are you like me and find there is abundant room for improvement? One thing I have definitely noticed is that my patience evaporates when I am tired.

I can remember when Zachary was a newborn and I lived in that sleep-deprived haze that is the first weeks and months with a new baby. Aiden was about two at the time, just learning to talk, and I must have used the phrase, "Mommy has no patience right now" a few too many times because one day he announced to his toys that "Ma ha no pa-ence now!" Yep, that was me. Still is some days.

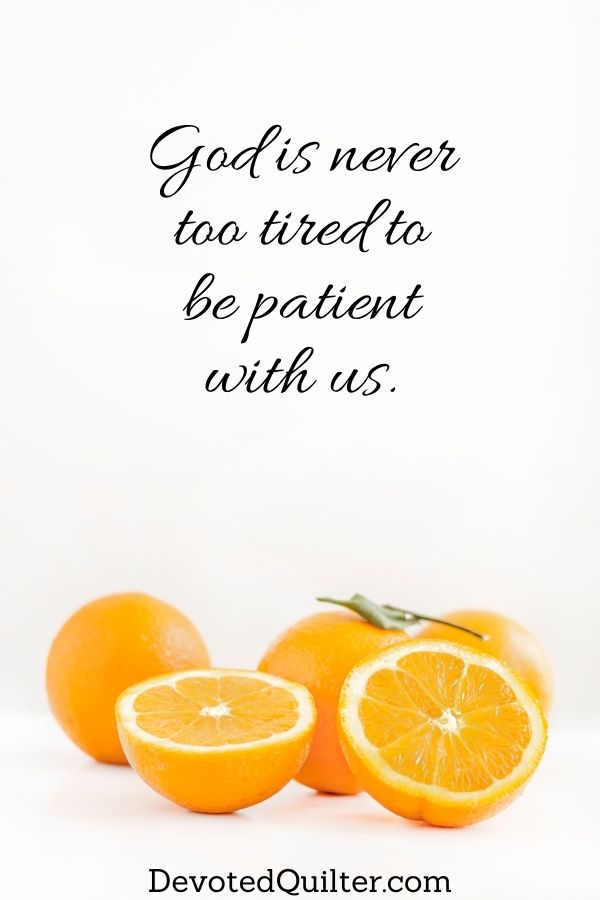
My first thought as I prepared to write about patience for today (other than Aiden warning his toys), was that God never gets tired. Psalm 121:3-4 says, "He will not let your foot slip—he who watches over you will not slumber; indeed, he who watches over Israel will neither slumber nor sleep." God doesn't need sleep, which means He never gets tired and He never has those moments when His patience evaporates because He didn't get enough sleep the night before. Isn't that a wonderful thought? No matter how irritating or exasperating or frustrating we may be, God is never too tired to be patient with us.
God is never too tired to be patient with us | DevotedQuilter.com
That is the kind of constant, predictable, unwavering patience His Spirit can cause to grow in us. The kind of patience that doesn't change, no matter how we are feeling or what our circumstances may be. The kind of patience we certainly can't create for ourselves because we don't have an inexhaustible supply. But He does. And He can (and will!) cause it to become part of us if we rely on Him.

Moment by moment, irritation by irritation, we have a choice to make. Will we react out of our own limited supply of patience, or will we choose to let God's unlimited patience flow through us?

I know three things for certain. 1. We will not always get it right. 2. We will never run out of opportunities to try again.

And the best one of all...God will be patient with us when we get it wrong.


July 15, 2021

Marbles - Summer Scrap Elimination

Hello and welcome to my stop on the Summer Scrap Elimination Challenge! I love sewing with scraps, so when Sheridan asked who would be interested in participating in this challenge, I signed up immediately. A challenge like this is always great motivation to dig into those scraps.

If this is your first time visiting me, I'm glad you're here! I'm a quilt pattern designer (see all of my patterns here) and a Christian. I share devotions here every Monday morning (read my most recent one here) and my quilting adventures all the time 😊 Sign up for The Bulletin to get my newsletter, which is filled with news from here, a delicious recipe and fun things to make.

Late last year I finally sorted all my scraps by colour and it has made it so easy to find what I need! I should have done it years ago, but I was hung up on the idea of needing beautiful baskets to store the separate colours in, but I didn't want to buy them, lol. Finally I decided to use shoe boxes instead, since I had a few of those lying around already, and that allowed me to get the job done. If you haven't yet found the perfect sorting/organizing system, I encourage you to just go for it, even if it's not Pinterest worthy. Being able to easily find the scraps we want makes it so much more likely that we will actually sew something with them!

For my project for the challenge, I decided to make colour coordinated panels from scraps, just sewing random bits together until I had a useable size. In this case, I chose to make the blocks 8 ½" square.
Marbles quilt block tutorial | DevotedQuilter.com
Crumb quilting like this is perfectly mindless and relaxing, though it is a bit time consuming. Sometimes, you just want to sew pieces together without worrying about matching points or precise cutting and this is perfect for those times.

Keeping the blocks all one colour, while also using a variety of fabric, was more challenging than I would have thought...it can be so hard to decide if a fabric is teal or blue, lol. Really, there are no wrong answers, though, so it was all good.
Marbles quilt block tutorial | DevotedQuilter.com
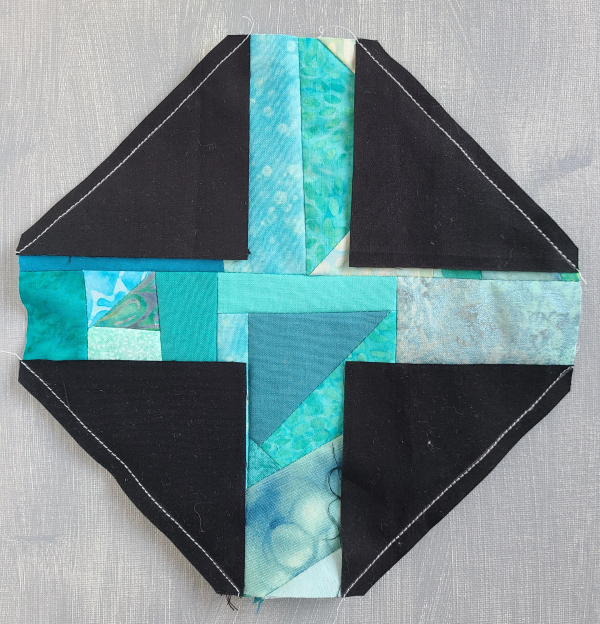
Just like this, these blocks would make a pretty quilt, but I chose to turn them into snowball blocks, with black corners (also pulled from the scrap box!). Of course, snowballs don't come in all the colours, so I'm calling these my Marbles 😊
Marbles quilt block tutorial | DevotedQuilter.com
I had every intention of having a finished mini quilt to share today, but then life happened, in the form of deadlines that needed to be met, hikes that needed to be hiked and campfires that needed to be enjoyed. So, instead of a mini quilt, I have one finished Marbles block and 6 squares ready for their corners, with another square started. 
Marbles quilt block tutorial | DevotedQuilter.com
This is an approximation of what they'll look like when I finish more blocks and get them made into a mini.
Marbles quilt block tutorial | DevotedQuilter.com
Want to make you own Marbles block? Here's how I made mine.

Start with a fun assortment of pretty fabrics, all in one colour. You'll also need thread, either in the same colour as your fabric or a neutral. I chose to use Aurifil 2600, which worked nicely with my variety of teal fabrics. You'll need a good pair of scissors to trim up your pieces and I use my Clover mini iron to press seams open as I go. When paired with my homemade pressing board, I can press the seams without leaving my chair. This is the only time I don't purposely set up the iron across the room, thereby forcing me to move regularly while sewing. If I did that while making these crumb blocks, I'd never finish a block! Lastly, you'll need your rotary cutter, mat and ruler.
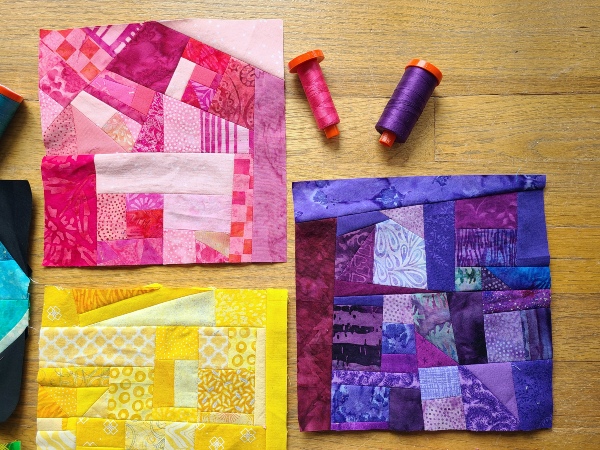
Marbles quilt block tutorial | DevotedQuilter.com
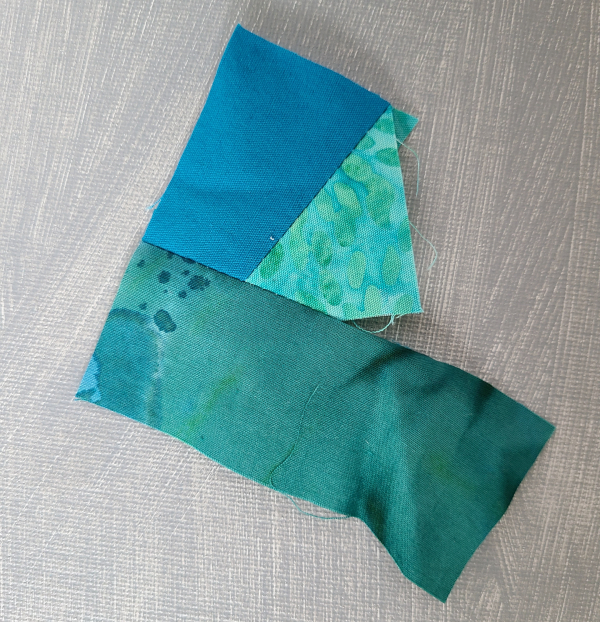
Without thinking too much, pick out two pieces. If needed, use the scissors to straighten up the sides, then stitch them together. Press the seam open. There will be a lot of seams in this block and pressing the seams open really helps the block to lay flat(ish).
Marbles quilt block tutorial | DevotedQuilter.com
Use the scissors to trim them even, giving you a straight edge to add the next piece to.
Marbles quilt block tutorial | DevotedQuilter.com
Again, without thinking about it too much, pick out the next piece and stitch it on. Don't be afraid to cut up a larger scrap if you need a shorter piece. Press the seam open again.
Marbles quilt block tutorial | DevotedQuilter.com
Trim with the scissors to give yourself the next straight edge and just keep going.
Marbles quilt block tutorial | DevotedQuilter.com
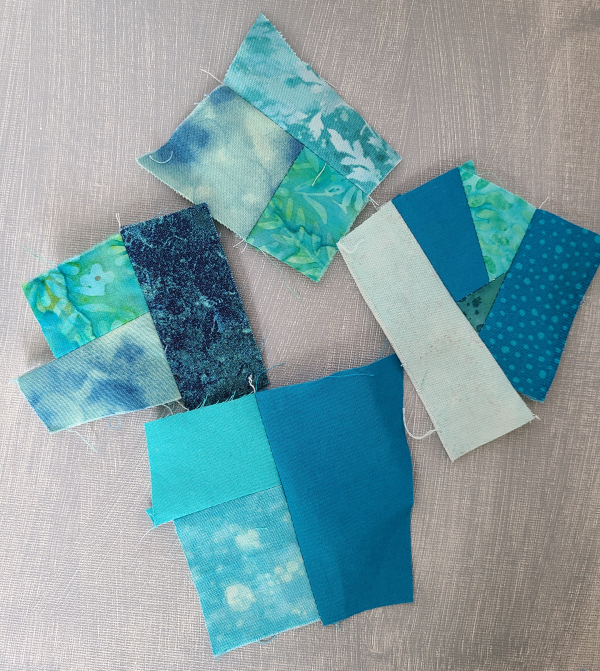
I usually like to work on several small chunks at the same time. I add a piece to each chunk, chain piecing them, then press them all at the same time. 
Marbles quilt block tutorial | DevotedQuilter.com
Before long, you'll be able to join the chunks together into a larger piece.
Marbles quilt block tutorial | DevotedQuilter.com
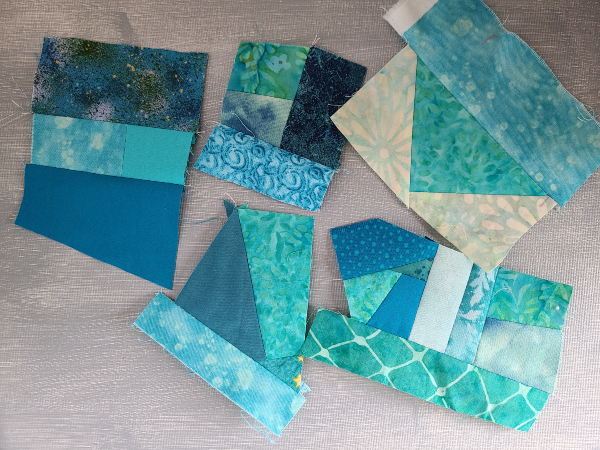
Keep repeating the same process, adding individual pieces or joining chunks together as you see fit. This is the mindless, there-are-no-wrong-answers part of the process 😊
Marbles quilt block tutorial | DevotedQuilter.com
After a while, the pieces would get so big that I didn't feel like I could cut a straight edge with my scissors, so I use my ruler and rotary cutter. In this case, the piece is bigger than the 8 ½" I was aiming for, so I trimmed one side and then set it aside while I worked on the chunks to make the other half of the block.
Marbles quilt block tutorial | DevotedQuilter.com
When I had enough sewn that I knew it would be bigger than 8 ½" square, I trimmed the other two chunks and then stitched all three of them together.
Marbles quilt block tutorial | DevotedQuilter.com
At this point, it's all crazy and wonky around the edges.
Marbles quilt block tutorial | DevotedQuilter.com
Use your ruler and rotary cutter to trim it to 8 ½" square. Depending on how big the trimmed off pieces are, you might want to throw them back into the scrap box for the next time, or just dive right into stitching your next block using those trimmed off bits as your starting point.
Marbles quilt block tutorial | DevotedQuilter.com
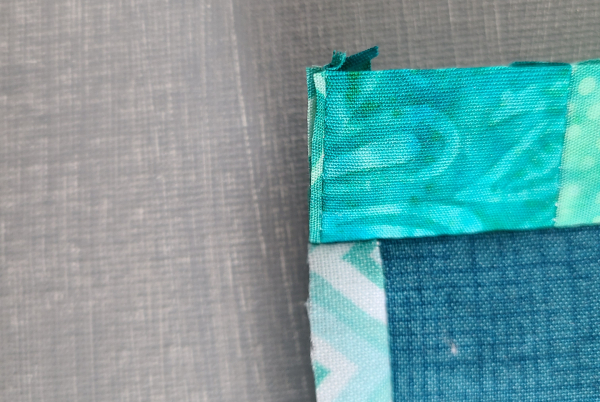
Because of the way bits are sewn together, then trimmed, it's quite likely you'll end up with seams right at the edge...
Marbles quilt block tutorial | DevotedQuilter.com
or pieces that will probably end up disappearing in the seam allowances. No big deal. That's just the way these blocks go.
Marbles quilt block tutorial | DevotedQuilter.com
To turn the squares into Marbles block, you'll need four black 3 ½" squares. Draw a line diagonally from corner to corner on the wrong side of all four. Because this is the Summer Scrap Elimination challenge, I'm also making bonus HSTs when I do these stitch-and-flip corners. There's no point in creating more scraps while making a scrap elimination project, right? I learned about using Triangle Buddies from Bonnie Hunter and I love to make bonus HSTs this way, so that's how I draw my second line on each square.
Marbles quilt block tutorial | DevotedQuilter.com
Pin the squares in the corners of your crumb block, with the diagonal lines going across the corners as shown. Stitch right on both lines.
Marbles quilt block tutorial | DevotedQuilter.com
Trim off the outside corner, leaving a ¼" seam allowance.
Marbles quilt block tutorial | DevotedQuilter.com
Press the corners open to reveal your finished Marbles block 😊
Marbles quilt block tutorial | DevotedQuilter.com
But don't forget about those bonus HSTs! Trim their seam allowance to ¼" and press them open.
Marbles quilt block tutorial | DevotedQuilter.com
In the interest of using them right away, I stitched my bonus HSTs into a little pinwheel block. Since I've only finished one Marbles block, I've also only made one pinwheel, but I plan to make a bonus mini quilt out of these pinwheels.
Marbles quilt block tutorial | DevotedQuilter.com
And that's it! Somehow my scrap boxes don't seem much emptier than they were when I started, but I truly think they multiply when we're not looking. Just means I have what I need to make lots more Marbles blocks and other scrappy projects, right?

I hope you'll tag me on social media when you make your own Marbles blocks. I'm @devotedquilter on Instagram and @devotedquilterdesigns on Facebook.