Hello and welcome to my stop on the 12 Days of Christmas in July blog hop, hosted by Sarah at Confessions of a Fabric Addict. Sarah is doing a quilt along during the hop, plus there are great projects being shared every day, so be sure to check it all out.
If this is your first time visiting me, I'm glad you're here! I'm a quilt pattern designer (see all of my patterns here) and a Christian. I share devotions here every Monday morning (read my most recent one here) and my quilting adventures all the time 😊 Sign up for The Bulletin to get my newsletter, which is filled with news from here, a delicious recipe and fun things to make.
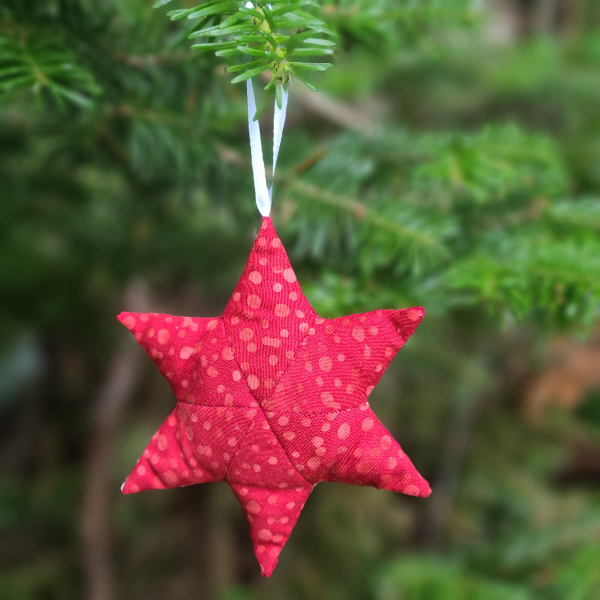
For today's post, I made a cute EPP star ornament and wrote up a tutorial so you can whip up a galaxy of ornaments in plenty of time for Christmas. I made
three similar ornaments for my grandmother for last Christmas, but this one has more room for stuffing so it's a little more pillow-like.
To make your ornament, you'll need:
- fabric scraps. They can be the same fabric or two different fabrics. The best choices will be solids or small prints, since large prints will disappear when cut into these small pieces. That being said, I chose to use the red with white dot circles even though the whole circle design would be lost because I liked the randomness of the white dots when they were cut up.
- small pins
- needle for hand stitching
- thread for basting. This doesn't need to match the fabric, since it will all be hidden on the inside of the finished ornament. I love to use up old bobbins or almost empty spools for basting EPP pieces. Here's how I store thread from nearly empty bobbins.
- diamond template. You can download the template here. Warning: don't try to make a quilt out of these diamonds as they will not lie flat when stitched into stars!
- scissors - both for fabric and paper
- not pictured, because I forgot about them when I took the picture - thread to match your fabric, ribbon for hanging the ornament and stuffing or batting scraps.

Let's get started!
Carefully cut out your paper templates. You need 12 diamonds per ornament, which means there are enough diamonds on the template to make two ornaments.
Pin a template to the wrong side of your fabric, then cut around it leaving a ¼" margin. I just cut that with scissors, eyeballing the seam allowance as it really doesn't matter if it's off by a bit or if it's not straight. Cut 6 matching fabric diamonds for each star.
Baste all the way around the diamond, without going through the paper. I have a
full tutorial here showing how I baste EPP shapes using hexagons, but it's the same method for diamonds, too. Remove the pins once the diamonds are basted.
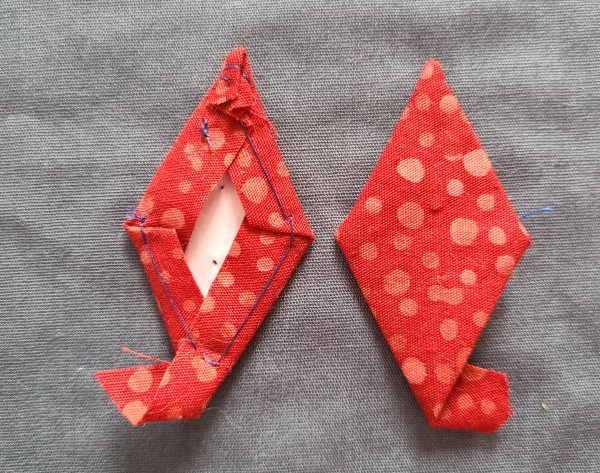
The one thing I do differently for these ornaments is to baste down the extra fabric at one pf the diamond points, which will be the outer point of the star. I do that by flattening down the extra fabric, then bringing my needle up through the center of the flap.
Then I fold one side over and tack it down so all of the fabric is hidden.
Repeat for the other side. I don't bother doing this for the other point, since that point will be the star center and that extra fabric won't be visible. See how all that extra fabric is hidden when viewed from the front?
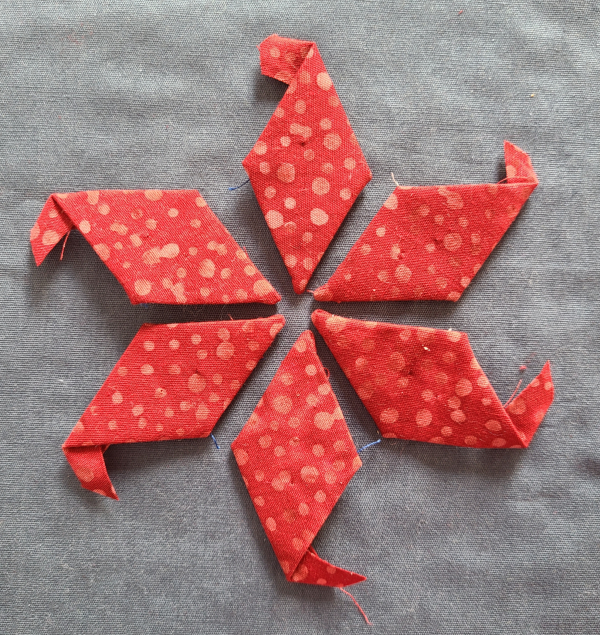
Do that for all 12 fabric diamonds.
Using a whip stitch, stitch three diamonds together into a half star, making sure the basted points are towards the outside, not the center. Repeat with the other diamonds to make 4 half stars.
Then join them together to make two stars, again using a whip stitch. You can see here that these stars do not lie flat at all. Instead they puff up in the center. This would be awful if we were trying to make a flat quilt out of them, but is perfect for these pillow-y ornaments 😊 Take the papers out now.
I forgot to take a picture of this step, but cut a piece of ribbon about 6" long and baste it to the back of one of the star points. That will make it a lot easier than trying to hold the ribbon in place while stitching the stars together (learned that the hard way with the first ornament I made back in December!).
With the stars wrong sides together, start stitching about halfway up one of the points, using a ladder stitch. Keeping the stitches small will keep the stuffing from showing through the gaps later. Stitch all the way around the star, until you are going down the point before the one where you started. This will leave a gap along one of the "valleys" between points so you can stuff the ornament.
I used a strip of batting trimmed off a quilt for my stuffing. I put the strip on my cutting mat and run my rotary cutter over it, cutting the batting into tiny strips (which don't show very well in the picture, unfortunately).
Then I cut across the strips in the other direction, creating small bits of batting that are perfect for stuffing the ornament.
Start by stuffing the star points, then keep filling the star until it is as firmly stuffed as you want it to be. I am always surprised by how much stuffing this actually takes! Close the opening with a ladder stitch. I found that when I reached the center of the "valley," I wanted a little more stuffing in the point I had just finished closing, so I poked a bit more through the hole that was left. Then, when there were only three or so stitches left to go, I poked in another tiny bit to really fill that last point.
I used the sticky side of a bit of tape to remove all the batting fluff left on the outside of the ornament.
There you have it, one finished EPP star ornament, ready to hang on the tree!
As I said before, there are plenty of great projects being shared as part of the blog hop, so go check them all out and get your Christmas crafting list started early 😊
Wednesday, July 14th
Joy of Days Filled With Joy
Thursday, July 15th
Moira of The Quilted Snail
Friday, July 16th
Jamie of L'Fair Quilts
Saturday, July 17th
Bonnie of In Stitches With Bonnie
Sunday, July 18th
Joanne of Everyone Deserves
a Quilt
Monday, July 19th
Kate of Katie Mae Quilts
Shasta of High Road Quilter
Tuesday, July 20th
Vicki of Vicki's Crafts and Quilting
Wednesday, July 21st
Leanne of The Devoted Quilter (that's me!)
Thursday, July 22nd
Kathy of Kathy's Kwilts and More
Sandra of Musings of a Menopausal Melon
Friday, July 23rd
Carole of From My Carolina Home
Saturday, July 24th
Joanne of Everyone Deserves
a Quilt (Part 2)
Sunday, July 25th
Karrin of Karrin's Crazy World


What a great ornament. I love that you don't need to roll in that second end and using batting scraps is another terrific idea. Thanks so much for sharing this great holiday gift idea.
ReplyDeleteWhat a cute ornament. I have some Christmas fabric- heavily printed with gold- would be perfect for this. I know what I’m doing tonight. Thank you for sharing!
ReplyDeleteWhat a fun little ornament to make and use a few more scraps up! Thanks for sharing:)
ReplyDeleteCute ornament, thanks so much for sharing!
ReplyDeleteVery clever and a very cute star for more than Christmas!
ReplyDeleteHow cute is that star! A great project to do in the evenings I think... thanks for sharing! xx
ReplyDeleteThat's a cute project!
ReplyDeleteOh so cute, Leanne! I'm excited to make some of these for my own trees - a good handwork project to keep by the chair for when I'm watching tv in the evenings. Now to find those EPP paper pieces in the studio.....
ReplyDeleteSo cute, you make it look easy.
ReplyDeleteThanks for the tutorial, Leanne!!
ReplyDeleteI'm always looking for new ways with EPP so love this! Great fabric and batting scrap buster too.
ReplyDelete