I'm working on a new pattern and it involves some Drunkard's Path blocks. As I was prepping them for sewing, it seemed like a good time to take some pictures and write a tutorial for how I sew my Drunkard's Path blocks.
If you haven't tried sewing curves before, you might think they're really hard, but they're not nearly as bad as they seem. It takes a little while to prep the pieces, but once they're ready you can stitch them up fairly easily.
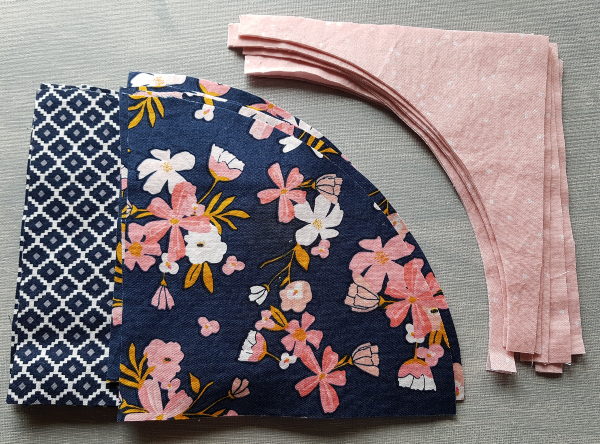
The first step is to cut your pieces using a template. You can buy acrylic templates or just print the templates that come with the pattern you're using, which is what I did. A Drunkard's Path block is a quarter circle and each block has two pieces, the outer curve and the inner curve. You'll need one of each to make a block. I'm using prints from the Golden Aster line, by Gabrielle Neil for Riley Blake, for the inner curve pieces. The outer curve pieces are from the Blossom line, by Christopher Thompson, also from Riley Blake. Don't they look fabulous together?
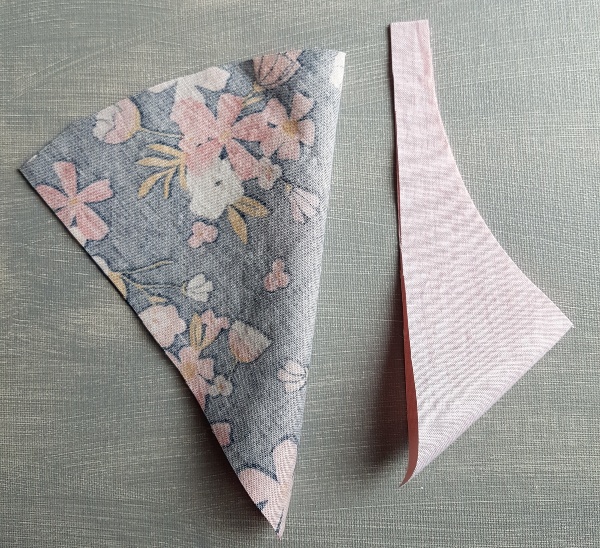
Fold the inner and outer curve pieces in half and finger press to create a little crease in the center of the curve.
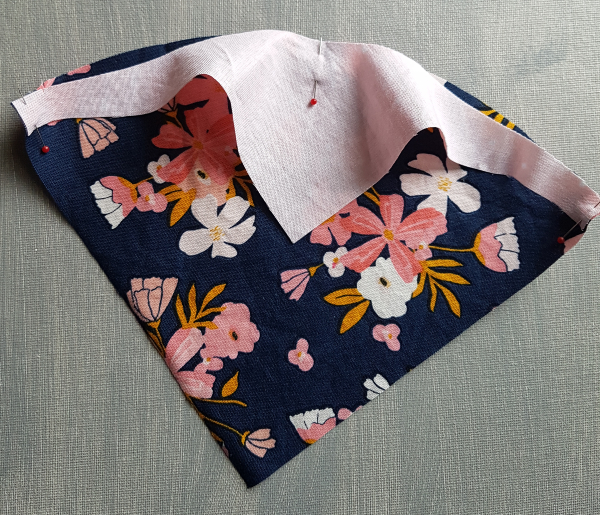
Right sides together, match the creases, with the raw edges lined up. At this point, the creases are the only place where the curves will match up. That's okay! It's supposed to look like that 😊 Pin at the crease. There are people who sew beautiful curves without pins, but I'm definitely not one of them. I find pins are a huge help with getting those curves to look nice.
Now match up the edges and pin them.
You want to make sure the sides stay aligned, so I like to make sure the pin is getting a good bite of the outer curve piece. Otherwise that piece likes to tilt out of position.
On these blocks, which finish at 6 ½", I use three more pins between the center and edge pins. On smaller blocks I might only use one or two and on bigger blocks I would use more. I like to keep things really secure.
Then do the same thing on the other side of the block.
As you can see, there are some ripples in the fabric of the outer curve piece. That's fine! As you sew, just make sure the ripples are beyond the ¼" seam allowance so you don't stitch them into the block.
When you start to sew the curve, be careful taking out the first pin. The corner of the outer curve piece may angle itself right out of position as soon as the pin is out. If possible, I like to put the presser foot down before I take out the pin, so it will hold that edge in place.
Sew somewhat slowly, remembering to smooth the ripples in the outer curve piece so they don't get stitched into the seam. I use the fingers of my left hand to gently smooth the excess fabric away from the raw edges.
Give the block a good press and you're done!
The seam allowance will naturally want to go towards the outer part of the curve, so I usually just press it that way. Sometimes, if I'm making full circles out of 4 Drunkard's Path blocks, I'll press half of the blocks with the seam allowance towards the inner part of the curve, so the seams can nest.
That wasn't too hard, was it? 😊 I hope you'll give Drunkard's Path blocks a try. There are so many fun things you can make with these pretty quarter circle blocks.


Great visual tutorial!
ReplyDeleteA very useful tutorial - thank you!
ReplyDeleteThis is such a nice tutorial, and good for you to take the time to prepare it for newer quiltmakers. Personally, after making more than 365 Drunkard's Path blocks for my 2019 temperature quilt, I'm quite over them. It will be along time until I intentionally choose to make more! :-)
ReplyDeleteIt's 2022! How did I miss this? Great directions! Thanks
ReplyDelete