Are you thinking about making a temperature quilt? I made one in 2020...well, okay, my temperature quilt
represents 2020, but it wasn't actually finished until almost the end of 2021. Even though it took me much longer than I thought it would, it was a lot of fun to make and I'm really glad I decided to go for it. Even more, I love how it turned out and plan to soon hang it up in my
new sewing room.
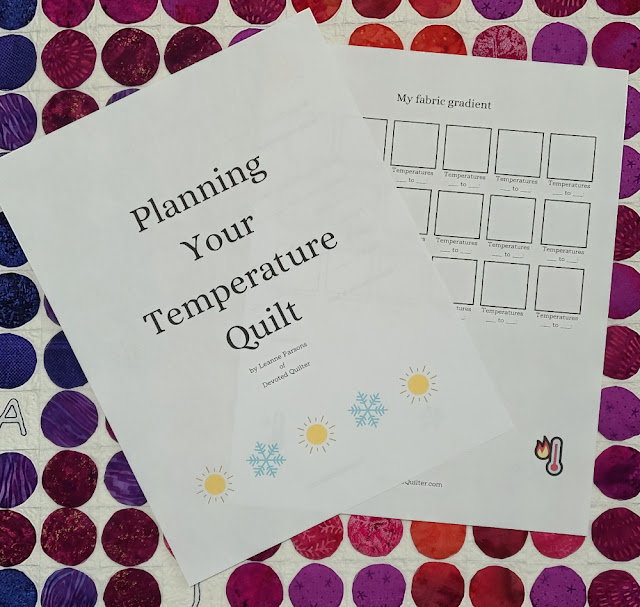
Since we're nearing the start of another new year, I have a few tips to share if you're thinking about diving in to make your own temperature quilt. And, I have a free workbook you can download to help you keep track of everything you decide.
Enter your email address here to have the workbook sent to your inbox.
Data source
First things first, where will you get the daily temperature information you're going to use? Look for government agencies or weather apps or websites that show historical weather (meaning just weather before today, lol, not necessarily from what we'd consider History). This is important so you can check to see what the high temperature actually was yesterday and so you don't have to worry if you forget to check for a day or two while on vacation or if you fall behind - you can just go back and look it up. Also, I recommend you have a backup plan for getting the temperature. I used Environment Canada for my temperatures, but there were a few days throughout the year when some kind of glitch happened that meant the temperature wasn't listed and I had to use a second source.
Which temperatures and which shape?
These next two decisions kind of go hand-in-hand. Will you track both the high and low temperature for each day or only one of them? And, what shape will you use to display the temperatures? Some shapes, like HSTs and flying geese, naturally lend themselves to tracking two daily temperatures, though they could certainly be used with a background fabric instead if you want to track only one temperature. Other shapes, like the circles I used, are only one fabric, so they work better for tracking one temperature (the high, in my case). I've seen people use hexagons to track the daily high temperature, and I've also seen half-hexagons used to track both. All of that to say, choosing what to track and what shape to stitch are both entirely personal decisions and there's no right or wrong answer.
Another part of choosing which shape to use is how they will be stitched. By machine or by hand? If by machine, is your machine always set up for piecing? Or do you sometimes switch it over to machine quilt something that will take a while to finish and it would be a pain to have to constantly switch back and forth to stitch your temperature blocks? Or are you okay with making the blocks in batches, once the machine is set up for piecing again? In my case, I decided to go with hand appliqued circles because my free motion quilting can often take a week or more for a quilt, so I didn't want to fall that far behind on my blocks, since I intended to make a block a day (for the day before). The joke was on me, though, since I fell way, way, waaaay behind and didn't actually finish making my 2020 blocks until the fall of 2021. Good thing I could go back and look up what those high temperatures had been!
What size for the blocks?
Once you know what shape you'll be using, it's time to figure out what size the blocks should be. Keep in mind, there will be 365 of them, so you probably don't want to go too big! Start by thinking about how big you want the finished quilt to be, just in general terms. Do you want a throw size? A baby quilt? A wallhanging? Each one will require a different size for the blocks. Graph paper would be a great way to help you visualize how the finished quilt would look with different size blocks.
I knew I didn't want my temperature quilt to be big, so I decided my blocks would finish at 1 ½". When you're planning what size to cut your blocks, don't forget to account for the seam allowances! My blocks are arranged in a 19 x 20 layout, which gave me a 28 ½" x 30" quilt center. That layout also left me with some leftover blocks, which I distributed so one was at the start of each month and two were at the end. I embroidered the initial for each month and the year on those leftover blocks.
How many fabrics?
How many fabrics will you need? This is going to be determined by two factors: the variation in temperature over the course of a year (just how low and how high do your temperatures go?) and how many degrees each fabric will represent. Here in Newfoundland in 2020 our daily high temperatures ranged from - 15°C to 29°C. I had each fabric represent 3 degrees, except for the fabric that only represented 0°C, which means I used a total of 16 fabrics.
Which colours?
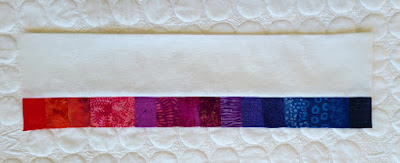
Now the most exciting part! Which colours will you use? Keep in mind that the colours you choose for the temperatures in the middle of the year will be more prominent in the finished quilt than the ones for the temperatures in January or December. When I was planning my quilt, a lot of the ones I looked at used a colour range from blue-green-yellow-orange-red. That meant the middles of the quilts had a lot of yellow and orange, which really didn't appeal to me. I much preferred the ones with a blue-purple-pink-red progression, so that's what I went with.
In hindsight, I could have done a better job arranging the fabrics into the gradient. There are a couple that are not quite right and should have been moved to slightly cooler temperatures to make the gradient flow better. I would caution you to take your time here and make sure you get that nice flow between fabrics.
Sticking with it
A year is a long time to commit to a project! It helps to have a plan for when you'll stitch your blocks. One a day? A week's worth every weekend? A dedicated day now and then to get caught up? In order to stick with it, you have to design the project in a way that fits into your life and the way you like to work. There's no sense in designing something that you won't be able to keep up with or that you won't enjoy. We want this to be fun, after all!
That being said, there will probably be times when the plan goes awry. Life will get in the way no matter how well you design the project because that's just what life does. It's good to go in knowing that disruptions will happen so you don't beat yourself up when something does come up. Then, it's just a matter of deciding if you need to adjust your plan going forward or if it was just a brief disruption that won't impact things once you get caught up.
And if, like me, you end up so far behind schedule that you stop working on it entirely, know that the blocks will be there waiting when you're ready to come back to them. And you can always join me for WIPS-B-GONE to get it finished! WIPS-B-GONE is my annual project finishing challenge, the first of which was exactly what got me to finish my own temperature quilt. Now I'm hosting the challenge for the second time and working through some of my other WIPS.
Have fun!
Make sure your download the
How to Plan Your Temperature Quilt worksheet so you can keep track of all of your decisions and your fabric gradient. Whatever shapes and fabrics you decide to use, I hope you have fun planning and stitching your temperature quilt.


Whoa, great tips!!! I love the idea that it's small enough to hang on the wall of your studio, Leanne! I recommend you put this on KathleenMcMusing tips & tutorial link up, which just came out today.
ReplyDeleteThese are fantastic tips, especially about the practicality of making sure you have multiple trusted data sources. I hadn't considered that!
ReplyDeleteIt's so nice to have a very honest and practical article on the temperature quilt. Some of my "easy" projects have been set aside only to be stumbled over 5 or 10 years later. Your tips should help make this a much easier project to attempt. I like that you emphasize the "fun" aspect of quilting.
ReplyDeleteVery nice review, Leanne! Once a person has made a temperature quilt, it's very helpful to share that information with others. Since I always "go big" when I make a quilt, my Drunkard's Path temperature quilt blocks were 4-1/2" square, finishing at 4" square. Mine has 23 colors. I'm so glad I made it because it's gotten a lot of "mileage," appearing in quilt shows, two magazines, and even an art exhibit! Yours is really lovely, and I'm sure this post will encourage others to make one.
ReplyDeleteI've made 3 temperature quilts, each using a different layout and included the high and low Temps for the day....fun year long project!
ReplyDeleteGreat tutorial and thanks for linking up to Tips and Tutorials! It is a project that sometimes gets on my to do list...but I fear getting behind. You overcame that, so it gives me hope.
ReplyDeleteI love your version. Embroidering the month and year was a great idea. I'm still working on my 2020....I made it to June. Not sure I love it enough to finish, but we'll see. It's hidden somewhere in a box. LOL
ReplyDeleteThanks for sharing this planning tracker, Leanne! A temperature quilt is on my Bucket List.
ReplyDelete