Hello and welcome to my stop on the Summer Scrap Elimination Challenge! I love sewing with scraps, so when Sheridan asked who would be interested in participating in this challenge, I signed up immediately. A challenge like this is always great motivation to dig into those scraps.
If this is your first time visiting me, I'm glad you're here! I'm a quilt pattern designer (see all of my patterns here) and a Christian. I share devotions here every Monday morning (read my most recent one here) and my quilting adventures all the time 😊 Sign up for The Bulletin to get my newsletter, which is filled with news from here, a delicious recipe and fun things to make.
Late last year I finally sorted all my scraps by colour and it has made it so easy to find what I need! I should have done it years ago, but I was hung up on the idea of needing beautiful baskets to store the separate colours in, but I didn't want to buy them, lol. Finally I decided to use shoe boxes instead, since I had a few of those lying around already, and that allowed me to get the job done. If you haven't yet found the perfect sorting/organizing system, I encourage you to just go for it, even if it's not Pinterest worthy. Being able to easily find the scraps we want makes it so much more likely that we will actually sew something with them!
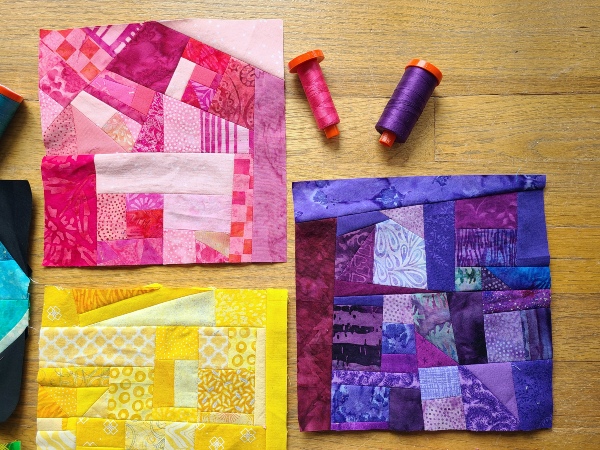
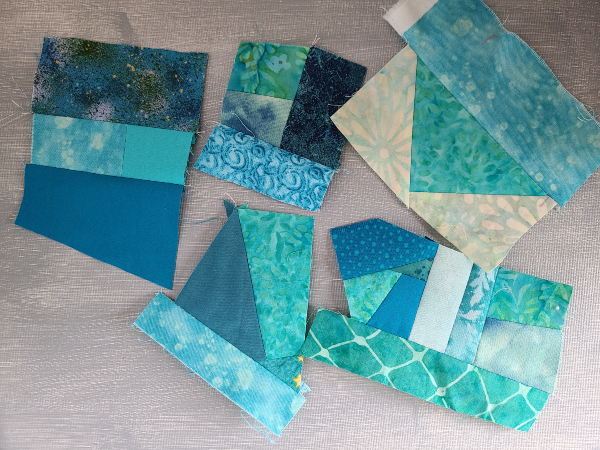
For my project for the challenge, I decided to make colour coordinated panels from scraps, just sewing random bits together until I had a useable size. In this case, I chose to make the blocks 8 ½" square.
Crumb quilting like this is perfectly mindless and relaxing, though it is a bit time consuming. Sometimes, you just want to sew pieces together without worrying about matching points or precise cutting and this is perfect for those times.
Keeping the blocks all one colour, while also using a variety of fabric, was more challenging than I would have thought...it can be so hard to decide if a fabric is teal or blue, lol. Really, there are no wrong answers, though, so it was all good.
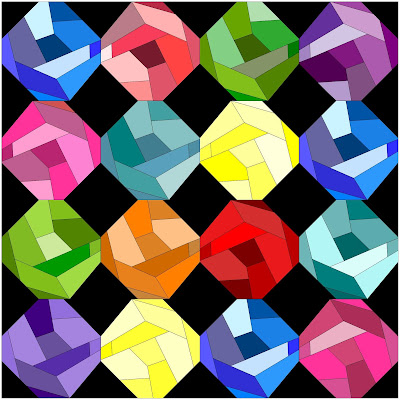
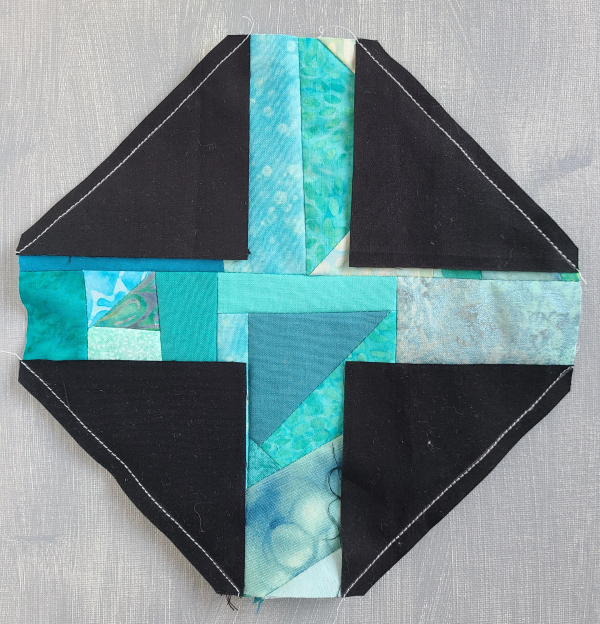
Just like this, these blocks would make a pretty quilt, but I chose to turn them into snowball blocks, with black corners (also pulled from the scrap box!). Of course, snowballs don't come in all the colours, so I'm calling these my Marbles 😊
I had every intention of having a finished mini quilt to share today, but then life happened, in the form of deadlines that needed to be met, hikes that needed to be hiked and campfires that needed to be enjoyed. So, instead of a mini quilt, I have one finished Marbles block and 6 squares ready for their corners, with another square started.
This is an approximation of what they'll look like when I finish more blocks and get them made into a mini.
Want to make you own Marbles block? Here's how I made mine.
Start with a fun assortment of pretty fabrics, all in one colour. You'll also need thread, either in the same colour as your fabric or a neutral. I chose to use Aurifil 2600, which worked nicely with my variety of teal fabrics. You'll need a good pair of scissors to trim up your pieces and I use my Clover mini iron to press seams open as I go. When paired with my homemade
pressing board, I can press the seams without leaving my chair. This is the only time I don't purposely set up the iron across the room, thereby forcing me to move regularly while sewing. If I did that while making these crumb blocks, I'd never finish a block! Lastly, you'll need your rotary cutter, mat and ruler.
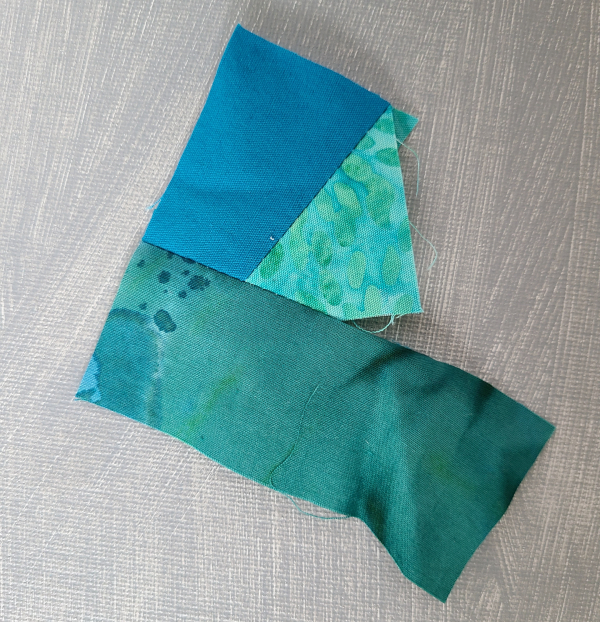
Without thinking too much, pick out two pieces. If needed, use the scissors to straighten up the sides, then stitch them together. Press the seam open. There will be a lot of seams in this block and pressing the seams open really helps the block to lay flat(ish).
Use the scissors to trim them even, giving you a straight edge to add the next piece to.
Again, without thinking about it too much, pick out the next piece and stitch it on. Don't be afraid to cut up a larger scrap if you need a shorter piece. Press the seam open again.
Trim with the scissors to give yourself the next straight edge and just keep going.
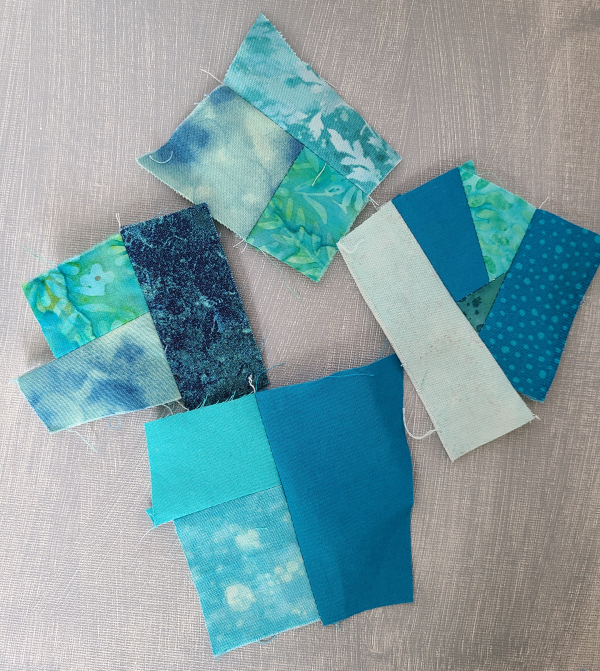
I usually like to work on several small chunks at the same time. I add a piece to each chunk, chain piecing them, then press them all at the same time.
Before long, you'll be able to join the chunks together into a larger piece.
Keep repeating the same process, adding individual pieces or joining chunks together as you see fit. This is the mindless, there-are-no-wrong-answers part of the process 😊
After a while, the pieces would get so big that I didn't feel like I could cut a straight edge with my scissors, so I use my ruler and rotary cutter. In this case, the piece is bigger than the 8 ½" I was aiming for, so I trimmed one side and then set it aside while I worked on the chunks to make the other half of the block.
When I had enough sewn that I knew it would be bigger than 8 ½" square, I trimmed the other two chunks and then stitched all three of them together.
At this point, it's all crazy and wonky around the edges.
Use your ruler and rotary cutter to trim it to 8 ½" square. Depending on how big the trimmed off pieces are, you might want to throw them back into the scrap box for the next time, or just dive right into stitching your next block using those trimmed off bits as your starting point.
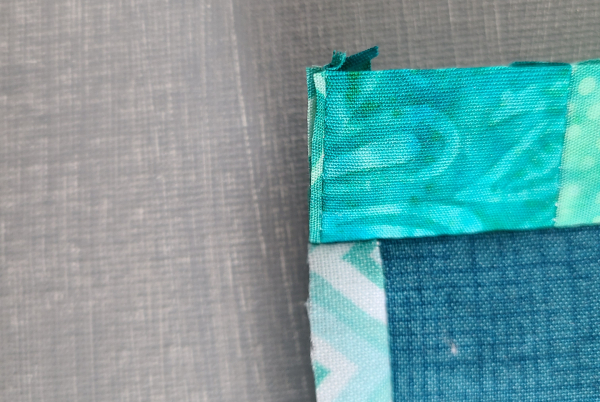
Because of the way bits are sewn together, then trimmed, it's quite likely you'll end up with seams right at the edge...
or pieces that will probably end up disappearing in the seam allowances. No big deal. That's just the way these blocks go.
To turn the squares into Marbles block, you'll need four black 3 ½" squares. Draw a line diagonally from corner to corner on the wrong side of all four. Because this is the Summer Scrap Elimination challenge, I'm also making bonus HSTs when I do these stitch-and-flip corners. There's no point in creating more scraps while making a scrap elimination project, right? I learned about using
Triangle Buddies from Bonnie Hunter and I love to make bonus HSTs this way, so that's how I draw my second line on each square.
Pin the squares in the corners of your crumb block, with the diagonal lines going across the corners as shown. Stitch right on both lines.
Trim off the outside corner, leaving a ¼" seam allowance.
Press the corners open to reveal your finished Marbles block 😊
But don't forget about those bonus HSTs! Trim their seam allowance to ¼" and press them open.
In the interest of using them right away, I stitched my bonus HSTs into a little pinwheel block. Since I've only finished one Marbles block, I've also only made one pinwheel, but I plan to make a bonus mini quilt out of these pinwheels.
And that's it! Somehow my scrap boxes don't seem much emptier than they were when I started, but I truly think they multiply when we're not looking. Just means I have what I need to make lots more Marbles blocks and other scrappy projects, right?
I hope you'll tag me on social media when you make your own Marbles blocks. I'm @devotedquilter on Instagram and @devotedquilterdesigns on Facebook.















Two scrappy projects at once; I like it and look forward to seeing it grow and come together for you!
ReplyDeleteCrumb blocks are one of my favorite things to do with scraps. It is interesting that some people find it stressful. I agree with you - There are no wrong answers. It is all play and no stress for me.
ReplyDeleteI do believe the "marble" block is the best use of crumb blocks I've seen yet. I like how the marble facets shine (even though there are no true sides or cuts in a marble- maybe it could be the air bubbles in the marble) in the design layout.
ReplyDeleteI've done crumble blocks before but I really like your idea of using all the same color & make marbles. Thanks for sharing.
ReplyDeleteI'm a pushover for a scrappy quilt, and these blocks just sent me over the edge. :-) They're so colorful and fun! You came up with a great idea, and I'm looking forward to seeing your finish. Though, I completely understand how life can make other plans for you! But as I'm sure you agree, it's good to be thankful for the vaccine that makes it possible for us to go places again. Travel without too much concern can't be underestimated. It's just how summer is meant to be spent. Enjoy your days away as much as your days at home. Blessings.
ReplyDeleteI think this is the method i will use to make a “jewel” quilt. Thanks for the inspiration!
ReplyDelete